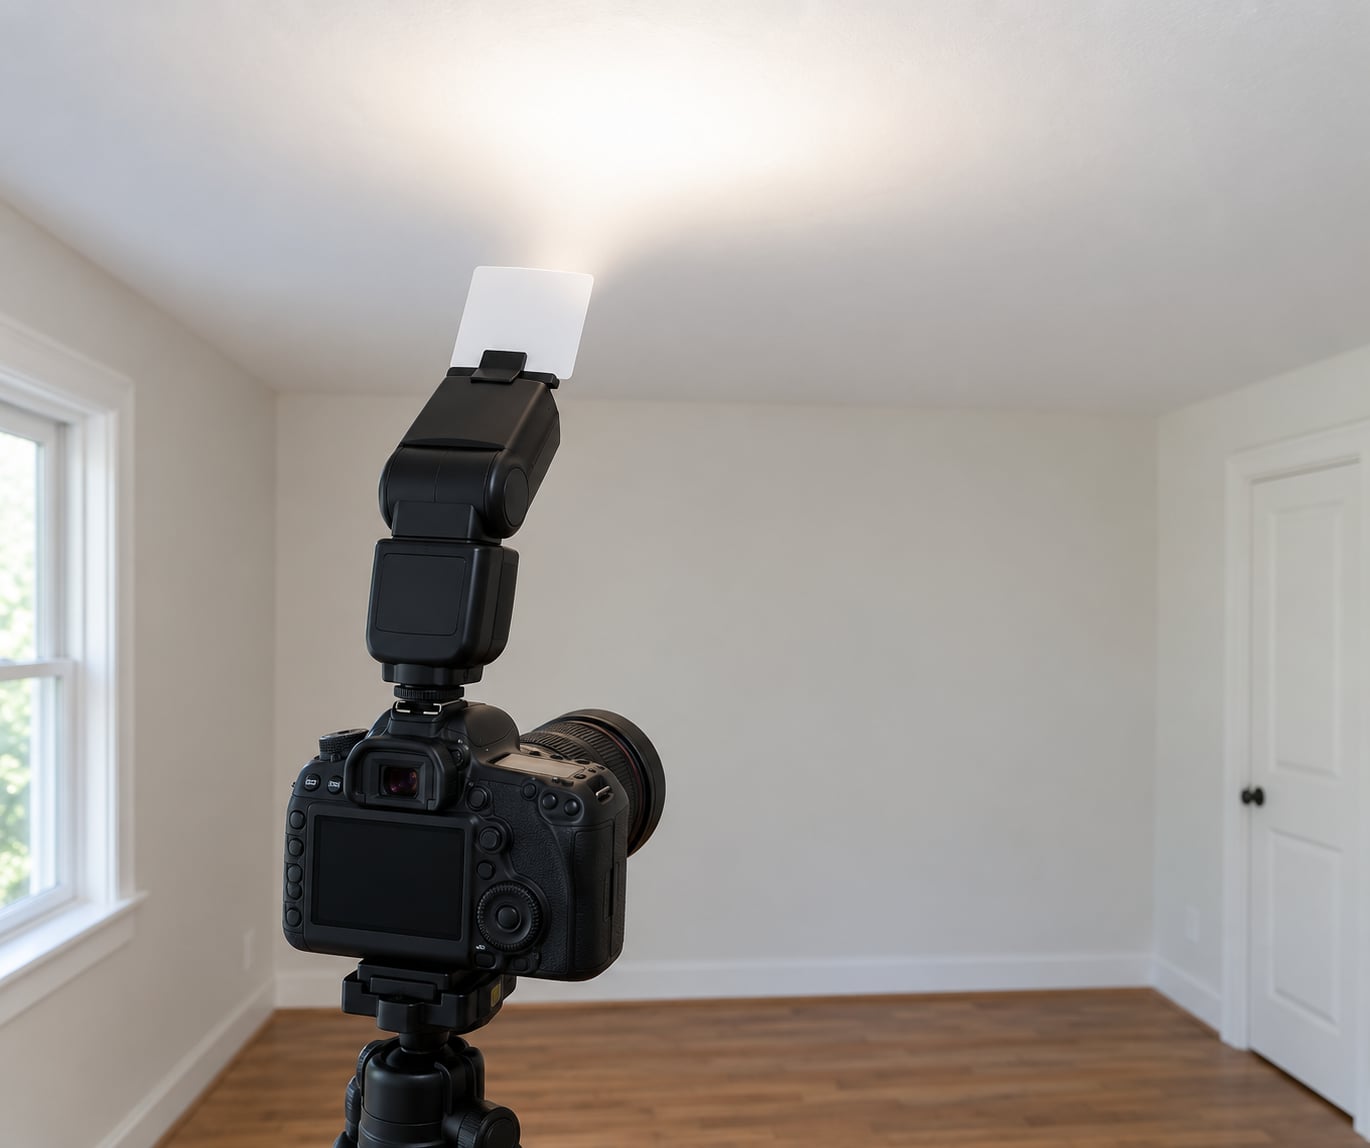
To bounce flash off a ceiling, tilt the flash head back until its beam hits the ceiling, not your subject, and dial the power down. The ceiling turns into a huge, improvised softbox that spreads the light before it falls back onto the face. It takes about five minutes to set up and fixes the flat, hard look of direct on-camera flash.
That is the whole trick, and it is genuinely beginner-friendly. The fiddly parts are all in the fine tuning: how far forward to aim, how much power to remove, and what to do when the ceiling in the room is not white. This guide walks through each one with the numbers I actually use.
Table of Contents
- What You Need
- How to Bounce Flash Off a Ceiling Step by Step
- 1. Choose a Light, Neutral Ceiling
- 2. Set the Flash and Camera
- 3. Position the Subject Away from the Back Wall Before You Bounce Flash Off a Ceiling
- 4. Aim the Flash at an Overhead Part of the Ceiling
- 5. Test and Adjust the Bounce
- 6. Make Final Corrections
- Common Mistakes
- Photography Tips for Better Ceiling-Bounced Light
- Frequently Asked Questions
- What angle should flash be when bouncing off a ceiling?
- Can you bounce flash from any ceiling?
- Why does my ceiling look too bright after using bounced flash?
- How do I know whether to use ceiling bounce or a wall bounce?
- Does bouncing flash work with a camera’s built-in flash?
- How do I keep the background from becoming too dark?
- Conclusion
What You Need
You need surprisingly little. A camera with a hot shoe and a speedlight with a swivel head covers it, and that is the whole mandatory list.
- A speedlight with a tilt and swivel head. Any modern on-camera flash tilts back far enough to reach a normal ceiling. More tilt range means more aiming options in awkward rooms.
- A camera with manual flash control. Any DSLR or mirrorless body works. Phones with a built-in pop-up flash usually cannot tilt at all, so a small speedlight is the low-cost way in.
- A room with a ceiling between 2 and 4 metres (roughly 7 to 13 feet). Low ceilings are usable but need a gentler angle; very high ceilings give beautiful light at the cost of power and recycling time.
- A white or near-white ceiling. Matte paint is fine. Textured ceilings work too, just less evenly.
Optional tools earn their place quickly. A small white bounce card or a sheet of white foam board clipped under the flash head gives the light a closer surface when the ceiling is too dark to be useful. A black card or foamie held against the flash blocks the beam from spilling straight onto the subject and washing out the shadow the bounce is supposed to soften.
A tripod and a rear-screen or app preview are not optional in practice. You will take a lot of test frames, and checking them at full size beats squinting at a small screen every time.
How to Bounce Flash Off a Ceiling Step by Step
This workflow takes you from an empty room to a finished frame in six moves. Work through it once, then repeat it with the numbers dialed in for the venue.
1. Choose a Light, Neutral Ceiling
Check the ceiling colour and texture before you fire a single frame. A white or cream ceiling returns most of the light it receives, and cream gives a slightly warmer result you can correct later.
Avoid dark timber, exposed ducting, acoustic tiles in deep colours, or a ceiling with heavy texture. Every dark patch steals light and creates an uneven pool that shows up as blotchy illumination on the face. Ceiling height changes the character of the light too: a low ceiling sits closer to the subject, so the apparent source is smaller and the shadows firmer than the same ceiling in a tall room.
2. Set the Flash and Camera
Start in manual flash mode at your camera’s highest sync speed, which is usually 1/200 second. Set the shutter speed to that number and drop the aperture to f/4 or f/5.6 for an indoor portrait, then raise ISO until the exposure reads close to correct with the flash at reduced power.
For power, start around 1/8 to 1/4 output on a typical speedlight rather than full power. Bouncing wastes a lot of energy: some goes past the subject, some spreads across the ceiling, and some reflects at angles that never reach the face. If you shoot TTL instead, start with flash exposure compensation at -1 EV and pull back from there.
Two shortcuts worth knowing. If your flash supports high-speed sync, you can use shutter speeds above the normal sync limit, which is handy when you need a wider aperture, but HSS costs a lot of power. And if the flash has a zoom head, set the coverage to the widest setting so the beam still lands on the ceiling when it is tilted back and spreads more evenly.
3. Position the Subject Away from the Back Wall Before You Bounce Flash Off a Ceiling
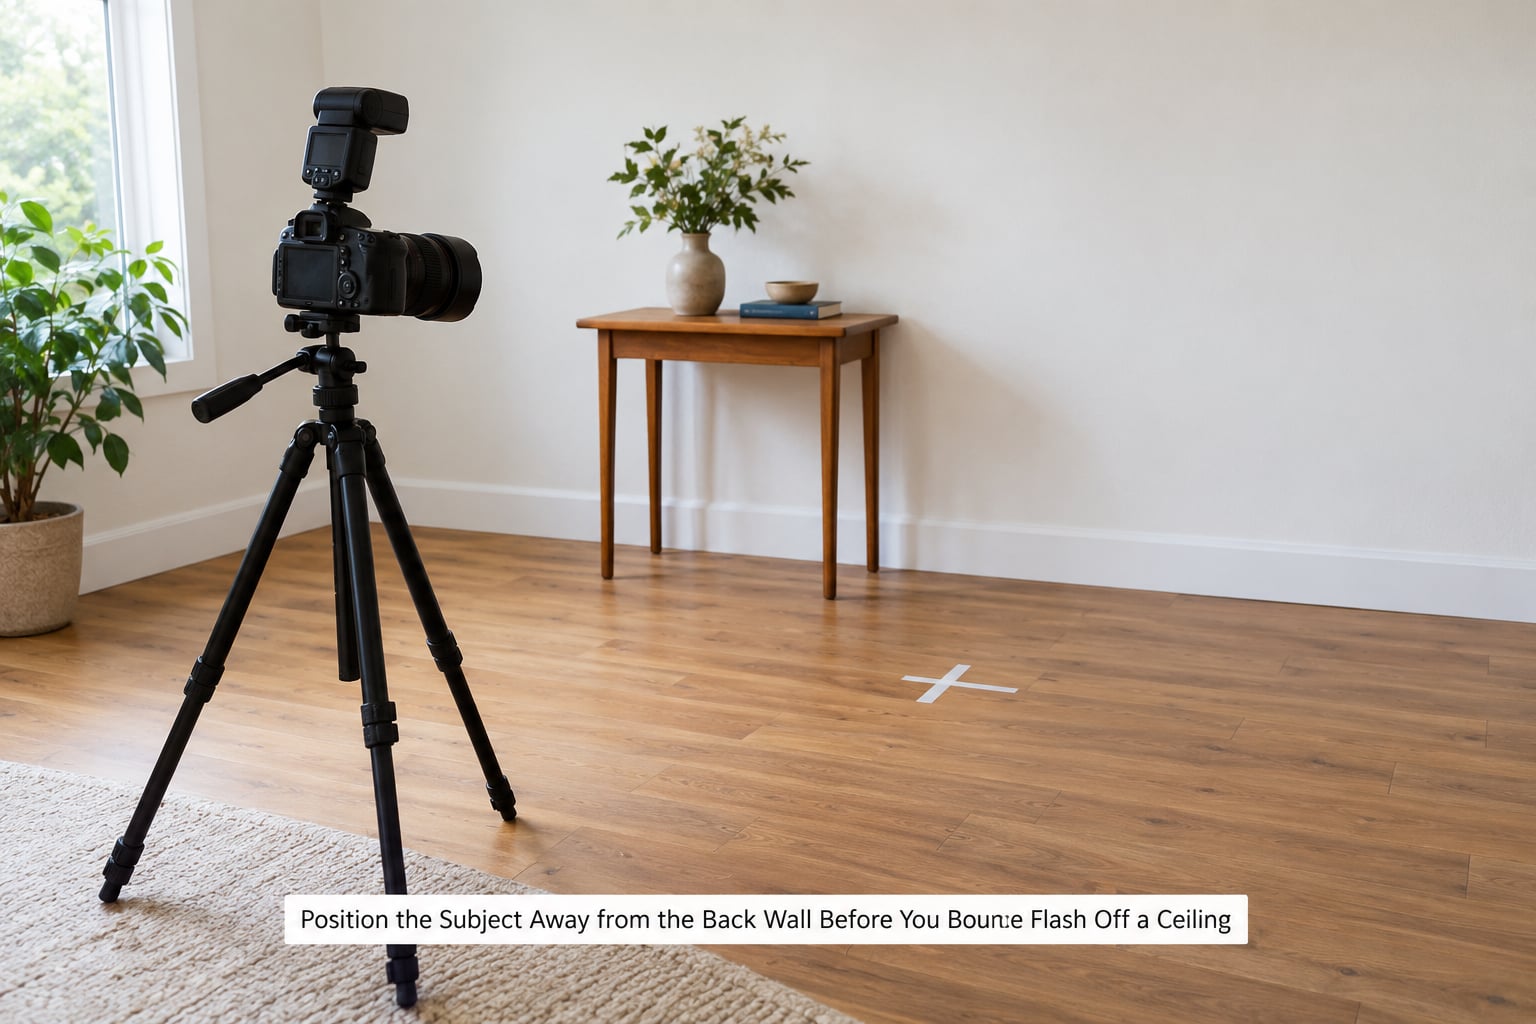
Push your subject two to three feet away from the wall behind them. Light coming from above and in front hits the face first and the wall second, so the wall ends up darker than the face and you get separation instead of a flat grey slab behind the head.
Then turn the subject slightly off the camera axis. A face angled a few degrees away from the lens gives the light somewhere to wrap around to, and the shadow side stays soft rather than falling into a hard line.
4. Aim the Flash at an Overhead Part of the Ceiling
Aim the flash head back about 45 to 60 degrees from vertical, then nudge it forward so the beam lands on the ceiling just behind or slightly above the subject’s head. Fifteen to thirty degrees off straight up is the useful range, and staying near that zone is why bounce flash photographs so much better than bare pop-up flash.
Do not point it straight up. A vertical beam returns light from directly overhead, which drops the eyebrows onto the eyes and the shadow of the nose onto the cheeks while giving you no catchlight anywhere. Tilting the beam forward puts the apparent light source above and slightly in front, where a photographer would put a softbox.
Think of the flash as a softbox you are pointing somewhere. Where the surface reflects from is where the light appears to come from, and that is what the camera records. Walls, ceiling-wall joints and corners work the same way, so you are not locked into a straight ceiling bounce.
5. Test and Adjust the Bounce
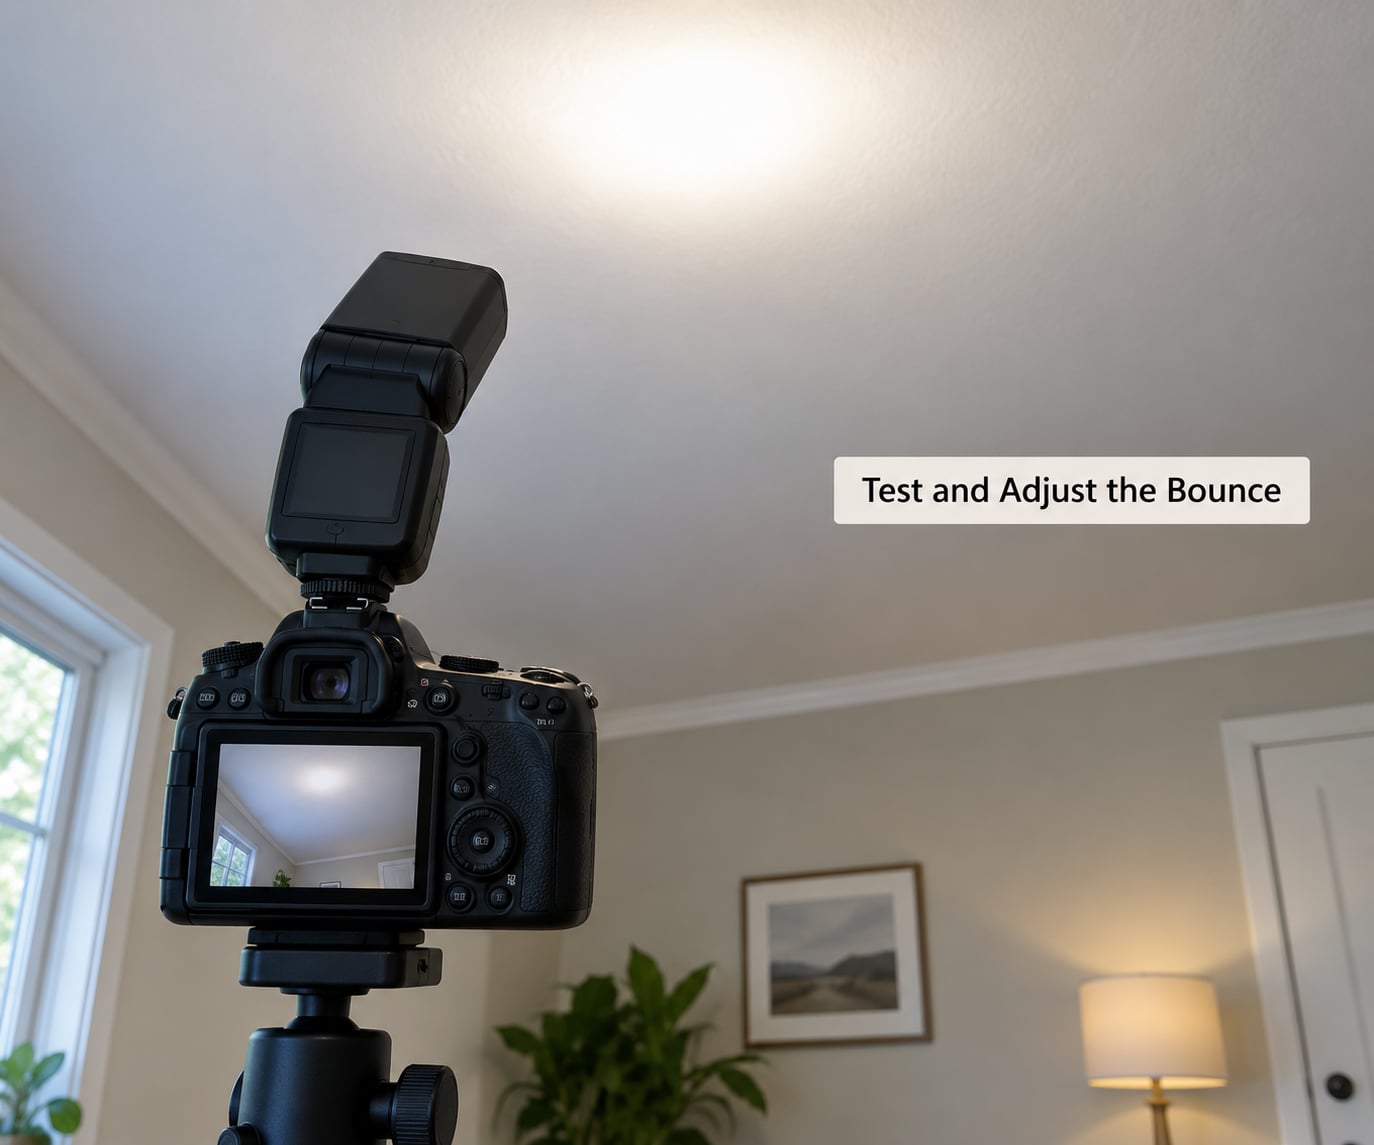
Take a test frame and look at three things in order: the brightness of the face, the shadows under the eyes and chin, and the ceiling in the background. Work from the face outward, because everything else is secondary to a correctly exposed subject.
If the face is correct but the eye sockets are black, the light is too vertical or too close to overhead. Tilt the beam further forward by about ten degrees. If the background ceiling shows a bright oval, the beam is too narrow or too hot; zoom the head out one setting or aim at a broader patch of ceiling further away.
Two numbers worth remembering from the geometry: aiming roughly 15 degrees off vertical with the subject about 6 feet away gives very soft shadows, and if a hot patch keeps landing in frame, moving the flash off the camera axis makes it much easier to control, the same way you would treat a mirror reflecting into the lens.
6. Make Final Corrections
Fix white balance first, because a cream or timber ceiling adds a colour cast that no exposure change will remove. Set a custom white balance from a grey or white card in the frame, or shoot raw and correct later.
Next, control the background. If it went too dark after you lowered the flash power, add a second, low-powered flash aimed at the wall behind the subject, or open the shadows in post. If it went too bright, the fix is framing: tilt slightly more so the hotspot moves out of the shot, or move the subject so the bright patch falls behind the camera rather than behind them.
Finally, check flash-to-subject distance. Bring the subject closer to the ceiling and the light gets softer and flatter; push them further down the room and the shadows firm up and the fall-off grows. Aim for the subject to stand at least a metre below the bounce surface, which is most normal ceilings.
Common Mistakes
Every failure here has a simple cause and a simple fix. Match your result to the symptom.
- Hard shadows and a flat face. You are pointing the flash straight up or straight at the subject. Tilt 15 to 30 degrees forward of vertical.
- A bright oval on the ceiling in the background. The beam is too narrow or the flash is too close to the ceiling. Zoom the head out or aim at a broader patch further away.
- Everything is overexposed. Bounced light is spread over a huge area, so you rarely need full power. Drop output a stop at a time, or set -1 EV on flash exposure compensation.
- A dull colour cast on the face. The ceiling is cream, timber or painted a tint. Custom white balance or a raw file fix.
- Uneven light across the face. The ceiling has texture or dark patches, or the beam is landing partly on a wall. Aim at the flattest, brightest section you can find.
- The camera keeps overriding you. Automatic mode or auto ISO is fighting your flash settings. Switch flash to manual, lock the ISO, and shoot in manual exposure.
- Dark eye sockets with no catchlight. Straight-up bounce, or the subject is too close to the ceiling. Angle forward and increase the distance.
Photography Tips for Better Ceiling-Bounced Light
Once the basics work, a few adjustments take the look further.
Control contrast with distance rather than with power. In a tall room with a high ceiling, the light is naturally soft and low contrast, which suits wide group shots. A living room with a low ceiling gives firmer shadows, so add a white reflector under the chin or bounce a second flash off a nearby wall to lift the shadow side.
Preserve background detail by keeping the subject well off the back wall. You get a clean tonal gradient behind the head instead of a flat bright patch, and the separation reads as depth rather than as a background collage.
Use the largest room you can. A hotel ballroom or a church hall gives the flash a huge surface to work with, and the extra ceiling height means slower recycling between frames, which matters on a dance floor where you are shooting at the shutter speed limit.
Know when not to bounce. Outdoors under an awning there may be nothing white above you, in which case a bounce card, a white foam board or a small softbox does the same job faster. For close group photos where you need fast recycling and consistent output, direct flash with a small diffuser can be more predictable than a ceiling bounce that changes with every step you take.
Frequently Asked Questions
What angle should flash be when bouncing off a ceiling?
Tilt the flash head back about 45 to 60 degrees, then angle it 15 to 30 degrees forward of straight up so the beam lands on the ceiling just behind or above your subject’s head. Straight-up vertical bounce drops the eyebrows onto the eyes and gives you no catchlight. Moving the beam forward puts the apparent light source above and slightly in front of the face, which is where you would put a softbox.
Can you bounce flash from any ceiling?
A white or cream matte ceiling works well. Dark timber, exposed ducting, deep acoustic tiles and heavily textured surfaces absorb light and create blotchy illumination on the face. Ceiling height matters too: a low ceiling sits closer to the subject, so the apparent source is smaller and shadows are firmer than the same ceiling in a tall room.
Why does my ceiling look too bright after using bounced flash?
Usually one of three things. The flash output is too high, so drop it a stop at a time or set flash exposure compensation to -1 EV. The zoom setting is too narrow, concentrating the beam into a small hot patch, so widen the coverage. Or the flash is sitting too close to the ceiling, so move it further from the surface or aim at a broader patch of ceiling.
How do I know whether to use ceiling bounce or a wall bounce?
Look at where the light needs to appear from. A ceiling bounce suits portraits, group shots and anything needing soft overhead-plus-front light. A wall bounce gives you more direction, which is better for shaping a face or lighting a subject from the side. If the ceiling is low, coloured or absent, a wall, a ceiling-wall joint or a corner between two surfaces works just as well.
Does bouncing flash work with a camera’s built-in flash?
Almost never, because most pop-up flashes only tilt straight up and cannot be aimed forward. Even the ones that swivel lack the tilt range and manual power control the technique depends on. A dedicated speedlight gives you everything the ceiling bounce needs to work.
How do I keep the background from becoming too dark?
Keep the subject two to three feet from the wall behind them so the wall receives less light than the face, and turn them slightly off the camera axis. If the background is still too dark after you reduce flash power for the face, add a second low-powered flash aimed at the wall, or lift the shadows when you process the raw file.
Conclusion
Start with the simplest version: point a speedlight at a broad section of plain ceiling, tilt the head back 45 to 60 degrees with the beam angled slightly forward of vertical, and take one test frame. If the ceiling or the background looks too bright, drop the flash output a stop and shoot again.
That single loop, aim, fire, adjust, is the whole technique. Once you have it working in one room you will start seeing bounce surfaces everywhere, and the light gets a lot easier on your subject’s face as a result. Updated for 2026.