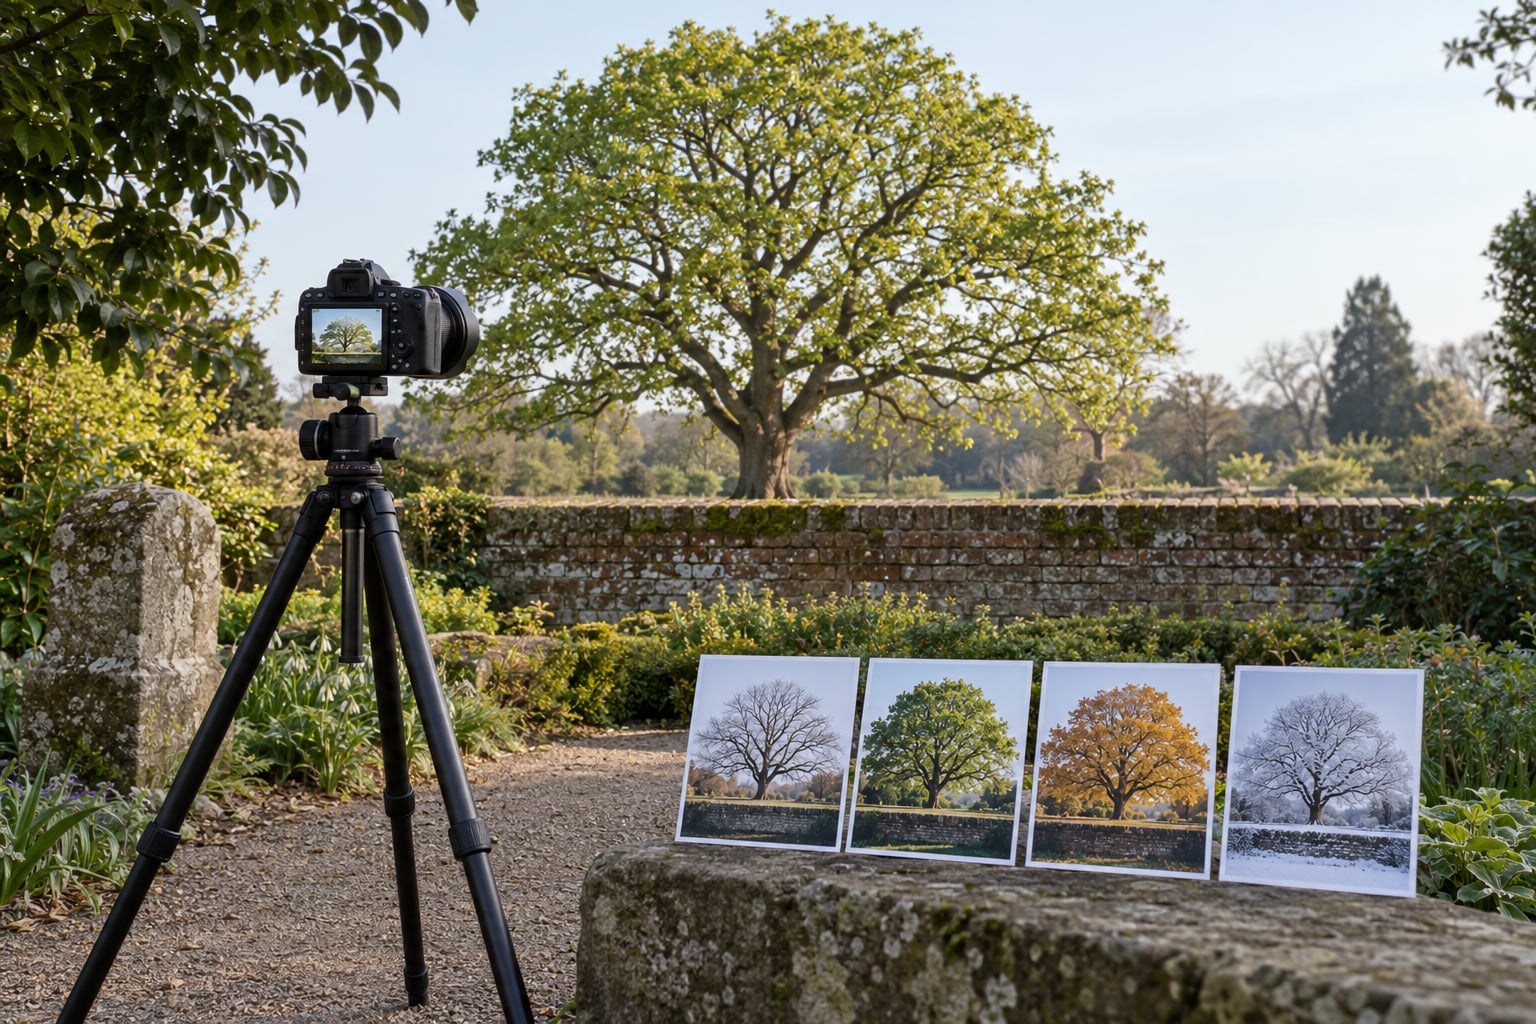
To photograph the same spot through the seasons, pick one viewpoint, fix the camera there on a tripod at a recorded height and focal length, and return on a similar light angle each visit so the frame stays matched. Then match white balance and exposure in editing so the set reads as one series instead of four unrelated shots.
This is a hobby-level project. Most people do it with a phone or an entry-level camera, and a full four-season set takes about a year of short visits. The tricky part was never the photography. It is re-finding the exact frame months later, and almost nobody explains that part.
Forum threads about same-spot work keep circling the same complaint: photographers return to a location they remember clearly and the frame is somehow different every time. The camera moved two steps left, the tripod is a different height, someone used a wide lens in summer and a standard one in autumn. Fix the viewpoint and the rest of the project gets easy.
There is a second reason this project works where daily challenges fall apart. On a 365-day challenge the subject often barely changes, and people report losing interest by month two because the results feel flat. A seasonal set always changes. Blossom, leaf fall and first snow are guaranteed events, and the payoff is a finished comparison rather than a streak you abandoned.
Table of Contents
- What You Need
- Step-by-Step: Photograph the Same Spot Season by Season
- Choose and Record One Fixed Subject
- Create a Baseline Photograph
- Plan Visits by Season and Weather
- Lock the Camera Settings as Closely as Practical
- Repeat the Composition at the Same Time of Day
- Photograph Small Details as Well as the Wide View
- Review, Label, and Compare the Images
- Common Mistakes
- What to Do When a Season Goes Wrong
- Frequently Asked Questions
- Do I need a tripod to photograph the same spot repeatedly?
- How do I keep the same composition when the light changes every season?
- Can I do a same-spot seasonal project with my phone?
- What if it doesn’t snow that winter?
- How do I edit photos of the same place taken in different seasons so they match?
What You Need
A tripod is the one piece of gear that does real work here. It holds the camera at one height, keeps the lens angle fixed and removes camera shake as a variable when the light drops in winter. A remote release or the camera’s two-second timer means you stop touching the camera after framing.
One lens, used every time, matters more than an expensive one. Changing focal length changes the whole geometry of the frame, so a set shot on 24mm and 70mm will not line up. Pick the lens that frames your subject with a little room around it and keep it on the body year round.
For finding your way back, record the camera’s GPS coordinates on your baseline frame and save them somewhere offline. Add a written note: facing direction, approximate compass bearing, distance from a fixed landmark like a fence post or a bench, and how many steps from the path. A landmark check matters most in winter, when a bare hedge looks nothing like a summer one.
A phone with a sun-position app tells you when the sun will hit the spot and from which side. A weather app with an hourly view handles the practical question of when you can actually get there and still have usable light. Neither is a subscription purchase you need before you start; free versions cover a single location.
Shoot RAW. Every season needs a different white balance and exposure, and RAW files give you room to pull four very different frames back to one look. JPEG corrections are baked in and impossible to undo later.
Keep a simple project folder from day one, named by date and season. Later you will want to compare frames side by side, and hunting through a general library for April of last year is how projects die quietly.
Step-by-Step: Photograph the Same Spot Season by Season
Choose and Record One Fixed Subject
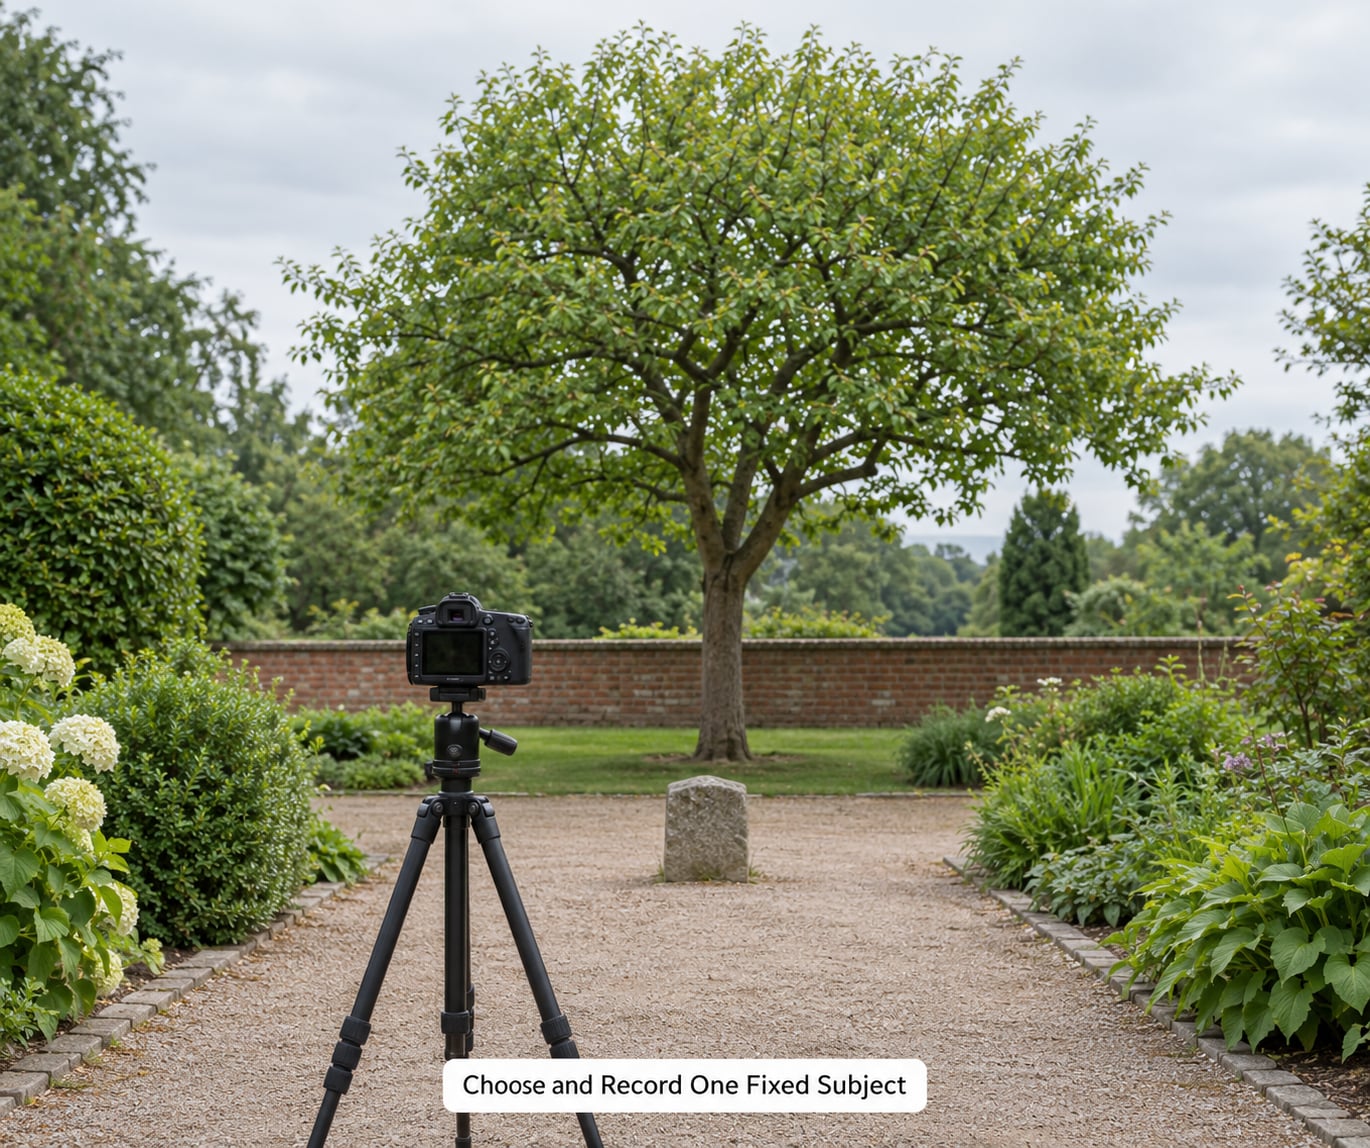
Choose a subject you can recognise instantly from fifty paces: a single tree, a bridge, a row of gates, a corner of a field. Scenes with too many competing elements become impossible to compare, because you end up looking at a different picture every time.
Walk the spot before you commit. Look at it in flat light and think about where the subject sits with the sun behind you, then with the sun to one side. Pick the direction that works in more than one season rather than the one that looks best in a single afternoon.
Check access before you fall in love with the frame. Some paths close for winter, some fields are gated, and a spot that is only reachable after heavy rain will cost you months. Ten minutes of walking the boundary saves the project.
When you settle on a position, record it properly. Note the compass bearing, the height of the tripod centre column, how many paces from a fixed reference point, and what is in the top-left corner of the frame. Write it down and also keep it in your phone notes. Memory is not a record.
Create a Baseline Photograph
Your baseline frame is the reference everything else is measured against, so make it in good light with nothing rushed. Set up the tripod, lock the legs, extend the centre column to your recorded height, and mount the lens you intend to use for the whole year.
Focus manually on a fixed point and do not touch focus again for the series. If you shoot wide, focus at roughly a third of the way into the scene; if you shoot closer, focus on the subject itself. Mark the focus ring with a piece of tape so a stray thumb does not undo it in autumn.
Compose the baseline so foreground, middle ground and background all have a place. Nothing can be added to this frame later. If the bottom of the image is bare path and the top is empty sky, that is what you will be looking at in every season, so fix it now by changing height.
Take three exposures and keep the best. Then write a settings note next to the file: focal length, aperture, shutter speed, ISO, white balance setting and the time of day. This note is what makes the series reproducible instead of merely hopeful.
Plan Visits by Season and Weather
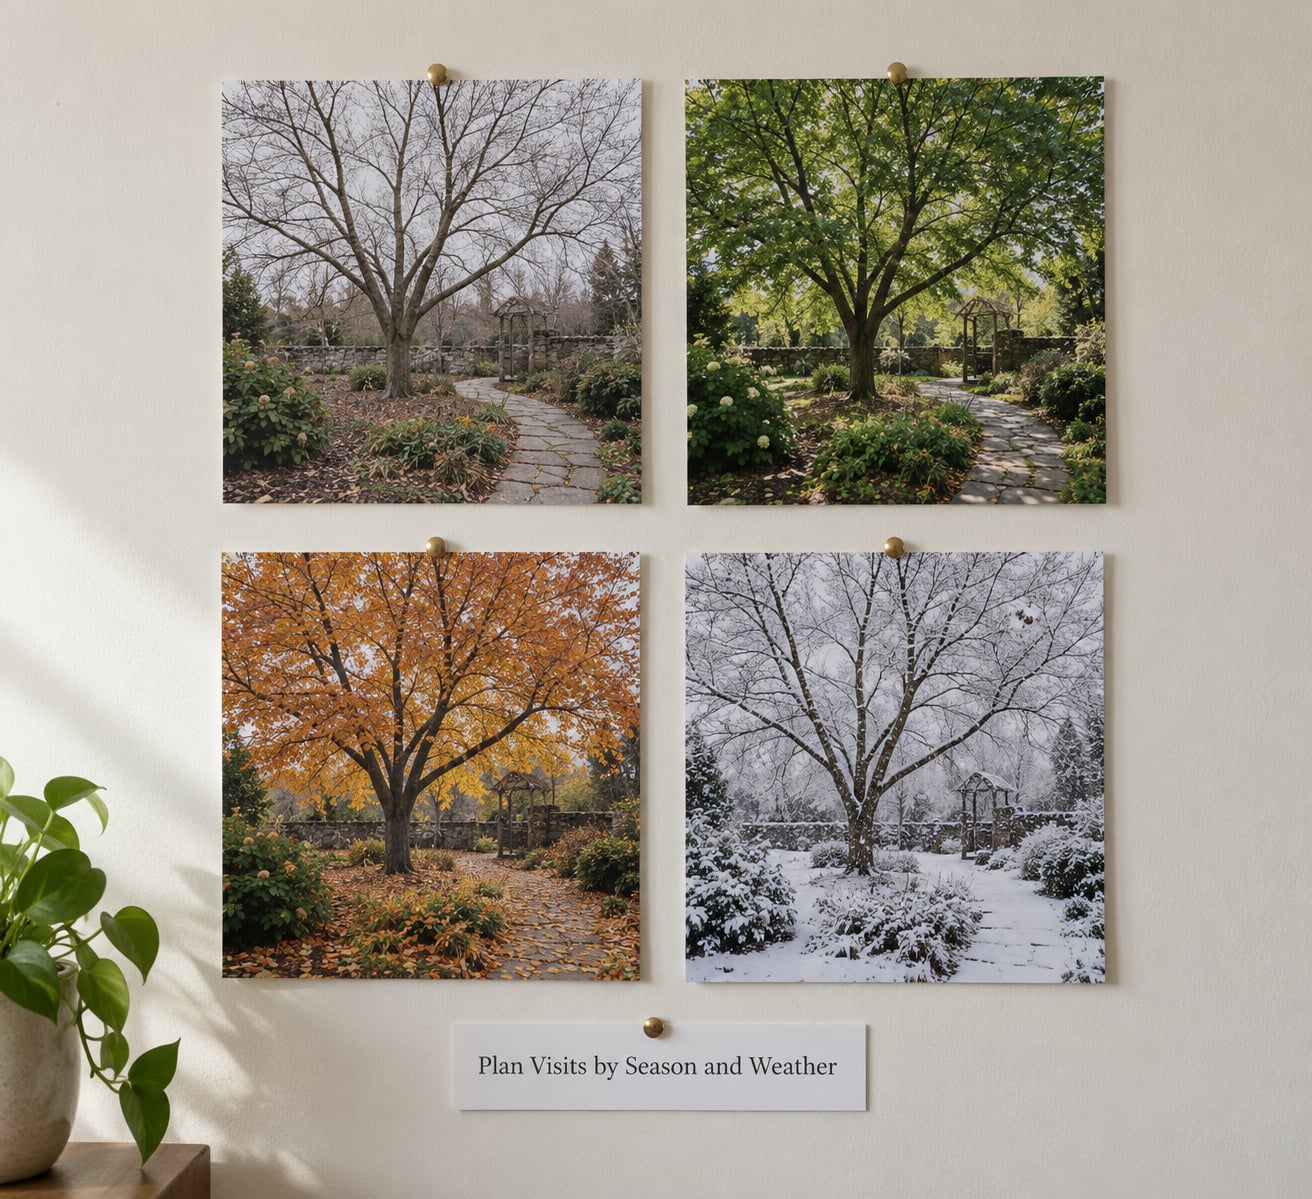
Plan roughly one visit a month rather than four dramatic outings a year. Monthly returns give you more usable frames and spread the effort. A season where you only shoot once is a season you probably missed the good morning.
Track what happens rather than only when you shoot. Note the first blossom date, the first leaf, the date of first frost and the first snow in a plain list each year. That record is the project as much as the photographs, and it tells you when to return next.
| Season | Typical light | Colour palette | What to point the camera at |
|---|---|---|---|
| Spring | Low and soft, frequent rain haze | Pale green, blossom pink, wet brown | Blossom against a plain sky, buds opening, puddles reflecting new growth |
| Summer | High and hard, long shadows near midday | Deep green, strong contrast, haze | Full canopy texture, grass against light, wildlife in the frame |
| Autumn | Lower, warmer, fast-changing around midday | Ochre, rust, gold | Falling leaves in the wind, backlit canopy, ground covered in colour |
| Winter | Shortest days, blue hour long, flat overcast | Blue, white, near-monochrome | Bare branch structure, frost patterns, first snow, long evening shadows |
Wait for useful variation, not perfect conditions. Six grey days in autumn will produce a better series than one sunny afternoon, because the point is to record change. Aim to shoot at the same time of day each visit so the light angle is comparable.
Lock the Camera Settings as Closely as Practical
Decide in advance which settings are fixed and which are allowed to move. Focal length, focus distance and tripod height are fixed. Aperture, ISO and shutter speed flex with the light, because a winter evening at f/11 and ISO 100 will produce a frame too dark to use.
White balance is the setting that most often spoils a set. If you leave it on auto, every frame comes out a slightly different colour and four photographs of one place look like four photographers. Set it manually to daylight or shade for the whole series.
Shot in RAW with a fixed white balance, this becomes a small correction later instead of a repair. If your camera has a custom white balance or user-defined setting, load your baseline value into it before each visit.
Exposure is a compromise. Winter scenes need up to two or three stops more light than summer ones, and holding the exact same exposure produces one correct frame and three unusable ones. Lock exposure against the subject instead of against a number: meter the mid-tone of the same tree trunk each season and let the rest follow.
Repeat the Composition at the Same Time of Day
Sun position is the biggest unavoidable variable between seasons, and pretending otherwise wrecks the comparison. The sun sits lower in winter and higher in summer, so the shadows change length even from an identical viewpoint.
Two approaches work. Pick a fixed clock time and accept the changing shadows, which reads as an honest record of the year passing. Or track the sun and shoot whenever the light hits the spot from the same direction, which holds the lighting constant but changes your schedule.
Most people do the first for four seasons and the second for a five-frame hero series. Whichever you pick, write the time and the sun direction in the frame notes so nobody including you has to guess later.
Sun position apps will tell you when the sun clears a building or a tree line for your specific spot. On cloudy days that matters less, which is another argument for grey-weather visits: overcast light is the most repeatable light of the year.
Photograph Small Details as Well as the Wide View
The matched wide frame is the spine of the series, but it is not the whole series. From the same tripod position, shoot a medium frame and one or two close details using the same tripod and no head movement. A tight shot of the same trunk works as a second lens.
Details carry the change. Bark texture in summer, blossom in spring, lichen and frost in winter. Close frames also rescue you when the wide frame fails: if the light is wrong but a detail still works, you have a usable image from that visit.
Add a handful of deliberately different frames per visit. A higher angle from a step, a portrait orientation, a slow shutter with the tripod held still. What to photograph in autumn is mostly a matter of what the season is doing in front of you: leaves in motion, wet bark after rain, low sun through a thinning canopy.
Winter needs more attention to where you are standing than to your settings. Ice on paths, mud where you put your feet down, and early darkness all affect safety. Photograph from the same safe spot if that is what it takes, and change nothing else.
Review, Label, and Compare the Images
After each visit, edit the frame straight away while you still remember the conditions. Apply your baseline white balance and match exposure to the same reference you metered. If a frame cannot be brought into line with the set, keep it but move it out of the main sequence.
Label files with a fixed scheme: date, season and a sequence number. Use the same scheme every year so sorting by name puts the seasons in order without any work.
Compare frames side by side on a laptop screen, not on a phone. Turn your screen brightness down to somewhere ordinary. Small differences in framing and exposure that look alarming at full brightness often settle into place at a normal level, and you stop discarding good frames for no reason.
Look for drift, not perfection. If the tree has shifted within the frame by a few pixels, that is what a season of growth looks like. If the horizon has moved noticeably, the tripod position slipped, and the fix is to re-find the landmark before the next visit.
Two or three visits a year will give you a usable set. Nine or twelve will give you a real record, and a vertical grid of the same frame each month makes a strong finished piece that needs almost no caption.
Common Mistakes
The most common error is composition drift. Each visit feels finished, so nobody checks that it matches the last one. Fix it by opening the previous baseline frame on your phone and holding it up behind the viewfinder, or by using the camera’s live view overlay to line up a fixed edge before you shoot.
The second is gear drift, which is the same mistake with a different cause. Swapping lenses or changing the tripod height between visits changes the geometry of the frame. Keep the body, lens and column height identical for the length of the project, and note the focal length in every filename.
The third is inconsistent white balance. Auto white balance on a RAW file records a different value each time, and the set ends up looking inconsistent even though nothing in the frame moved. Set it manually and copy the baseline value into every frame.
The fourth is giving up too early. Frame one is easy and frame four is the payoff. On a weekly challenge the change is often too small to notice for weeks, but a seasonal set changes fast enough to keep you interested even in year one.
The fifth is chasing weather instead of recording it. Wait for the conditions you want and you will skip half the year. Shoot in mediocre light, keep the frame matched, and let the conditions be part of the record.
What to Do When a Season Goes Wrong
Some winters have no snow and some summers are rain from June to September. Plan for it in advance rather than treating a bad season as a failed project.
- Shoot the season that arrived instead. Bare trees with frost and fog are legitimate winter frames. Most seasonal series are not defined by snow.
- Widen the window. If you only photographed in the first three weeks of a season, add a second visit a month later rather than dropping the season.
- Fall back on detail frames. A close view of the same trunk works when the wide frame cannot be matched.
- Document the gap. Write the date and reason in your project notes. A noted gap is honest; a silently skipped season looks like laziness later.
- Do not move the tripod to compensate. If access is blocked, shoot from where you can reach and label the frame as an exception.
Forum posters who stick with long projects tend to be the ones who accept uneven results. Long-term sets always contain some dull frames, and the value is in having the complete run rather than four perfect ones.
A phone works for this project, and plenty of people start there. Use the same phone, the same lens if it has more than one, and lock exposure and white balance in the native camera app before you shoot. Clean the lens, use the grid overlay to match framing, and shoot in the highest quality mode.
Challenge formats fit well if you struggle with motivation. A 52 Frames-style weekly project set to one location works, and the usual rule is simply one frame a week with no re-shoots. If you want a calendar rather than a set, a monthly slot on the first weekend gives you twelve matched frames.
Frequently Asked Questions
Do I need a tripod to photograph the same spot repeatedly?
No, but it is the single tool that makes matching frames realistic. A tripod holds the camera at one height, keeps the lens angle fixed and stops you nudging the camera after you framed it. Without one, you will re-set the camera each visit and small changes in position and angle will drift. A phone on a small tripod works for a fixed wide frame; you lose only the ability to shoot close details from the same position.
How do I keep the same composition when the light changes every season?
Keep the viewpoint fixed and let the light vary honestly. Sun height changes with the season, so shadows will move, and no amount of gear control will stop that. Two options work: shoot at the same clock time each visit and accept the shifting shadows as part of the record, or use a sun-position app and shoot when the sun hits the spot from the same direction. Many people do the first all year and the second for a final set of hero frames.
Can I do a same-spot seasonal project with my phone?
Yes, and most people who start this project are doing it on a phone. Use the same phone throughout, pick one camera app and stay in it, and lock exposure and white balance manually before each shoot instead of leaving them on auto. Turn on the grid lines and match framing against your baseline frame, and shoot in the highest resolution available. RAW or Pro formats help when your phone supports them, since seasonal white-balance differences need room to correct later.
What if it doesn’t snow that winter?
Photograph the winter that actually happened. Frost on bare branches, low mist, a frozen puddle and long evening shadows all read clearly as winter, and a series that forced snow into every frame would not be honest anyway. If your whole winter was grey and featureless, shoot a week of bad weather rather than one afternoon of it, since matched frames under flat light are the most comparable frames of the year. Note the snowless winter in your project log and leave the frame in the set.
How do I edit photos of the same place taken in different seasons so they match?
Match white balance first, since that is what makes four frames look like four different photographers. Shoot RAW and set a fixed manual white balance in the camera, then copy your baseline value to every frame in the batch. Match exposure second by metering the same reference in each image, such as the mid-tone of your subject. Crop to the same framing afterwards to remove any drift. Leave colour and contrast alone for now, judge the set on a normal-brightness screen, and add grading only once it already looks consistent.
Start with one visit this week. Choose the spot, write down the bearing and the column height, shoot your baseline frame in whatever light you have, and set your white balance manually. That single session is all the setup a four-season series needs. (2026)