How to shoot from above safely comes down to three things: a support that will not budge, a camera that cannot fall off it, and a clear floor under both. Photographing overhead is easy in theory and awkward in practice, because you are working at head height or higher, often on a chair, often with a cable trailing down one leg. Get the stability right and the shot is quick. Skip it and you get a cracked lens, a broken light, or a trip to the emergency room.
This guide covers overhead setups for food, crafts, product shots, artwork and everyday objects. It is deliberately platform-neutral, because most people who want an overhead photo are working with a tripod, a clamp arm or a boom pole rather than a drone. Where drones come up, it is because the same risk logic applies to anything you send up into the air.
Table of Contents
- What You Need
- Which overhead setup suits your subject?
- How to Shoot from Above Safely: Step-by-Step
- How to shoot from above safely: clear the area and check the support
- Choose a safe camera position
- Set the camera so it cannot fall
- Light the subject without creating heat or glare
- Set camera controls and compose the shot
- Take test shots and make controlled adjustments
- Finish safely and pack the setup down
- Common Mistakes
- Frequently Asked Questions
- How high can I safely shoot an overhead photo?
- Do I need a tripod, or is a phone good enough?
- Can I shoot overhead from a stool or a chair?
- What is the best lighting for a directly overhead shot?
- Is shooting from above with a drone the same setup?
- How do I keep the camera from falling off the tripod?
- Conclusion
What You Need
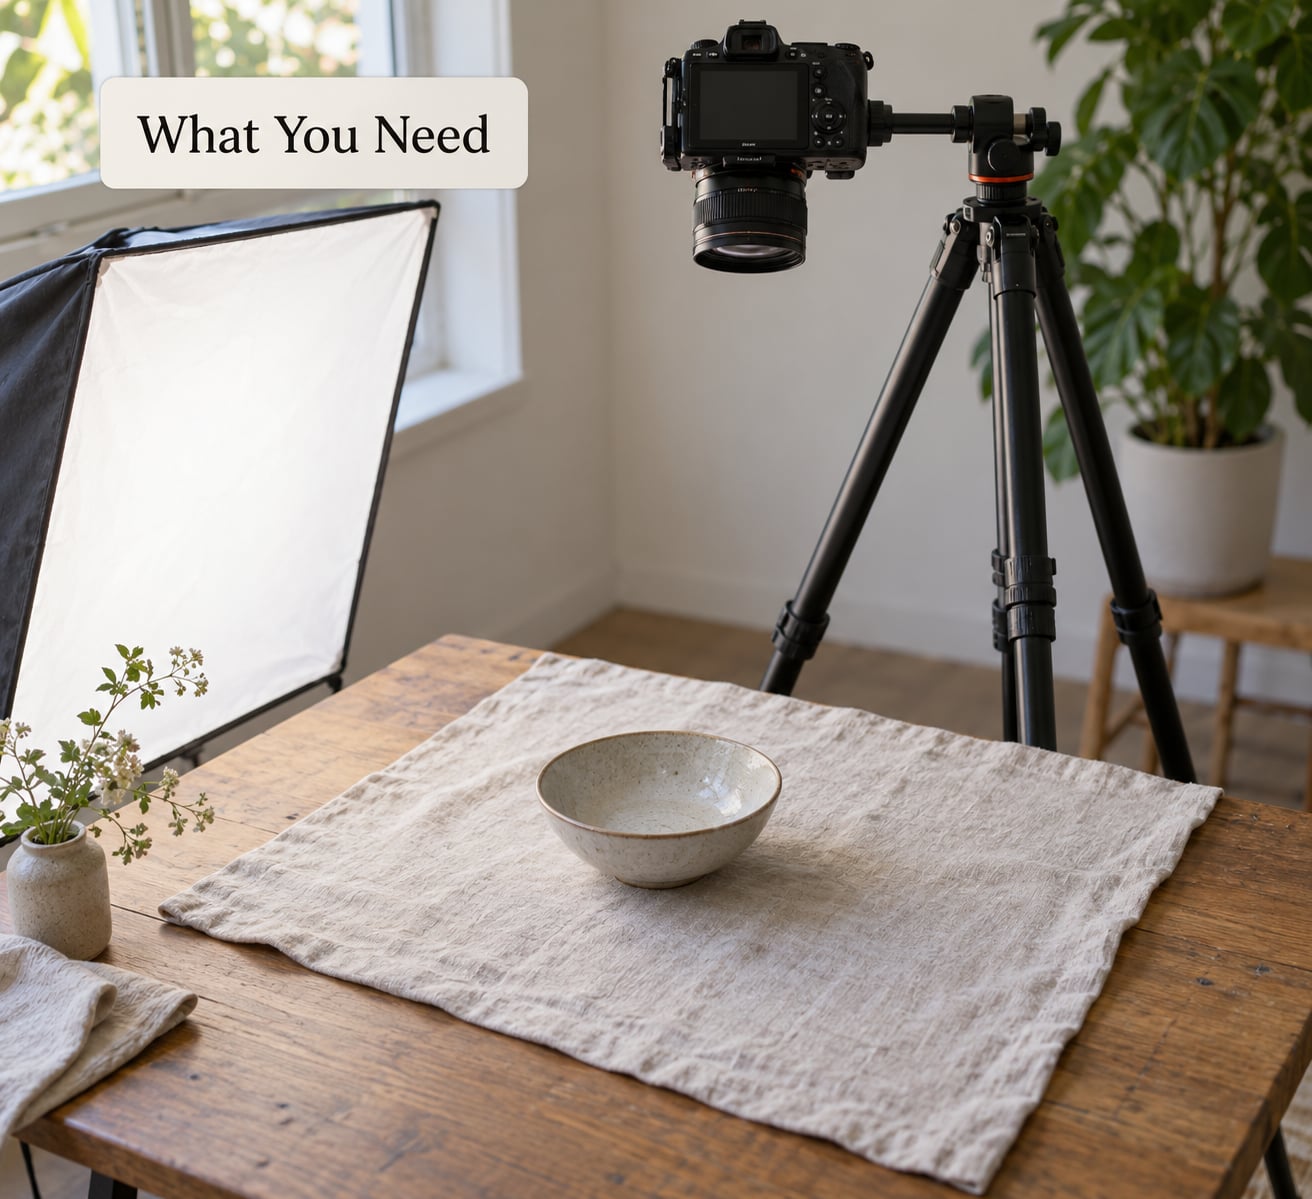
The short list: something to hold the camera, something to hold that, and a way to fire the shutter without touching the camera.
- A camera. Any mirrorless or DSLR with a tripod socket works. A phone needs a clamp mount and its own app for remote release.
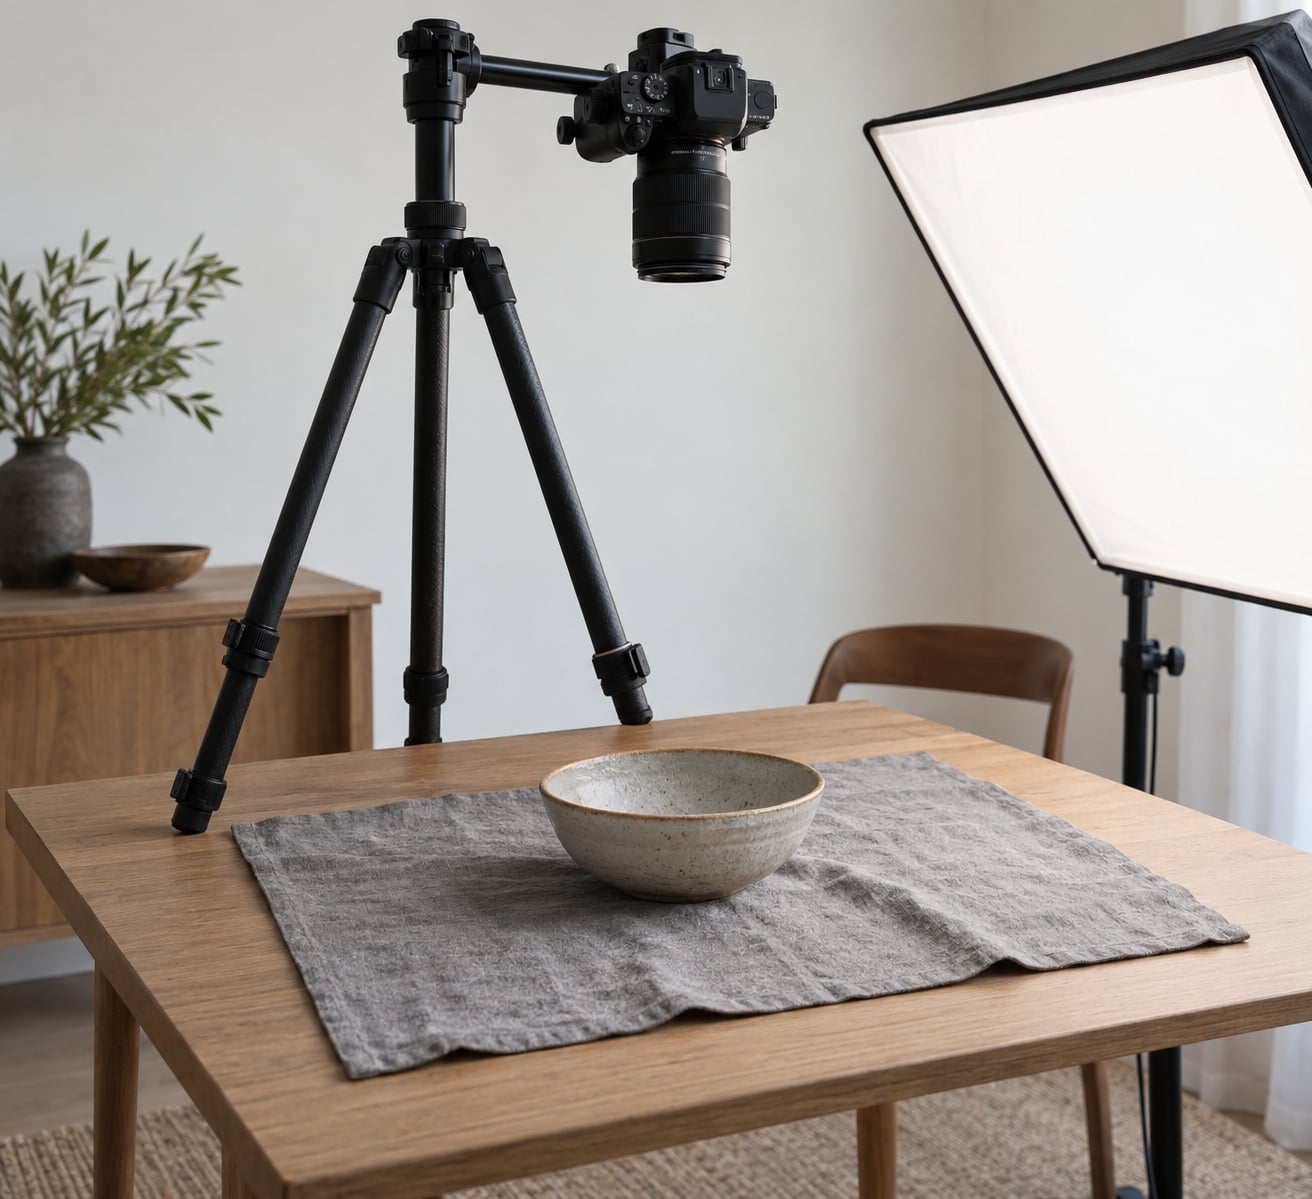
- A rigid support. A full-size tripod with a centre column is the standard. For tight spaces, a clamp arm or a sturdy boom pole clamped to a table leg does the same job at lower cost.
- A remote release or interval timer. A cheap wired release or a phone app beats touching the camera every time.
- A flat shooting surface. A table or floor mat gives you a known plane to align to and something to catch a dropped lens cap.
- Two diffused light sources. Softboxes, a white sheet over a window, or a pair of LED panels with diffusers. Bare bulbs directly over the subject will blow out the top of anything.
- Weights or a sandbag. On a light tripod, a small bag on the base column is cheap insurance against a nudge.
- A tape measure or laser measure. Needed for repeatable overhead framing when you are shooting a series.
If you have no tripod and no budget for one, you can still shoot overhead safely. Stand at a table, hold the camera in both hands above the subject with your elbows braced against your ribs, and use a timer. It is less precise, and you should test the framing on your phone first, but nothing will fall on your head.
Which overhead setup suits your subject?
All four methods below produce a straight-down image. They differ in how much room they take, how repeatable they are, and how much can go wrong, so pick on the subject rather than on the gear you happen to own.
- Tripod with centre column. Typical height is eye to shoulder level, setup takes about three minutes, and it is very repeatable. This is the workhorse for food, crafts, artwork and product shots.
- Clamp arm on a table edge. Sits 30 to 60 cm above the surface and sets up in under a minute. Repeatable if you mark the clamp position, and it fits tight kitchens and small workspaces where a tripod will not open.
- Boom pole clamped to a leg. Works below head height, takes about two minutes, and repeats well. Best when you are shooting video or a long sequence rather than a single frame.
- Handheld over a table. Arm height, no setup at all, and not repeatable at all. Fine for one-off reference shots, nothing more.
Whichever you choose, the same test applies: give the support a hard push in every direction before the camera goes on. Anything that moves, moves out of the plan for that session.
How to Shoot from Above Safely: Step-by-Step
The whole process takes about ten minutes once you have done it a few times. Most of that is setup; the actual shooting is a handful of frames. Work through it in this order and the risk drops each step: clear the space, get the camera somewhere you can reach, secure it so it cannot fall, light it without heat or glare, set your controls, shoot, then take everything down in reverse.
How to shoot from above safely: clear the area and check the support
Start on the ground with the room empty of loose clutter. Overhead work puts your head where the view used to be, and you cannot see the cords, the cat bed or the tripod feet of your own light stands.
Sweep the floor within a couple of metres of the setup and move anything that rolls, trips or sits at ankle height. Pay attention to the strips of light stands often have running across a floor to a power point. Those are the ones that catch feet in the dark.
Then check the support itself before anything heavy goes on it. Open the tripod legs fully, spread them wider for overhead work because the load sits high and off-centre, and press down on the head to feel for play in the locks. Any wobble at the head means tightening before you keep going, not after the camera is on it.
Never stand on a chair, a bin or a stack of books to reach a higher position, and never lean a ladder against the tripod. If the camera needs to be higher than your shoulders, raise the support, not yourself.
Choose a safe camera position
Set the height where you can look at the live view screen without stretching. The standard for food and product work is directly overhead with the camera pointing straight down, the lens centred over the middle of the subject.
For anything with a front face, tilt the camera down about 45 to 70 degrees instead. That keeps the background in frame and stops the shot going flat.
Keep both feet planted. Most overhead shots need no more height than standing with your arms raised, and you can always gain the last few centimetres by extending the tripod centre column rather than by standing on something. That single habit is most of how to shoot from above safely indoors.
Height and distance work as a pair. Moving the camera up and the subject stays the same size only if you zoom or step back, and stepping back on a narrow floor is where trips happen. On a wide floor, drop the tripod a leg’s width lower and take a step back instead. That keeps your body out of the light and off the cable run.
Check the lens-to-subject gap before you set anything else. Overhead, a wide lens has to get close to fill the frame, and that means the front element sits uncomfortably near the subject. If you are shooting anything breakable, put the camera as high as your support comfortably allows rather than as close as the framing demands.
Set the camera so it cannot fall
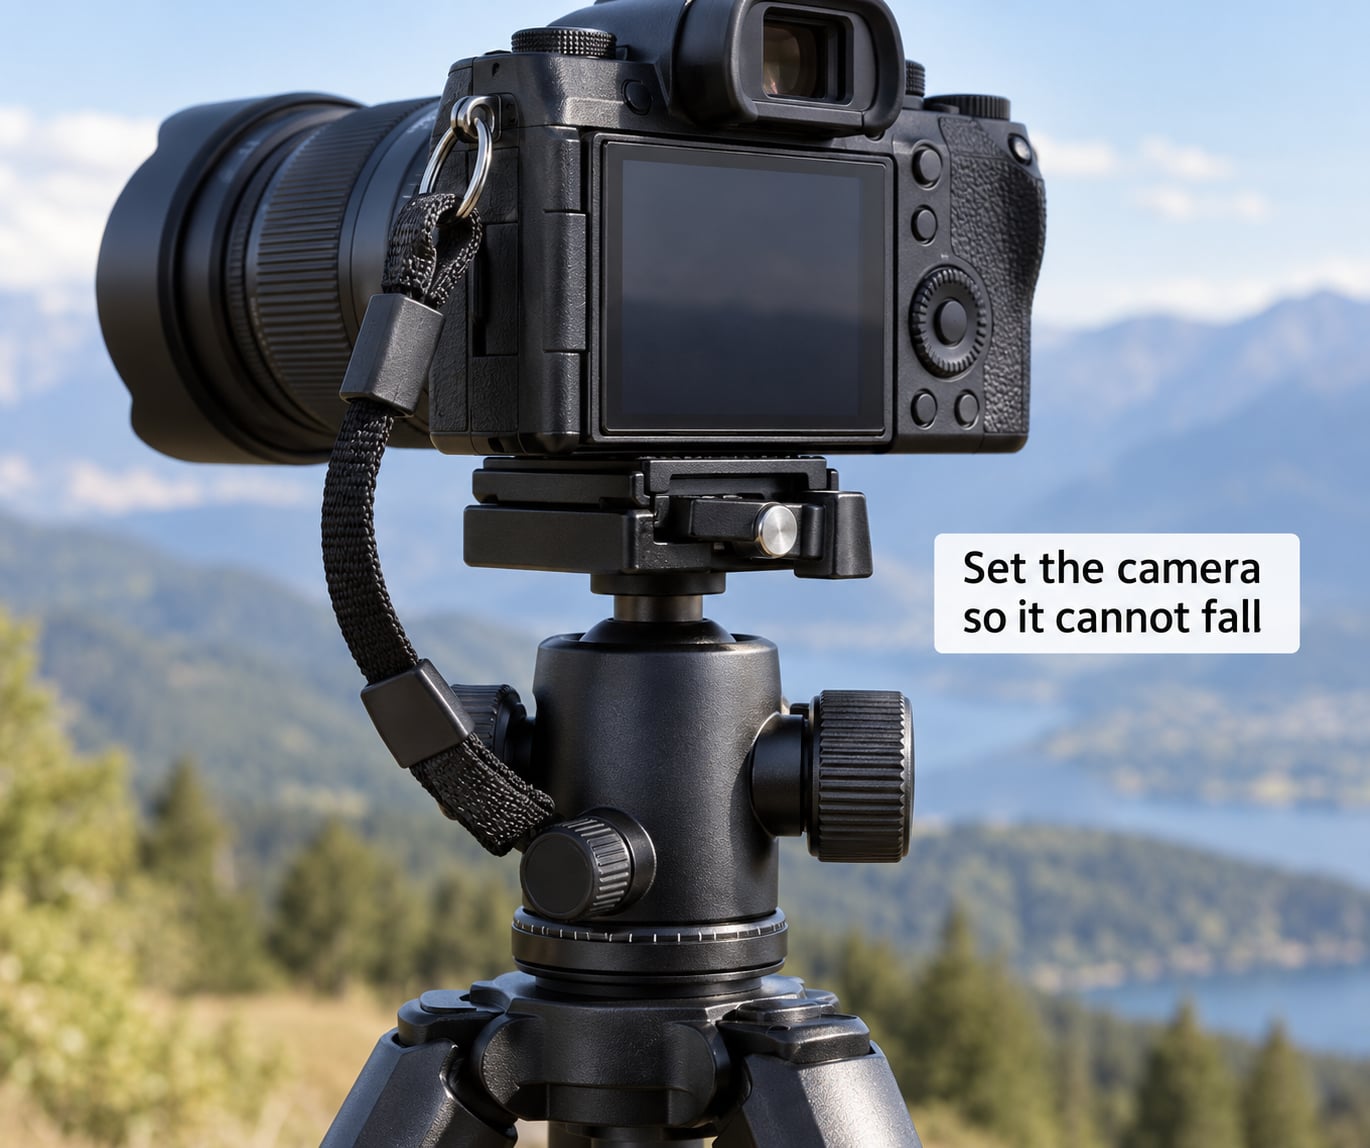
A camera pointing straight down over your head is the single highest-consequence mistake in this guide, because the lens is pointed at the floor and you cannot see whether the plate is seated.
Run through the locking sequence. Seat the quick-release plate on the camera’s tripod socket, tighten the plate’s own dial, lock the plate into the head, then tighten the head’s locking handle until it stops. Give the whole assembly a firm shake with the camera attached and watch the live view, not the hardware.
Add a tether for anything above about head height. A camera strap looped through the tripod centre column, or a short cable to a bag hook, catches the camera if a lock releases. Props are less reliable than straps, because a leg can swing.
Keep the lens centred over the work area so a bump sends it sideways rather than down onto the subject, and tighten the centre column collar only after the camera is balanced.
Light the subject without creating heat or glare
Overhead light needs two sources at roughly 45 degrees on either side of the subject, each raised until it sees a soft shadow. A single light straight above flattens everything and puts a hot reflection on glossy surfaces.
Keep lights off to the sides rather than over the camera, because a source near the lens axis reflects straight back into it. Diffuse anything that has a bare bulb or an exposed panel, and leave a little air around the fixture so it is not cooking the subject.
Run cables along the floor rather than across it. If a cable must cross, tape it flat and cover the run with a mat.
Overhead lighting has one failure mode that catches everybody: the ceiling fixture. Turn off every room light, because a bare ceiling bulb will fight your softboxes and give you a second, harder shadow underneath your subject. If you need the room bright for something else, work in a room you can darken.
Give each source about 30 cm of air around the front of it and keep them behind the subject line rather than over it. That is enough to soften a hard edge without needing a full softbox, and it also keeps hot fixtures away from food, wax, paper and anything else that changes under heat.
White cards are the cheapest reflector you will own. One propped opposite the brighter source lifts the shadow side by a stop or so; a black card beside it adds contrast instead. Move cards after the test shot, not before, since a card changes with every move.
Watch for reflections in any glossy surface. A tilted white card can put a bright streak right across a phone screen or a bowl. If that shows up in the frame, move the card down and further out rather than rotating the light and losing your setup.
Set camera controls and compose the shot
Switch to manual exposure and shoot RAW. Above the subject you are dealing with whatever light the room gives you, and auto will chase brightness every time you move a light or a prop.
Start at ISO 100 to 400, an aperture around f/5.6 for depth across a flat subject, and a shutter fast enough to freeze any hand movement on the camera. On a tripod 1/60 second is usually fine, but use a two-second timer or the remote release so you never touch the body.
Set white balance manually once you have decided on the look, rather than leaving it auto. Turn on the grid lines and use them to check that the camera is square to the table, since a few degrees of tilt is invisible from underneath but obvious in the file.
One exposure value you do not have on the ground is vignette. A lens shot from close up and straight down loses brightness at the corners, and with a large tabletop filling the frame it is easy to mistake for a lighting problem. If the corners are consistently dark, stop down a little or move the subject closer to the centre rather than adding a light.
Live view screen glare gets worse the higher you go, because you are now tilting the screen toward the ceiling lights. Drop screen brightness to the lowest level you can still read, and shade the screen with your hand or a small card if you are framing in daylight.
Take test shots and make controlled adjustments
Fire one frame and check three things before anything else: is it sharp, is it square, and are the shadows going where you intended.
Change one variable at a time. Move a light and recheck the shadows, change the aperture and recheck sharpness, shift the subject and recheck the grid. Moving the camera, the lights and the props together means you cannot tell which change fixed the problem.
Check the corners of the frame too. Wide lenses from close up often lose sharpness at the edges, and from overhead the corners of your table fill a lot of the image.
A third check worth building in: look at the histogram rather than the screen. Overhead scenes with a white backdrop clip at both ends, and the screen is bright enough to hide it. If the histogram touches either wall, you need to change exposure, not settings.
Shoot a bracket when contrast is high and you want one frame to work, such as a dark ceramic on a pale mat. Three frames at different exposures is faster than coming back for the shot.
Finish safely and pack the setup down
The shot is where injuries actually happen, so pack down in the reverse order of setup, every time.
Release the shutter, switch the camera off, remove the battery if you are storing it long-term, then take the camera off the head before you collapse anything. Lower the camera to chest height before you loosen the centre column, not after.
Fold the tripod legs one at a time, carrying the collapsed legs vertically rather than swinging them out, then wind cables loosely. Look at the floor one more time, and only then start rearranging the table.
Common Mistakes
Almost every overhead accident traces back to one of a handful of habits. Here they are with the fix.
- Standing on furniture. This is the big one. Fix: raise the tripod centre column or swap to a taller tripod. If you need to be on a ladder, that is a two-person job with the bag passed up by hand.
- Loose quick-release plate. Fix: run the shake test with the camera mounted and the live view visible.
- One light directly overhead. Fix: two sources at 45 degrees, each diffused.
- Touching the camera to shoot. Fix: two-second timer or remote release, every frame.
- Auto exposure and auto white balance. Fix: manual exposure, RAW, fixed white balance.
- Cables across the floor. Fix: route along the edges and tape any crossing flat.
- Leaving the head over-tightened with no camera on it. Fix: tighten handles to firm, not maximum, and re-check balance before mounting.
- Changing the whole setup after every frame. Fix: one variable at a time, then a test shot before the next frame.
A few habits that pay off: mark the tripod leg positions and the table edge with tape so you can rebuild the same framing in a hurry. Keep a spare battery, spare tether and a microfibre cloth in the same bag every time. And work in daylight where you can, because overhead shots lose contrast fast and a second light starts solving problems you would not have had at noon.
Two more that come up repeatedly. Shoot batches of eight or nine frames rather than one, because the difference between two good overhead shots is usually a millimetre of subject placement and nobody spots that by eye. And decide your tallest point before you build, not after, since adding height to an existing setup usually means loosening something you had already tightened.
If you are shooting a sequence with the same framing, write down the aperture, ISO, shutter speed, height and lens as you found them. Rebuilding from memory is how you end up with 30 near-identical images and no idea which one changed.
Frequently Asked Questions
How high can I safely shoot an overhead photo?
For a tripod or clamp rig, stay at a height you can reach comfortably with both feet on the floor, usually around eye to shoulder height. Anything higher needs a proper support, not a chair. If you are using a drone, US rules cap you at 400 feet above ground level, so check airspace and authorisation before you go anywhere near that ceiling.
Do I need a tripod, or is a phone good enough?
A phone can do it, but only if you clamp it rather than hold it. Mount the phone in a clamp on a tripod or boom pole, use the camera app’s remote or timer release, and prop a small diffuser card against any light source that reflects into the lens. Phones also need their exposure and focus locked, since auto settings drift between frames.
Can I shoot overhead from a stool or a chair?
Yes, if the stool is stable and you are not stretching. Most overhead food and craft shots are taken from a bar stool or a fixed chair at about table height. The moment you have to lean or twist to reach the frame, the shot is not worth it. Long exposures or heavy camera bodies make that limit tighter, not looser.
What is the best lighting for a directly overhead shot?
Two diffused sources placed at roughly 45 degrees on either side of the subject, raised until the shadows soften. Keep both sources off the camera axis, otherwise glossy surfaces reflect the light straight back into the lens. A window with a white sheet across it works well too, as long as it is broad enough to act as one soft source.
Is shooting from above with a drone the same setup?
Not really. A drone changes the safety question from stability to airspace, wind and bystanders, and the camera is far enough away that vibration and rolling shutter need managing. A clamp or tripod is the better choice for food, crafts and small objects, because everything stays in reach and nothing can drift.
How do I keep the camera from falling off the tripod?
Seat the quick-release plate on the camera, tighten the plate dial, lock it into the head, then tighten the head handle until firm. Mount the camera and shake the assembly while watching the live view. Above head height, add a tether: a strap looped through the tripod centre column catches the camera if a lock releases.
Conclusion
The safest first action costs about a minute: clear the floor, spread the tripod legs, and shake the camera on its mount while you watch the live view. Do that before you arrange a single prop.
Once the support is proven, set the height you can reach without standing on anything, add a tether if the camera sits above your head, and put two diffused lights either side of the subject. Shoot on manual exposure with a timer release, change one thing at a time, and take everything down in reverse. That routine is the whole of how to shoot from above safely, and it holds whether you are shooting a bowl of soup or a bridge from a rooftop.