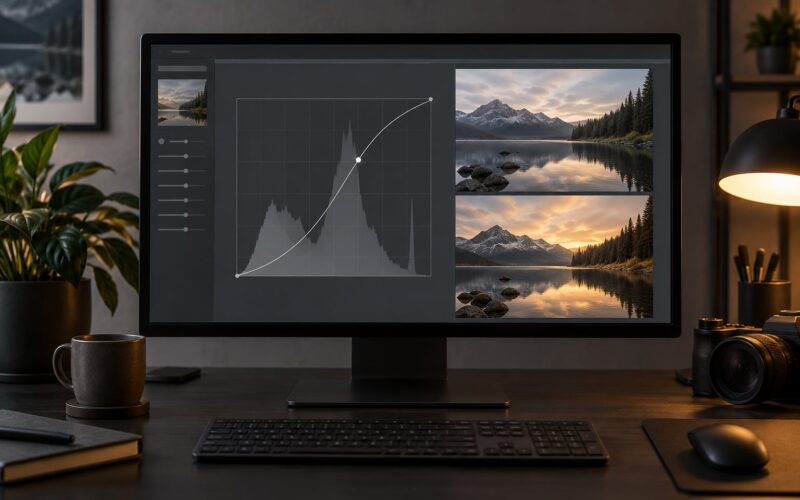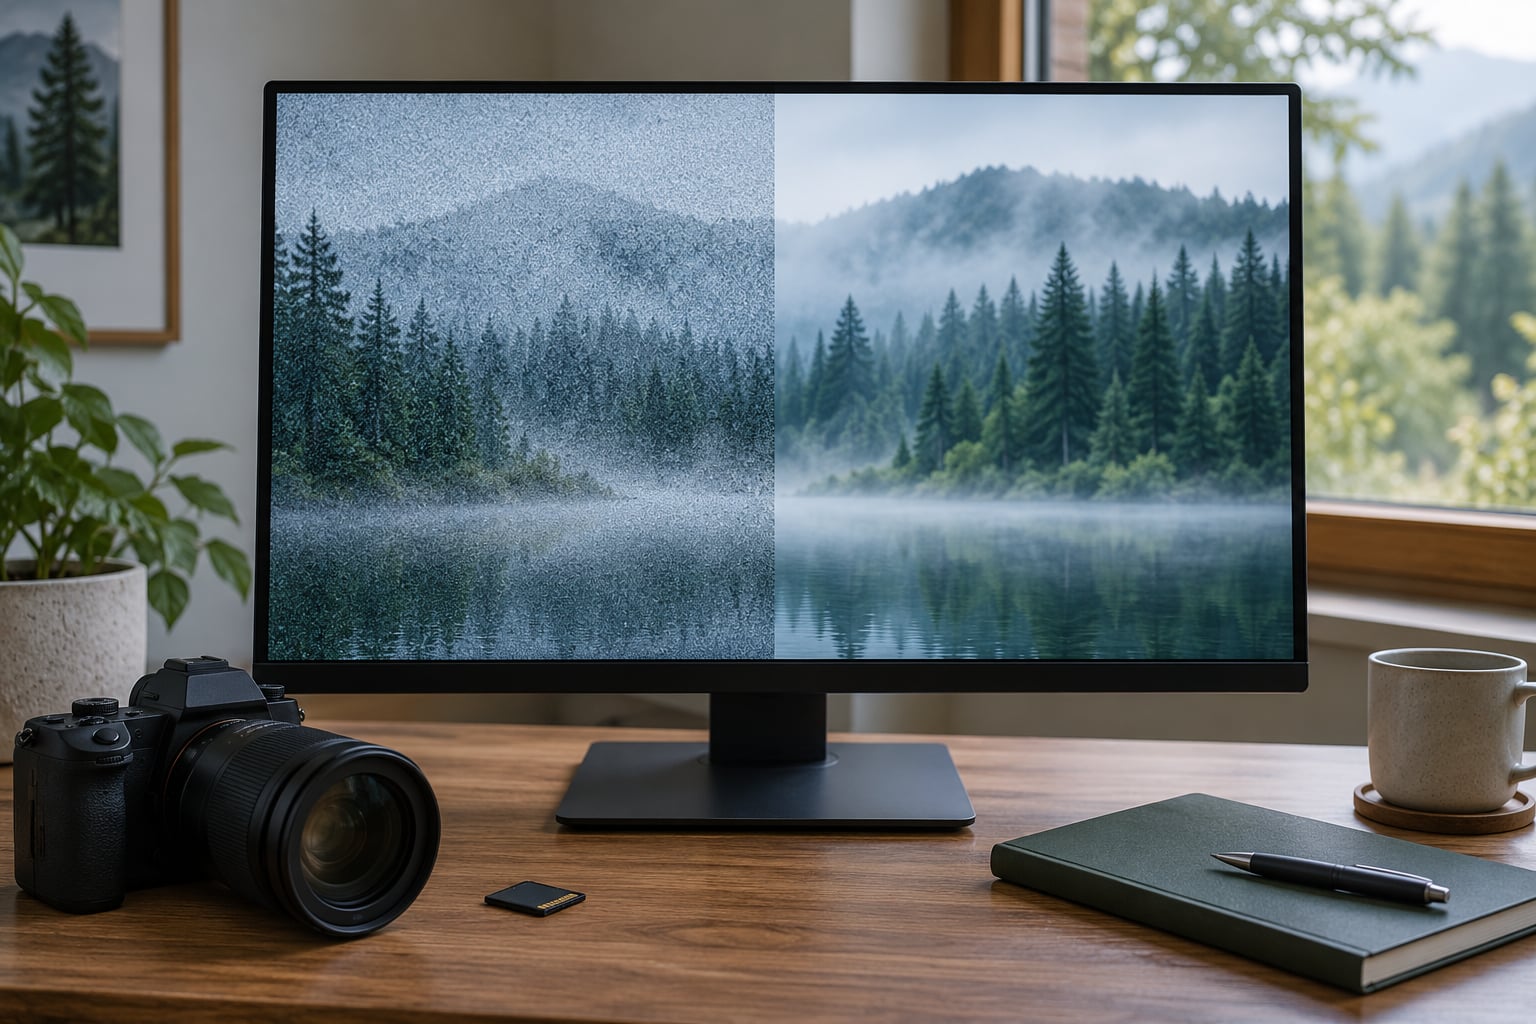
You can reduce noise in photos with a two-part routine: clean up the color speckles first, then smooth the luminance grain selectively and mask it so real texture survives. Start from the RAW file if you have one, work at 100% zoom, and finish with restrained sharpening. On a single image the whole thing takes a few minutes.
Noise is the random grain and speckle you see when the sensor records a weak, imperfect signal. It shows up most in dark areas, in long exposures, and whenever you push the ISO up to shoot in low light.
This guide covers Lightroom Classic and Lightroom, plus the equivalent controls in Photoshop’s Camera Raw filter, so you can follow it in whichever editor you already use.
Table of Contents
- What You Need
- Step-by-Step: How to Reduce Noise in Photos
- 1. Identify the Type of Noise Before Editing
- 2. Start With the Highest-Quality Source
- 3. Apply Color Noise Reduction First
- 4. Reduce Luminance Noise Selectively
- 5. Use a Mask for Noisy Areas
- 6. Protect Texture and Edges
- 7. Try AI Denoising as a Comparison, Not an Auto-Fix
- 8. Zoom In and Compare the Full Image
- 9. Apply Sharpening and Export the Right Size
- Common Mistakes
- Frequently Asked Questions
- Should I denoise or sharpen a photo first?
- Can I reduce noise in a JPEG photo?
- What is the best noise reduction setting for high-ISO photos?
- Are AI noise reduction tools better than manual adjustment?
- How much noise can be removed from an old photo?
- Conclusion
What You Need
Four things, and only one of them is optional.
- The original file. The RAW file if the camera wrote one, otherwise the largest JPEG you have. Not a copy you emailed to yourself or uploaded to a social app.
- An editor with noise reduction controls. Lightroom Classic and Lightroom both have them. In Photoshop, open a RAW file and use the Camera Raw filter, where the Detail panel carries the same sliders.
- A computer with a reasonable screen. A 24-megapixel RAW file is roughly 75 MB. On a phone or a small laptop with integrated graphics, working gets slow fast.
- A display you can trust. Ideally a calibrated monitor in a dim room. This one is optional in practice, but noise reduction judged on an uncalibrated screen is how you end up with a photo that looks flat to everyone except you.
It helps to know which kind of tool you are using. Workflow-based noise reduction works from sliders you set yourself: you decide how much smoothing happens and where. AI-assisted tools analyse the image and apply their own smoothing, which is fast on badly noisy shots but harder to steer.
Names differ slightly between applications. What Lightroom calls the Detail panel, some editors split into separate Noise Reduction panels, and mobile apps usually hide everything behind a single “Noise Reduction” or “Denoise” button. The order of operations below is the same regardless of labels.
Step-by-Step: How to Reduce Noise in Photos
Nine steps, in this order. The order matters more than the numbers you end up using: work on the source, clean color before grain, mask before you commit, and sharpen only at the end.
1. Identify the Type of Noise Before Editing
Open the file and press the zoom to 100%. Most editors show actual pixels at that zoom, which is the only honest place to judge noise.
You will usually find some mix of these five problems:
- Luminance noise looks like fine grain, usually grey or brownish, and follows no pattern. It is most obvious in flat dark areas like a night sky or deep shadow.
- Color noise appears as bright green, magenta and blue specks, again most visible in shadows. Because the specks are coloured, they pull the eye harder than grain does.
- Banding shows as flat steps or rings across a smooth gradient, typically a sky. It is not noise exactly, but it is fixed by the same kind of smoothing.
- Texture loss means fur, grass, fabric or masonry has already gone mushy from in-camera smoothing or an aggressive previous edit.
- JPEG artifacts turn up as small blocky patches and mosquito noise along edges. You can soften them but never fully remove them.
Check the four corners and the darkest part of the frame at 100%. Corners catch noise and vignetting together, which is a useful double diagnostic.
2. Start With the Highest-Quality Source
A RAW file holds 12 to 14 bits of data per colour channel; a JPEG keeps about 8 bits after it has thrown the rest away. That headroom is why RAW noise is recoverable and JPEG noise mostly is not.
Never edit a compressed copy if the original exists. A JPEG that has been saved repeatedly also picks up extra compression artifacts, so each round trip makes the grain chunkier and harder to treat.
In Lightroom Classic, use Develop, select all your RAW images, and make sure the Profile is Adobe Neutral or Adobe Color rather than a heavily compressed setting, which slows nothing down but does flatten fine detail in the highlights. In Photoshop, File, Open, then the file opens in Camera Raw automatically.
One more thing worth doing now: set exposure before you denoise. Correcting a badly underexposed frame afterwards asks the noise reduction to hide noise that a proper exposure would have avoided.
3. Apply Color Noise Reduction First
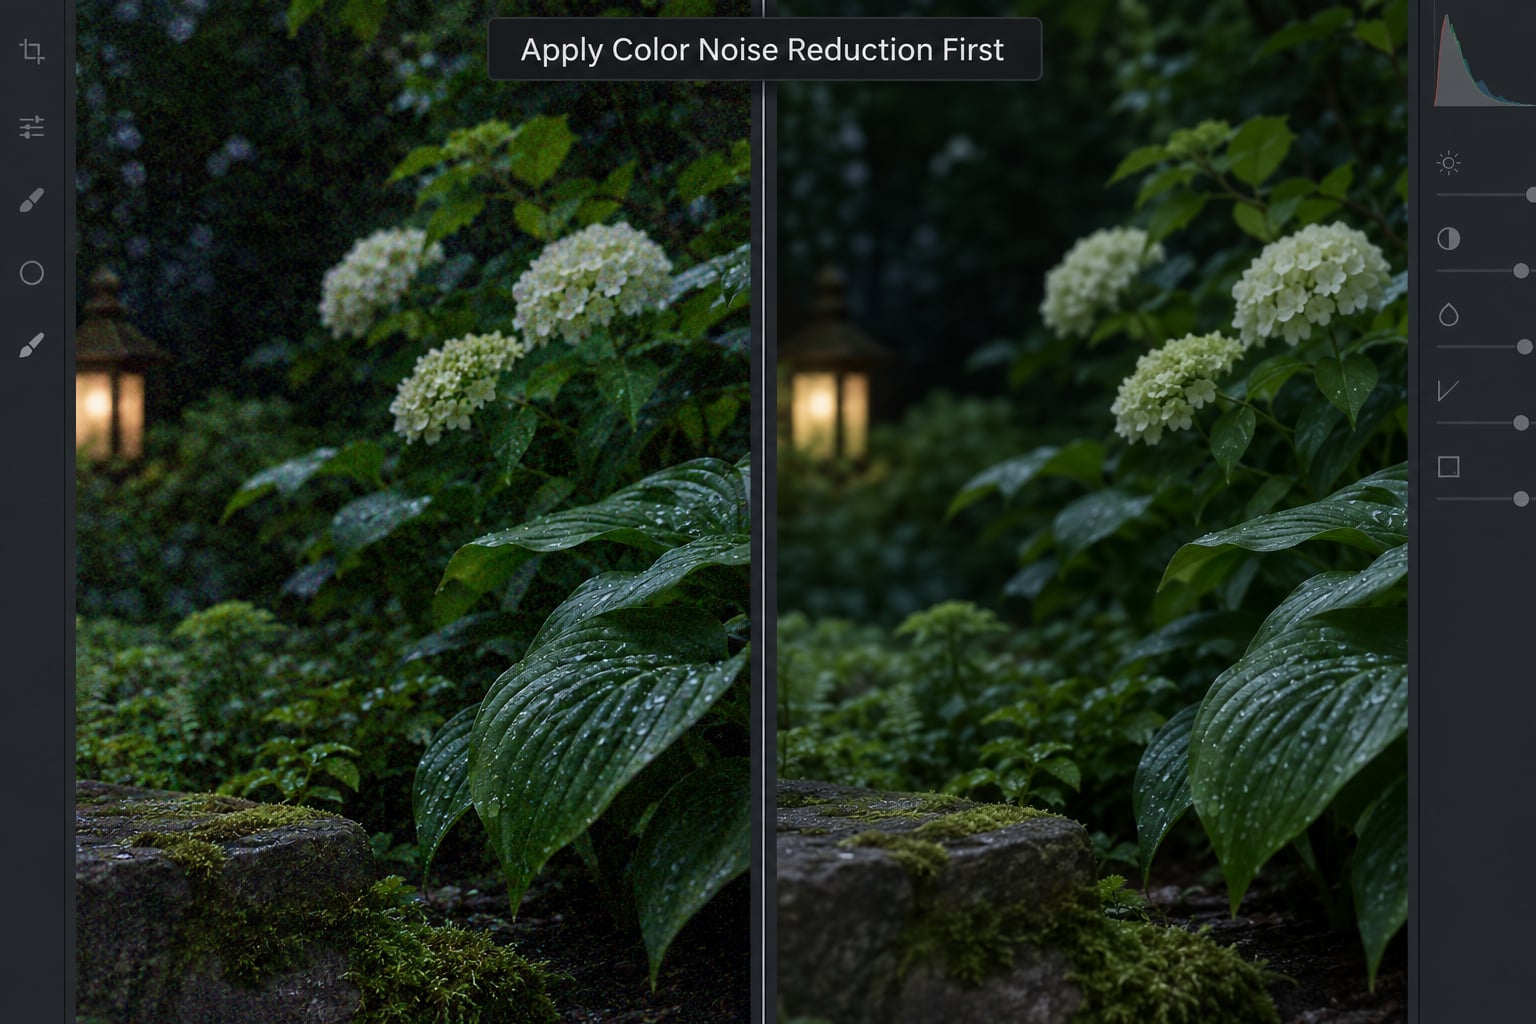
Color noise reduction is the safest adjustment in the whole workflow because it barely touches texture. Green and magenta flecks in dark foliage are genuinely unpleasant, and clearing them usually makes a photo look better even before you touch the grain.
In Lightroom Classic, the panel is Detail, with a Luminance group and a Color group underneath. Set Color between 10 and 25 to start. Color Smoothness goes higher than Color Detail because Color Detail protects edges between two different colours, while Color Smoothness blends specks in flat areas.
In Photoshop, open the file with the Camera Raw filter. Find Filter, Noise Reduction and set Color to roughly 25, or Color Reduction in newer versions. The names move around between versions, so look for the Detail panel or the Noise Reduction panel rather than hunting for an exact label.
Use Alt or Option while dragging any slider to see a before-and-after comparison in the preview.
You will know it worked when dark leaves, brickwork and twilight sky look evenly textured instead of freckled, and the edges between objects still look sharp. If edges have gone soft, pull Color Detail back up.
4. Reduce Luminance Noise Selectively
Luminance noise is the visible grain. Reducing it means smoothing neighbouring pixels together, and that is where detail gets sacrificed, so this slider deserves more care than the color one.
Shadows need more reduction than highlights, and in most editing programs the same slider applies to both. That is why masking, which comes next, matters so much.
Starting points: Luminance between 10 and 20 for an image shot at ISO 400 to 800, 20 to 40 at ISO 1600 to 3200, and up around 40 and beyond for ISO 6400 and higher. Raise the Detail slider first, because a higher Detail setting preserves the edges and texture that a high Luminance value would otherwise smear.
In Lightroom, Luminance, Detail and Contrast work together. Luminance sets how much, Detail sets how much of the fine structure survives, and Contrast sets how much of the smaller remaining contrast is kept. Newer versions of Lightroom Classic add a Texture slider, which protects broad areas of mid-frequency detail such as bark, brick and fabric while leaving grain alone.
If your editor does not separate luminance from color noise, expect one Noise Reduction slider and a Detail slider, with the same idea underneath.
The honest test: zoom to 100%, look at a textured edge such as hair or grass, and see whether the texture is still texture or has become a smooth patch.
5. Use a Mask for Noisy Areas
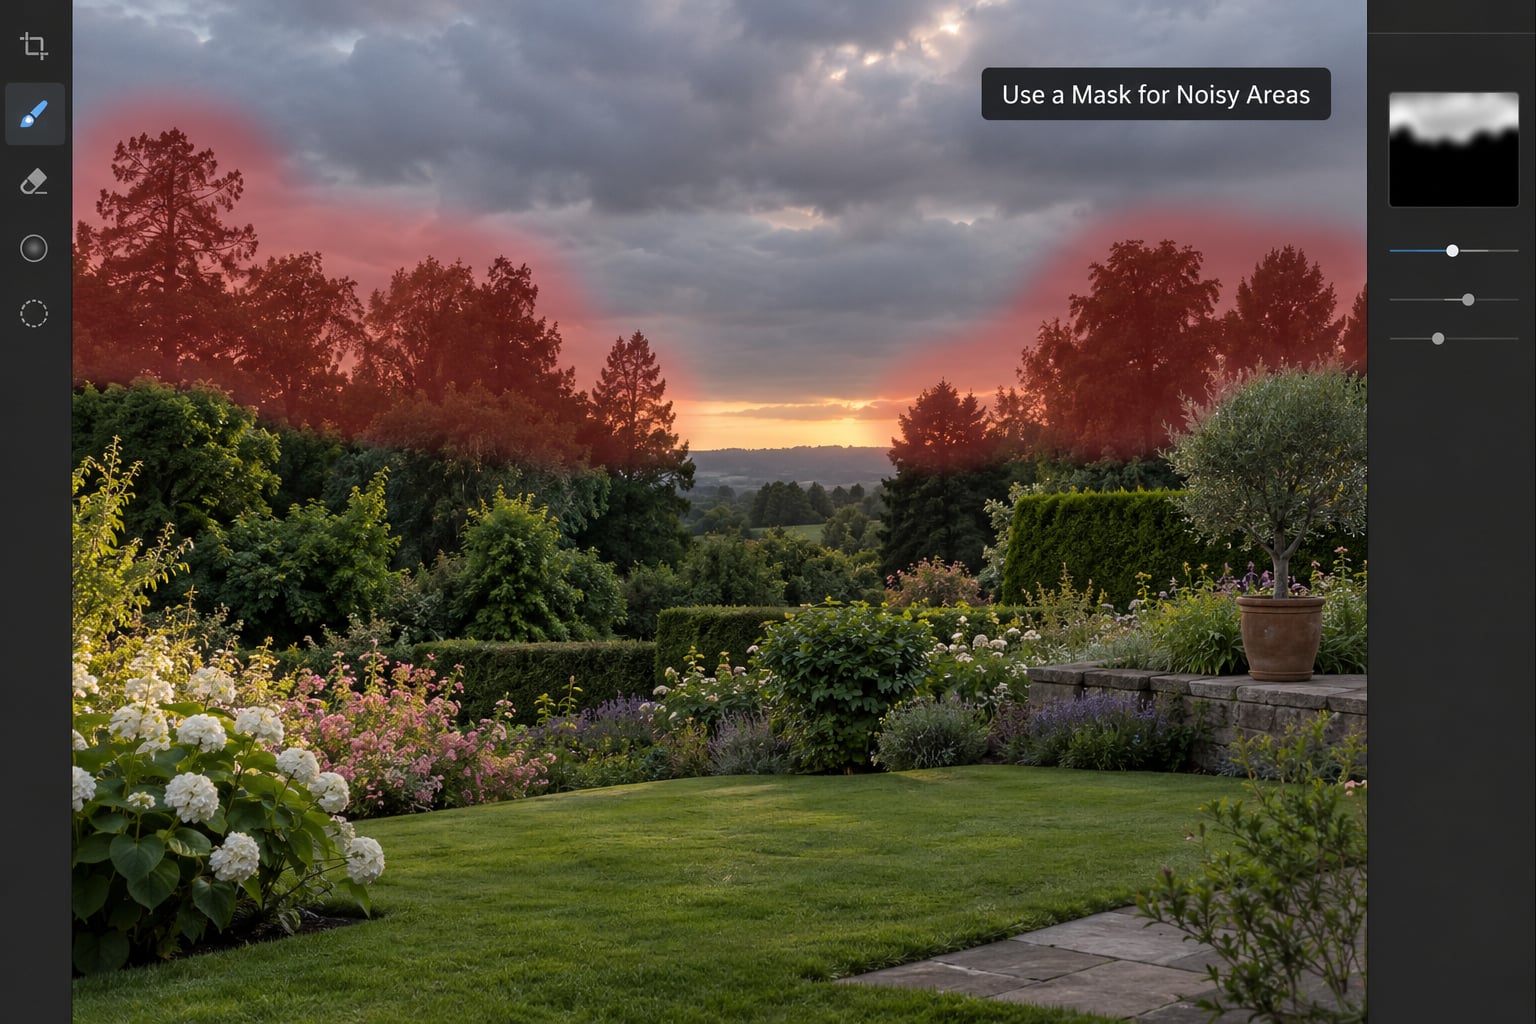
Global noise reduction treats a bright wall the same as a black tree canopy. Masking fixes that, and it is the single change that most separates a natural result from a plastic one.
Four ways to build a mask:
- Brush. Paint the noise reduction onto skies, water, deep shadows and foliage. Adjustment brushes in Lightroom carry their own Detail and Noise sliders, though many photographers find those local sliders underwhelming and prefer a global pass plus a mask.
- Gradient. Drag from the top of the frame downward for skies, and from the bottom up for foreground shadow. Invert it to protect a subject.
- Object selection or subject mask. Select the person, animal or bird and choose Select Inverse, then apply lighter reduction everywhere else.
- Range or luminance mask. Select only the darkest tones. This is the best choice for a subject that occupies the whole frame.
Worked example on a dusk landscape: drop global luminance to 10, then add a brush mask over the dark trees and the upper sky and take it to 35. The trees clean up dramatically while the sunlit grass in the foreground keeps every blade.
Feather the mask edges generously, roughly 40 to 60 percent, and pull the flow down to 50 percent. A hard edge produces a visible halo where smooth meets grainy, which is far more obvious than the noise you were trying to fix.
6. Protect Texture and Edges
Smoothing removes the local contrast your eye reads as detail. Protect it with the Detail and Texture controls, and undo any adjustment that leaves edges looking waxy or outlined.
Inspect four textures at 100%: hair against a dark background, grass or needles, masonry or wood grain, and any woven fabric. If any of them has gone to a flat smear, raise Detail and Texture before lowering Luminance again.
Keep the sharpening amount low while you work. Output sharpening amplifies whatever it finds, and if noise is still visible you are simply sharpening the noise too.
7. Try AI Denoising as a Comparison, Not an Auto-Fix
AI noise reduction can rescue a frame that manual sliders cannot, and it fails quietly when you accept it without checking. Use it as a comparison.
It helps most when the noise is severe: high-ISO night shots, dim indoor events, older files, and handheld frames where shadows were lifted hard. Light touch-ups rarely need it.
How to compare: duplicate the layer or the develop snapshot, run the AI tool on the copy, then toggle between the two at 100%. Judge the copy on leaves, eyelashes, star points and fur. Repeated patterns such as windows, fences and brick rows are the most reliable failure test, since AI smoothing often merges neighbouring similar pixels into mush.
Two practical notes. In Lightroom, AI Denoise writes a separate DNG alongside your file, and on a big batch it is slow, so a few key frames is a sensible use. In dedicated apps such as Topaz Photo AI or DxO PureRAW, the tool works on the DNG directly and gives more control than a one-click button, but it produces separate files too.
None of these is always superior. The manual sliders keep everything under your control and cost nothing, and community consensus across photography forums has been consistent for years: slightly noisy beats slightly plastic.
8. Zoom In and Compare the Full Image
Quality control takes longer than the adjustment and saves you from an over-edited file. Run this routine every time.
Check at 100% first, then drop to fit-to-screen. Noise that looks alarming at 100% is usually invisible at normal viewing size, and that is the size most people see your photo at.
Look at smooth gradients, especially a twilight sky. Steps or banding there mean you went slightly too far on luminance or too light on colour smoothing.
Toggle before and after, look at the unedited version for ten seconds, then look back. A photo that now feels too clean or too flat has been over-smoothed; back the luminance down and reapply your mask instead of sharpening your way out of it.
9. Apply Sharpening and Export the Right Size
Noise reduction leaves edges a little softer, and restrained output sharpening puts the bite back. Go to the Sharpening panel, use the default radius of about 1.0, and hold the amount near 40 for a normal photograph. Push past 60 and you are mostly amplifying noise.
For screen delivery, export a standard sRGB JPEG at the size it will actually be displayed. A 24-megapixel file shrunk for a website hides noise on its own, so skip the aggressive denoising you would apply to a print.
For demanding print work, a 16-bit TIFF is worth the extra file size because it leaves more data for the output stage to work with. Keep the layered or RAW working file either way, so you can return to it when you have more ideas.
Common Mistakes
Reducing every area equally. Global luminance smoothing cleans your shadows by flattening your highlights. Fix: mask the noise, or use a range selection for the darkest tones.
Using excessive smoothing. Once a photo looks plastic, no amount of sharpening will restore the lost texture. Fix: reverse the luminance value by half and re-mask instead of pushing further.
Sharpening before noise reduction. Sharpening first makes the grain more visible, so the noise reduction then has more to remove and takes more detail with it. Fix: denoise, check at 100%, then sharpen once at the end.
Editing a low-quality JPEG. Compression artifacts look like noise and cannot be undone. Fix: find the original RAW, and if none exists, work at a small reduction and accept what remains.
Masking with hard edges. A hard mask boundary produces a visible halo and looks far worse than the original grain. Fix: feather heavily, roughly 40 to 60 percent, and drop the flow to about 50.
Saving repeated lossy versions. Each JPEG save adds another layer of compression. Fix: keep one master working file and export a copy for delivery.
Expecting denoising to replace a better source. No tool creates detail that was never recorded. Fix: shoot cleaner where you can, and check whether a tripod, a slower shutter or a lower ISO would have removed the problem at the capture stage.
Two habits give the most natural results. Use the highest ISO your camera can handle well before reaching for the Luminance slider, and treat AI denoising as a last resort rather than the first click. A photo with visible grain that still has texture almost always looks better than a photo that is perfectly clean and empty.
Frequently Asked Questions
Should I denoise or sharpen a photo first?
Always reduce noise before you sharpen. Sharpening amplifies local contrast, and noise is local contrast, so sharpening first makes the grain more visible and forces the denoise step to remove more real detail to compensate. Denoise, inspect at 100% zoom, then apply restrained output sharpening in the 40 to 60 range on a radius near 1.0.
Can I reduce noise in a JPEG photo?
Yes, but expect a smaller improvement than from a RAW file. A JPEG keeps about 8 bits per colour channel and already contains compression artifacts, so noise reduction can soften those blocks along with the grain. Work with small luminance values around 10 to 20, lean on colour reduction, and save as a new file rather than overwriting your only copy.
What is the best noise reduction setting for high-ISO photos?
Treat these as starting points, not rules: ISO 800 and below, luminance 0 to 10. ISO 1600 to 3200, luminance 15 to 25. ISO 6400 and above, luminance 30 to 45. Keep the Detail slider as high as the noise allows, mask the reduction to shadows and skies, and check the result at 100% zoom on fine texture before you accept it.
Are AI noise reduction tools better than manual adjustment?
Neither wins outright. AI denoising handles severely noisy files faster and often cleans colour noise better, but it can merge repeated patterns such as brick, windows and foliage, and it writes separate files. Manual sliders give you full control, cost nothing, and keep texture better when the noise is mild to moderate. Many photographers compare both and keep whichever holds the detail.
How much noise can be removed from an old photo?
It depends on where the noise lives. Colour noise from a scanned negative or an older camera usually cleans up well. Luminance noise can be softened considerably, but removing it fully leaves a plastic, detail-free surface. Shot noise that was baked into a JPEG cannot be recovered at all. Old scans with visible grain often benefit more from converting to black and white than from heavy reduction.
Conclusion
The routine that works is unglamorous: inspect the original at 100%, identify whether you are looking at colour speckle or luminance grain, start with restrained colour reduction, then smooth the luminance only where the noise actually is and sharpen once at the end.
If you remember one thing about how to reduce noise in photos, remember this. Luminance smoothing is the only genuinely destructive step, so treat it as a local adjustment rather than a global one. A photo with a little visible grain and intact texture will always beat a perfectly clean frame that has lost its edges.