There are four ways to carry a tripod on a hike, and the right one depends on the trail, not the gear. Strap it to the outside of your pack, sling it across your body, hang it off one padded shoulder strap, or collapse it and stow it inside the pack. Each one buys you something different: hands free, balanced shoulders, or a low profile on narrow single-track.
The most common mistake is not picking badly, it is picking the side-mount rig for a ten-mile hike and then wondering why one shoulder aches by mile four. That complaint comes up again and again in hiking photography threads, along with the opposite regret: people who hauled a tripod up a ridge for every sunrise and used it twice all weekend.
Here is how to choose a method and rig it properly, updated for 2026. It takes about ten minutes to set up, most of it spent on strap placement rather than on the tripod itself.
Table of Contents
- What You Need
- Step-by-Step: How to Carry a Tripod on a Hike
- Step 1: Use a Padded Shoulder Strap for Short Hikes
- Step 2: Secure It Vertically to the Backpack
- Step 3: Carry It Across the Body with a Shoulder Sling
- Step 4: Collapse It and Keep It in the Pack
- Common Mistakes
- Tips for Different Trails
- Frequently Asked Questions
- What is the easiest way to carry a tripod on a hike?
- Can I attach a tripod to the outside of my hiking backpack?
- Should I carry a tripod or bring a monopod instead?
- How do I keep a tripod from getting wet in rain?
- Is it safe to carry a tripod across my body while hiking?
- How do I stop the tripod from swinging while walking?
- Conclusion
What You Need
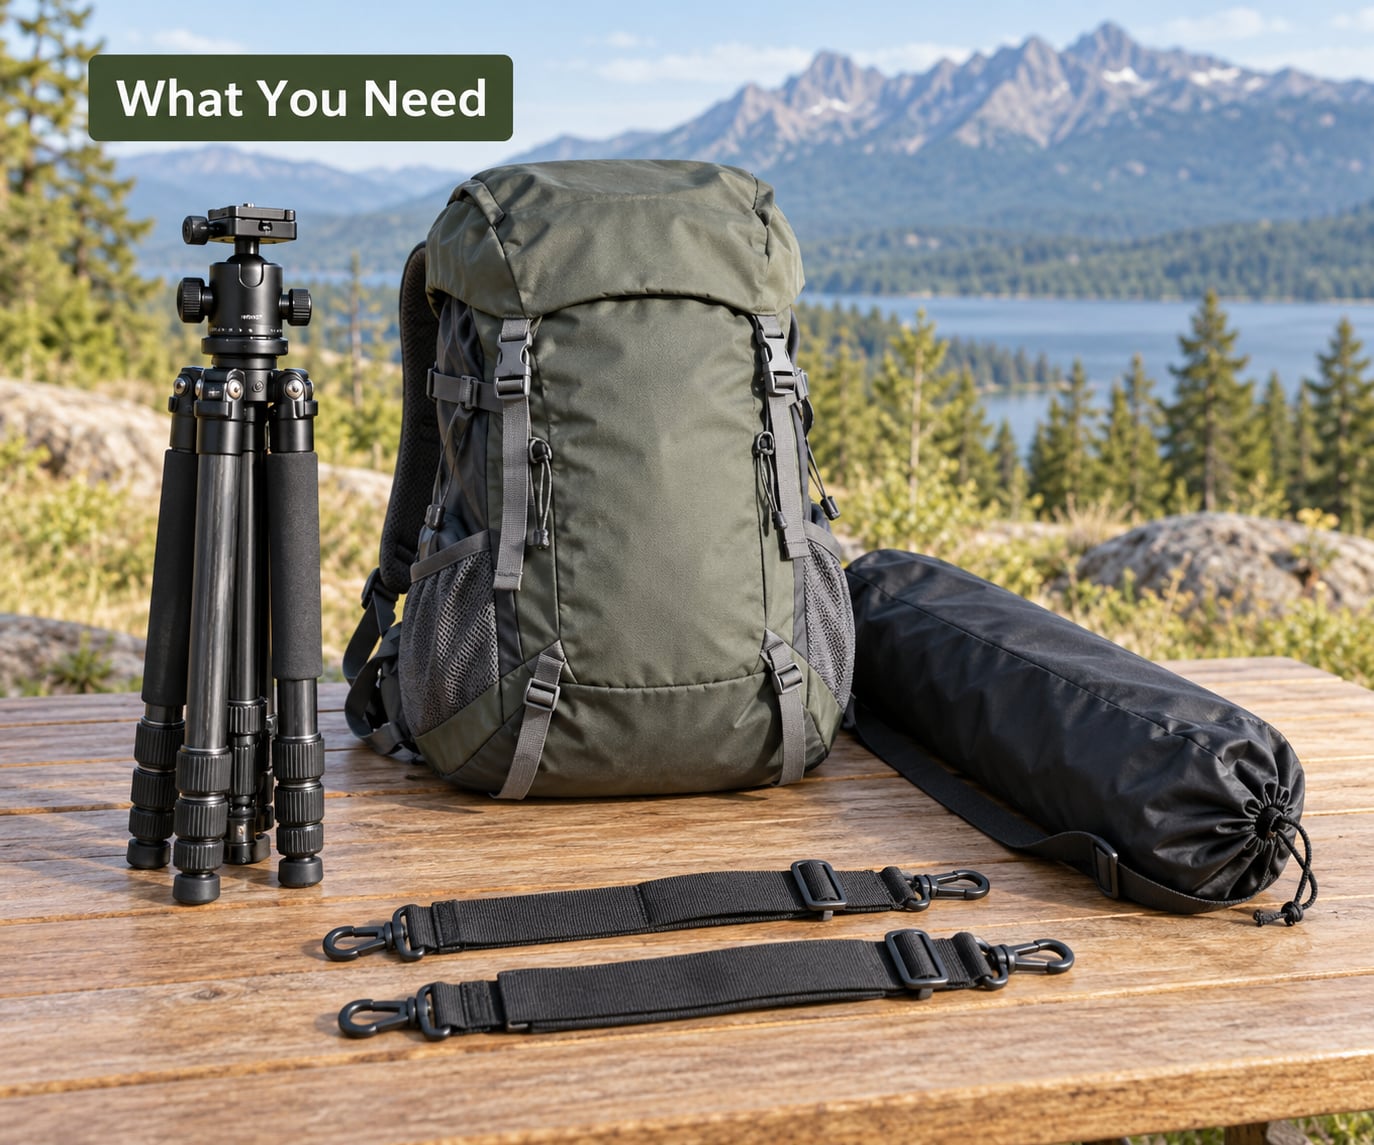
Start with the tripod itself. A travel tripod that folds to roughly 40 cm or shorter is the easiest to carry on any method, because it fits against a pack instead of sticking out past it. A full-size studio tripod is not a hiking tripod no matter how you rig it.
Then a sleeve or bag. This is the piece people skip and then regret in wet grass. A padded sleeve protects the ball head and leg locks from rock, mud and the edge of a pack lid, and it gives you something to grip when you strap it down.
Two more items do most of the work:
- Two adjustable straps or a hook-and-loop strap pair. Wide straps spread the load and stop the legs from cutting into you. Rigging a tripod with hook-and-loop straps by sliding the loose end under a side compression strap or a pack loop is the standard field fix.
- Two side compression straps on your pack. If your pack has no external attachment points, the compression straps are the anchor. Most packs do; a few ultralight ones do not.
Optional extras: a small camera harness for the body itself, a dry bag or pack rain cover for fog and drizzle, and a short loop of webbing if you want to lash the tripod diagonally across the lid.
Match the setup to the hike. A short loop trail and a light tripod need nothing more than a padded strap. A multi-day load with a heavy body and a long lens wants a harness and a vertical pack attachment, because the camera comes off your neck and onto your chest where the weight is shared.
Step-by-Step: How to Carry a Tripod on a Hike
Step 1: Use a Padded Shoulder Strap for Short Hikes
This is the method to learn first because it takes about a minute. Loop a wide padded strap or the tripod’s own carry handle over one shoulder strap of your pack, low on the padding where it sits over your shoulder blade, not up near your collarbone.
Pull the legs closed so the three sections nest together, then tighten until the tripod sits still. You should be able to swing your arm fully without the legs catching your forearm.
How to tell it worked: shake the pack hard. If nothing moves more than a centimetre and the legs stay behind your shoulder, the length is right. If it swings like a pendulum, tighten and shorten the drop.
This is a good fit for a one to three hour hike where you might stop a few times. It is not a good fit for a long day: one side of your body takes the whole load, which is exactly the pain hikers describe when a tripod rides on one shoulder strap.
Step 2: Secure It Vertically to the Backpack
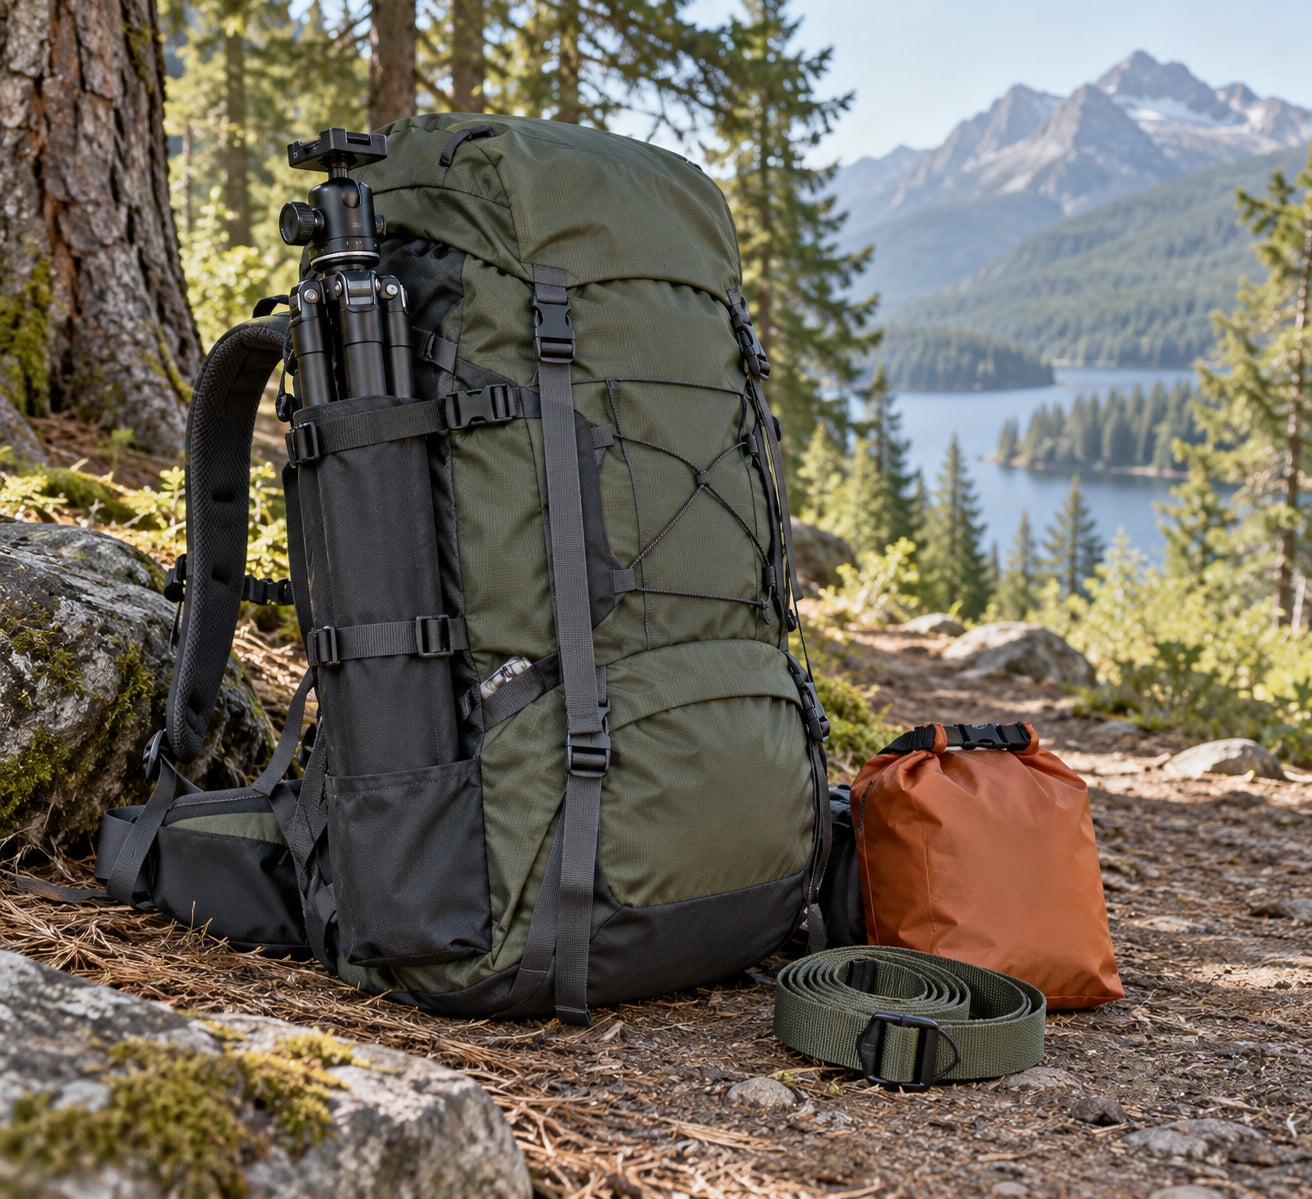
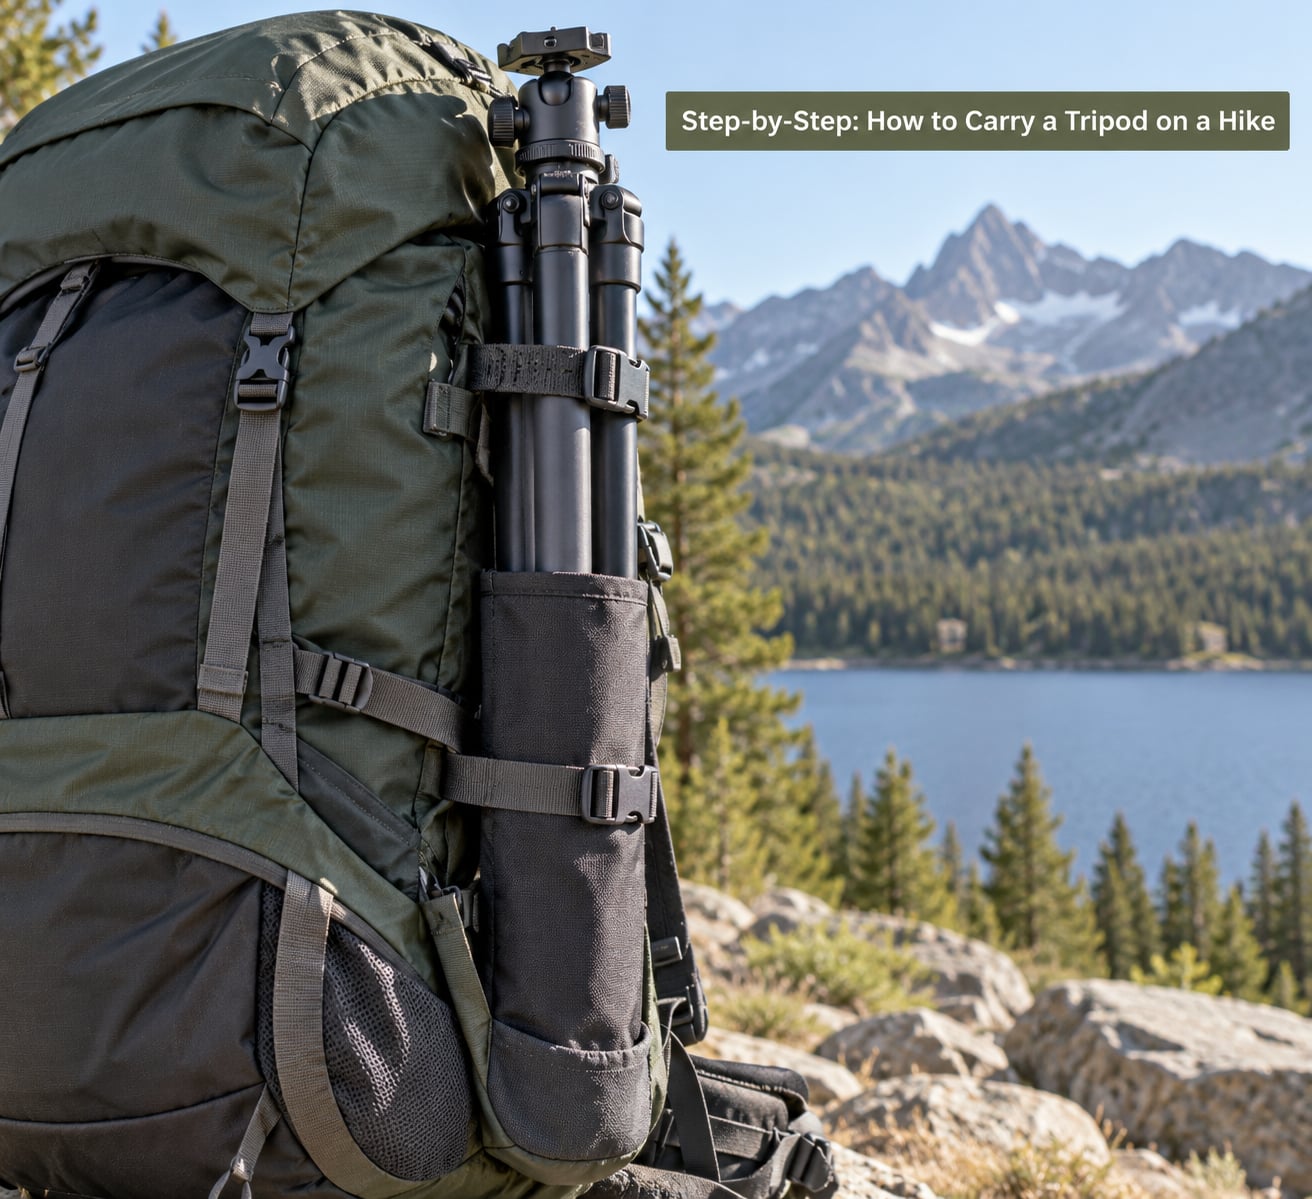
Put the tripod in its sleeve, legs closed, head at the top, and lay it flat against the side of your pack. Strap it at two points: one near the top by the lid or the upper compression strap, one near the bottom by the hip belt or the lower compression strap.
For a hook-and-loop strap, slide the loose end under the compression strap and pull it back on itself. If your pack has dedicated daisy-chain loops, thread a short webbing loop through two of them and clip or lash the tripod to that.
Keep the tripod vertical rather than diagonal when the trail is narrow. Vertical takes less width; diagonal distributes the weight across the whole pack face and stays stable on a wide forest trail. Angle it slightly nose-down if wind or footfall makes the top bounce.
Check three things before you walk: the pack still closes over it, the tripod does not stick out more than a few centimetres past the pack’s side, and a hard shake produces no more than a small wobble. That last test catches most swing problems before the trail does.
Step 3: Carry It Across the Body with a Shoulder Sling
A wide padded sling or a long strap works well if the tripod is light enough to sit against your torso without pulling you sideways. Run the strap from the bottom of the backpack on one side, up across your chest, and over the opposite shoulder so the tripod hangs at hip height on your dominant side.
Cross the strap behind your back rather than over your neck, and keep the tripod below shoulder level. If it rides up near your face or your collarbone, you have the loop too short.
This keeps the tripod clear of the backpack, which matters when you want to reach it without taking the pack off, and it spreads the weight across your chest instead of one shoulder point. The catch is bulk: a full-size tripod across the body is wide, and on a narrow trail it is the first thing to catch a branch or brush past.
Rest a folded jacket or your base layer between the leg sections and your body on a cold day. Bare aluminum against a sweatshirt is uncomfortable after an hour.
Step 4: Collapse It and Keep It in the Pack
Inside the pack is the right answer for short travel tripods, flexible or wrapped tripods, and any trail where the profile matters more than access speed. Collapse the legs fully, reverse or shorten the center column if the model allows it, then slide the tripod into its sleeve.
Place it along the back panel, flat and vertical, rather than diagonally across the middle where it can press into your stomach. Then put your softest and least crushable items around it. Food, a dry bag and a jacket absorb a knee drop far better than a lens or a hard battery case.
The tradeoff is access. If it is in the pack, you are taking the pack off to get it, and on a narrow ledge that is a real cost. One photographer in a hiking forum thread put it plainly: being able to reach the tripod without removing the pack is what decides the carry system for them.
Check that it worked by confirming the tripod does not move when you shake the pack and that nothing fragile sits directly against the leg locks.
Common Mistakes
Loose straps. The fix is a hard shake test every time you set the tripod down. A rig that passes on flat ground can fail on the first footfall that lands on a rock.
Unbalanced loads. A tripod on one side pulls the pack off your spine and twists your hips over a long day. Put it on the side of the less-loaded hip, or switch to the two-point vertical rig so the load is spread up and down rather than side to side.
Exposed metal. Bare leg sections get scraped by rock and jam when grit gets into the locks. A sleeve is the cheapest fix there is.
Swinging legs. Trip legs nest with the widest section closest to the body and the narrowest at the outside. Loose or angled legs swing into brush and into the person behind you on switchbacks.
Blocked access. If the tripod is strapped over the pack lid, you cannot reach anything else on the top. Strap it to the side panel, not the lid, or the two minutes of unpacking become ten.
Pressure points. A hard knob or leg lock pressed into the hip for hours is worse than the tripod’s weight. Angle the rig so hardware faces outward, not inward.
Tripod packed where it damages gear. Never put a tripod beside a lens or above a camera body in the main compartment. Side pockets and the back panel, with soft gear around it, are the safe places.
Tips for Different Trails
On a wide forest trail or fire road, almost any method works, and the vertical pack rig is the most stable. There is room for the tripod to hang off the side without snagging, and the swing is absorbed by the pack.
On narrow single-track, low profile wins. Collapse the tripod and put it inside the pack, or strap it flat and close to the body. Closed legs that stick out sideways are what catch branches and swing into brush, and they also hit the person following you when the trail switches back.
On steep climbs, keep it close to your center of mass. A tripod hanging low on the side makes you lean into the hill, and on a loose slope that is how people lose their footing. Rigs that ride high on the pack or inside it work better than anything slung at hip height.
At stream crossings, hand carry wins. Water, wet rock and a loaded pack are a bad combination, and a free hand is worth more than a fast tripod deployment. The tripod doubles as a walking aid over uneven ground, and several photographers have said it has saved them a fall.
In rain and fog, put the tripod in a dry bag or wrap it in a pack liner for the length of the hike. Cold morning condensation gets into leg locks and ball heads, and grit plus moisture is the combination that causes a jam later. Unpack it at home, dry it fully, then wipe the locks with a cloth.
For crowded trails and multi-day hikes, weigh whether the tripod earns its place at all. Someone on r/Ultralight described bringing one on every trip and using it only for long exposures or when waiting for the right light, roughly once every two or three days. If your shoot is not long exposures, sunrise panoramas or blur-water shots, a monopod or a self-timer may be the smarter carry.
Test the whole rig before you leave. Walk ten minutes around the block with a loaded pack, then again in the dark with a headlamp so you can see your anchor points. Fix problems in the driveway rather than halfway up a ridge with fading light.
Frequently Asked Questions
What is the easiest way to carry a tripod on a hike?
Strap it vertically to the side of your pack with two compression straps, legs closed and head up. It takes a minute to rig, keeps both hands free, and holds the tripod clear of brush on a wide trail. On narrow single-track, collapse it into its sleeve and carry it inside the pack instead.
Can I attach a tripod to the outside of my hiking backpack?
Yes, on any pack with side compression straps, daisy-chain loops or external webbing. Use two attachment points, one high and one low, and slide the loose end of a hook-and-loop strap under a compression strap. Leave the tripod in a sleeve so the leg locks are not scraping against the pack, and re-test the sway after you adjust the hip belt.
Should I carry a tripod or bring a monopod instead?
Bring the tripod if you plan long exposures, sunrises, panoramas or smooth water. Bring a monopod if you are shooting handheld-style and want the camera accessible without setting anything down. A monopod weighs a fraction of a tripod and fits inside a small pack, so for a day hike with no exposure plan it is usually the better carry.
How do I keep a tripod from getting wet in rain?
Put it in a dry bag or wrap the folded tripod in a pack liner for the whole hike, and keep it in a sleeve so water does not sit against the leg locks. Fog and condensation on cold mornings matter more than rain, so dry the tripod fully at home and wipe the locks with a cloth before the next outing. Grit plus moisture is what causes a jam.
Is it safe to carry a tripod across my body while hiking?
It is fine on a wide trail, and it is one of the better options for getting the tripod out without removing your pack. Keep the strap below shoulder level and cross it behind your back rather than over your neck. On narrow trails a full-size tripod carried across the body is wide, so it can catch branches and brush as you pass.
How do I stop the tripod from swinging while walking?
Tighten every attachment point until the tripod moves no more than about a centimetre when you shake the pack firmly. Strap at two points rather than one, keep the legs fully closed and nested, and angle the rig slightly nose-down so footfall damps the top instead of bouncing it. Re-check the rig after the hip belt is adjusted to your waist.
Conclusion
Pick one method and test it before the trip. A padded shoulder strap suits a light tripod on a short hike, the vertical two-point pack attachment is the most stable option for a full load on a wide trail, and a collapsed travel tripod inside the pack is the right call whenever the trail is narrow or the low profile matters more than fast access.
Then weigh the tripod honestly against your shoot. If there is no long exposure or sunrise in the plan, a monopod earns its place in the pack and your shoulders will thank you for the swap.