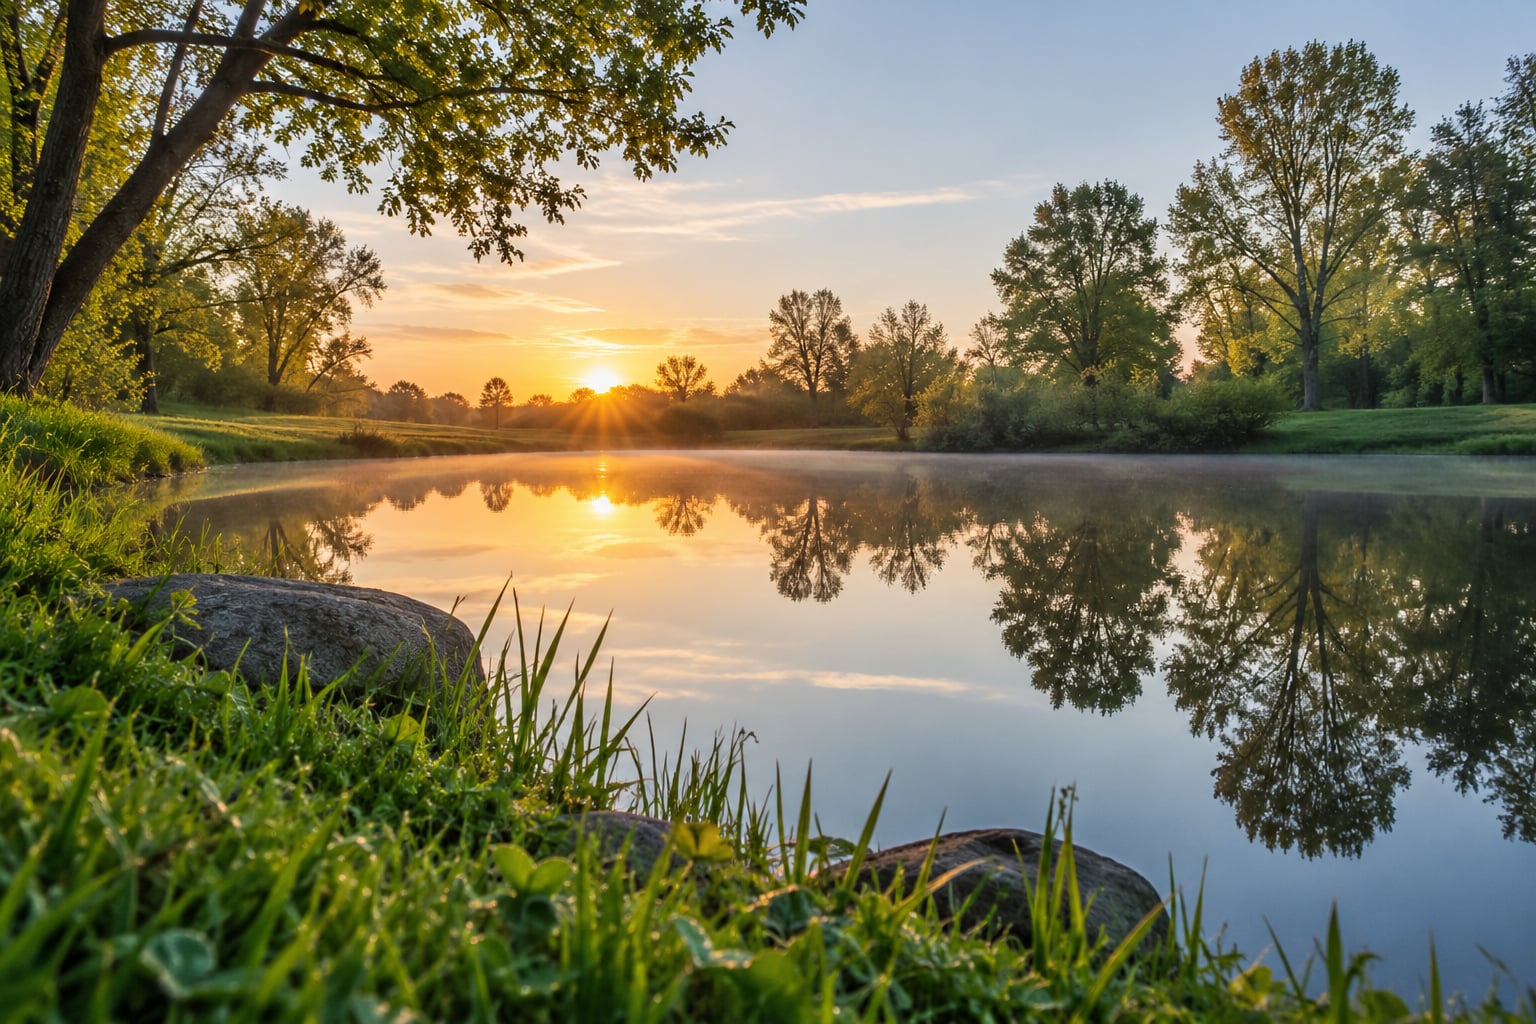
To photograph reflections in still water, get low and shoot across the surface rather than down into it. A camera near the water at a shallow angle, on a tripod, at f/8 to f/11 and base ISO, gives you a sharp mirror image of your subject instead of the murky bottom. Most of the work sits in scouting and camera position, not in gear.
There are two possible outcomes when you point a camera at water. You either get a clean mirror and a symmetrical frame, or you get ripples, glare and a dark half-finished image where the reflection should be. Which one you get depends mostly on where you stand and how still the surface is.
The whole process takes about twenty minutes once you know it. The waiting is the hard part, and it happens before you unpack anything.
Table of Contents
- What You Need
- Step-by-Step
- 1. Scout the Water Before You Set Up
- 2. Use Light That Creates a Strong Reflection
- 3. Set the Camera for Maximum Detail
- 4. Compose the Subject and Its Mirror Image
- 5. Control Waves, Glare, and Polarization
- 6. Use a Filter and Lens Cleaning Technique
- 7. Review the Image at Full Size
- Common Mistakes
- Tips for Stronger Reflections
- Frequently Asked Questions
- What time of day is best for photographing reflections in still water?
- Do I need a polarizing filter for reflections in still water?
- What aperture should I use for water reflection photography?
- Is a tripod necessary to photograph reflections in still water?
- How do I deal with wind and ripples on the water?
- Can you take good reflection photos on a phone?
- Conclusion
What You Need
You need two things to start: a camera and water that is not moving. Everything below that list is optional, and several photographers who shoot reflections weekly carry almost nothing at all.
- A camera with manual mode. Any interchangeable lens camera or bridge camera works. A phone does too, with a few adjustments covered in step 7.
- A tripod. Essential once your shutter drops below about 1/125 second. It also lets you get the lens close to the surface without bracing it on a rock.
- A lens cloth and a hood. Spray off a lake and the front element fogs or spots immediately, and spots on a mirror surface are impossible to retouch convincingly.
- A circular polarizer, optional. Useful against glare, harmful to the mirror effect at full strength. Step 5 explains when to mount one.
- A graduated neutral density filter, optional. Balances a bright sky against darker water in a single exposure instead of a bracketed merge.
- A longer focal length, optional. A 70mm to 200mm isolates one reflection from a busy shoreline. Wide lenses need a subject that fills the frame, because any turbulence at the edges shows.
Step-by-Step
This is the seven-part workflow I use for water reflection photography, in the order that saves the most wasted frames. Scout first, light second, settings third, and composition last, because the picture changes completely when the tripod moves.
1. Scout the Water Before You Set Up
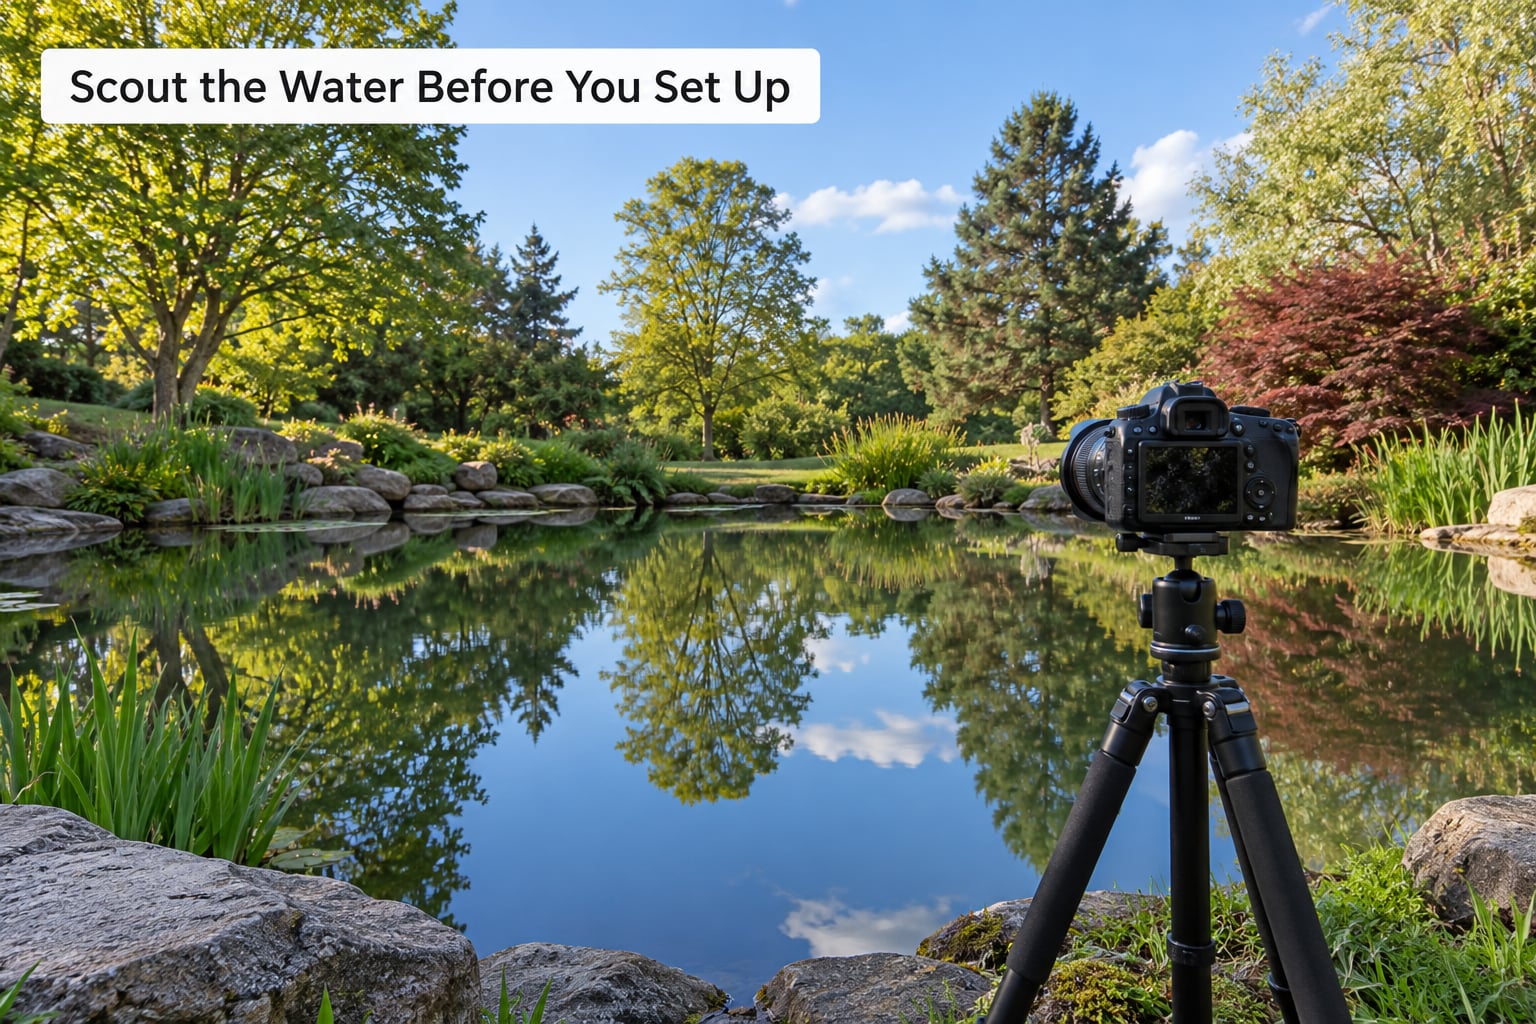
Still water is easiest to find in the hour before sunrise, when the air has cooled overnight and the wind has not started. Small and shallow water beats a big lake almost every time, because a large lake has a long wind fetch, meaning wind travels across it uninterrupted and roughens the whole surface.
Stand at the edge for two minutes and watch the water, not the view. If you can see any travelling texture on the surface, there is a breeze and the mirror is gone. Look for the edges too: algae, floating litter, a bright footpath or a fence post will all pull the eye away from the symmetry you came for.
Tidal rivers are underrated here. Slack tide arrives several times a day and flattens the current into something glassy, which gives you a local option without driving to a mountain lake. Puddles, flooded ditches and swimming pools on a still morning all work the same way.
2. Use Light That Creates a Strong Reflection
Keep the sun behind you or well off to one side. With the sun at your back, the subject is lit and the sky above it stays blue, which is the combination that produces saturated colour in the reflection. Shooting straight into low sun washes the sky out and leaves you with a flat grey band on the water.
Side light gives you texture on the subject and a longer tonal range in the mirror. The blue hour works too, when the sky is brighter than everything else and the water becomes the brightest part of the frame, which is the one situation where the reflection is not the darker element.
Contrast is what makes a reflection read as a reflection. A pale building against a dark treeline looks doubled and slightly strange. A dark building against a bright sky reads immediately as a mirror, and that is worth more than any filter.
3. Set the Camera for Maximum Detail
Start at base ISO, manual mode, f/8 to f/11, and a shutter speed fast enough to freeze any movement: 1/125 second or faster handheld, or anything at all on a locked tripod. Shoot RAW so you can recover the shadows in the reflection later.
Focus manually on the reflection rather than trusting autofocus, which will hunt for contrast in a scene split down the middle by the horizon. Focus roughly a third of the way into the frame if the subject is distant, or on the waterline itself if it is close.
Meter with a spot meter aimed at the brightest part of the subject, then adjust the shutter speed until it reads about half a stop below full. Expect the reflection to sit close to one stop darker than the subject. If the top half of your frame is correctly exposed and the bottom half is black, this offset is why.
Check the histogram rather than the screen, and pull exposure back if the brightest sky pixels are clipping. When the sky and the dark water exceed what your camera can hold in one frame, bracket three exposures at two stops each and merge them in post.
4. Compose the Subject and Its Mirror Image
Put the horizon on a third rather than in the middle, then give the water half the frame anyway. A middle horizon splits the image into two equal halves that rarely sit together, while an off-centre horizon makes the water the largest shape in the picture.
Get the camera level. A tilt of a few degrees is invisible on an ordinary horizon and glaring when the frame is meant to be symmetrical, so switch on the electronic level or the viewfinder grid before you compose.
Keep the ratio of subject to reflection close to one and one. Too much sky and the reflection shrinks into a detail. Too much water and you have a nice reflection of something too far away to read.
Simplify the edges. A single tree, a single building, or one strong vertical shape reflects cleanly; a whole cluttered shoreline reflects as noise. Use the bank or a jetty as a leading line into the frame when the surroundings will not simplify.
5. Control Waves, Glare, and Polarization
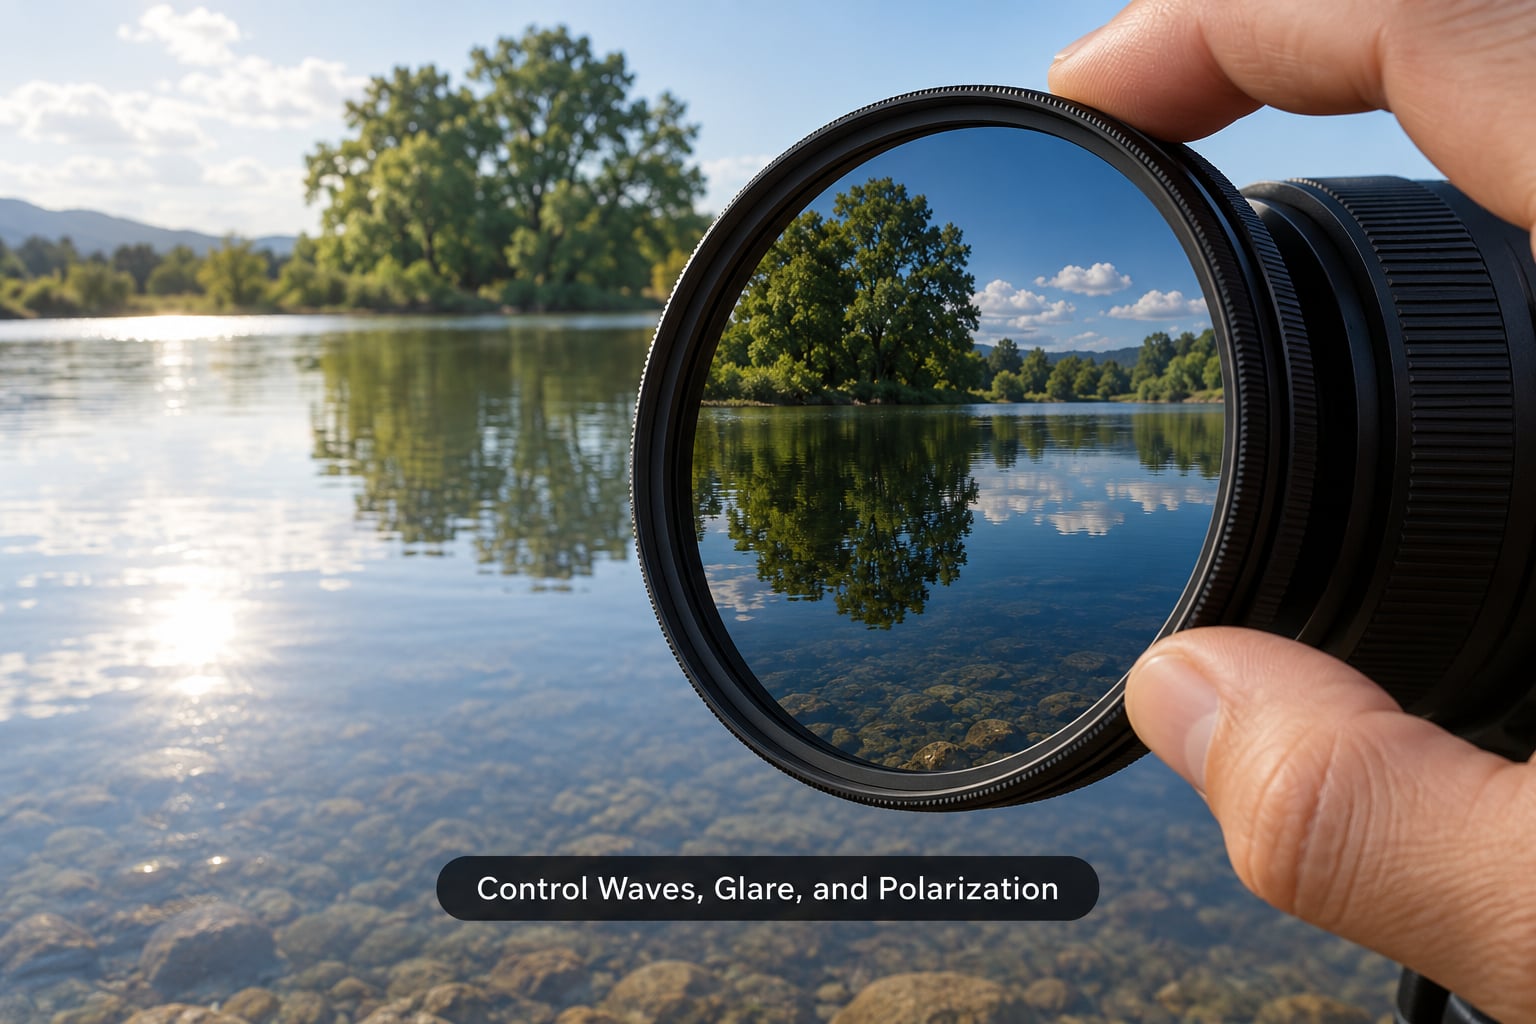
Here is the contradiction most tutorials never resolve. A circular polarizer at full strength removes reflections almost completely, because the reflected light from the water surface is partly polarised and the filter cuts it. At a partial rotation, roughly halfway to three-quarters of a turn back from maximum effect, it suppresses surface glare while leaving most of the mirror intact.
So mount the polarizer when glare is your problem, rotate it slowly, and watch the darkest point of the frame. Stop just short of that point. Skip the filter entirely when colour and a full-strength reflection matter more than glare control.
Long exposures deserve a warning rather than a recommendation. They smooth ripples beautifully, but the movement of the surface is what makes the mirror. Two or three seconds of exposure on wind-blown water gives you a milky band instead of a reflection.
Wind is the one thing you cannot fix. If the surface breaks up, the answer is to wait, come back at a different hour, or change what you are shooting rather than add exposure time.
6. Use a Filter and Lens Cleaning Technique
A graduated neutral density filter solves one specific problem: the sky is two or three stops brighter than the water, and a single exposure cannot hold both. Slide the filter until the dark band meets the horizon line, and the filter takes an average reading from the sky while leaving the water untouched.
Do not stack filters by habit. A polarizer plus a graduated filter costs light, softens the corners on wide lenses and adds flare near the frame edge. Use one filter for one job, and remove it before you change position.
Clean the front element before every setup and again after the first shot near water. Wipe with a dry section of the cloth and breathe on the glass only when nothing else will shift the smear. A rubber lens hood blocks spray and off-axis flare, both of which land right across the reflection.
When the tripod goes low, keep the legs out of the water. A muddy bank or a slippery slab will take the camera down with it, and a nylon stocking bag or a cheap rain cover over the body costs nothing next to a drowned sensor.
7. Review the Image at Full Size
Zoom to 100 percent on the reflection, not on the subject. Sharpness in the double is the whole point, and cameras often focus correctly on the top half while the water stays soft from motion or condensation.
Check four things in order: the horizon is level, the brightest sky pixels are not clipped, the reflection carries detail rather than a black block, and any ripples run in a direction that supports the composition instead of fighting it.
Small mistakes are fixable in the frame. Correcting tilt is a keystroke, and a slight highlight recovery in RAW is invisible at normal sizes. Changes of position are not fixable, so decide in the field whether to move the tripod, change the angle, or wait for the surface to settle.
On a phone, tap the brightest part of the subject to set exposure, switch to the default camera app rather than a portrait mode that fakes a blur, and hold the phone as low as your elbows allow. The 2x lens gives a cleaner reflection from further back; the 0.5x lens exaggerates the surface and works only on genuinely flat water.
Common Mistakes
- Shooting down into the water. A steep angle shows you the muddy or weedy bottom. Drop to within about a foot of the surface and shoot across it, and the water turns reflective again.
- Long exposures on rippled water. The exposure that makes silky water kills the mirror. Stay fast on moving surfaces.
- A polarizer turned to maximum. Full strength removes the reflection you came for. Rotate back until the mirror returns.
- A tilted horizon. Check the level before the first frame, not in editing.
- Blown highlights in the sky. Spot meter the brightest part of the subject and pull back half a stop.
- A dirty front element. Water spray spots read as permanent defects. Clean first, hood second.
- A cluttered frame edge. Move a metre sideways rather than cropping later, and the reflection has room to breathe.
- Focusing on the subject instead of the double. Focus on the reflection, or a third of the way into the frame.
Tips for Stronger Reflections
- Check a wind forecast and pick the calmest morning of the week rather than the nearest one. On a big water body, expect to spend two or three outings before the surface cooperates.
- Shoot a short series from one position: one exposure, then the same frame at a slightly different height. Choosing later from a set is far better than packing up too early.
- Try a longer focal length to lift one reflection out of a busy shoreline. Wide lenses show every ripple, so give them a subject that fills the frame.
- Once you have a clean frame, try breaking it. A thrown rock or a single drip turns the mirror into an abstract ripple pattern, and the contrast between the two frames is often the best of the session.
- Watch the colour. A teal or green pond reflecting orange sunset light produces a cast that no slider fixes cleanly, so adjust white balance on the frame rather than correcting one half later.
- Protect the camera, not just the image. A wipe-down, a dry bag and a spare battery mean you can wait an hour for the wind to drop without regretting it.
Frequently Asked Questions
What time of day is best for photographing reflections in still water?
The hour before sunrise is the most reliable window. Overnight cooling stops convection on the surface and the wind has not started, so the water stays flat. Late evening works too if the wind drops first. Midday is usually the worst: rising thermals roughen even sheltered ponds.
Do I need a polarizing filter for reflections in still water?
Only for glare. At full strength a circular polarizer removes most of the reflected light and the mirror disappears, which is why some guides say never use one. Rotate it back from the maximum setting and it cuts surface glare while leaving the reflection largely intact. Skip it when colour matters more than haze.
What aperture should I use for water reflection photography?
Start at f/8 and move toward f/11. That keeps the near edge of the water and a distant subject acceptably sharp together. Small scenes like a puddle with a single tree can stay wide open for a soft, dreamy double. Very small openings soften everything, so stop where focus starts to suffer.
Is a tripod necessary to photograph reflections in still water?
It is once your shutter drops below about 1/125 second, and it is the only way to get the lens close to the surface without shaking. On a tripod you can use any shutter speed, focus manually and stop down freely. Handheld shots are fine at dawn in bright light, but the light fades fast.
How do I deal with wind and ripples on the water?
You cannot remove them, so work around them. If you can see travelling texture on the surface, wait, move to a sheltered corner, or switch to a longer lens framing a tighter patch of water. Adding exposure time is the one option that never works, because the movement of the surface is what creates the mirror.
Can you take good reflection photos on a phone?
Yes. Tap the brightest part of the subject to meter, use the default camera app instead of a portrait mode that fakes blur, and hold the phone as low as you can while keeping your elbows braced. The 2x lens gives a cleaner double from further away. Shoot RAW or the highest resolution and convert later.
Conclusion
Start with one action: arrive at first light, find water with no visible texture moving across it, set the tripod low with the lens almost touching the surface, and take one manual exposure at f/8 and base ISO before you try anything clever. Everything after that is variation.
Once that first frame works, change one thing at a time: move the tripod, rotate the polarizer, change the focal length. Learning how to photograph reflections in still water is mostly learning which single change the conditions are asking for.