To photograph frost patterns on windows, light the ice from the side or from behind so it refracts, focus manually at close range with a tripod, and meter for the bright background instead of the frost itself. Start around f/8, ISO 100 to 400, and 1/125s, then stop down to f/11 when the depth of field feels too thin to hold a whole crystal cluster.
That is the short version. The part nobody warns you about is timing. A good pane can form in one cold, humid night and be gone within a few hours of morning sun, so most of the skill sits in showing up prepared rather than in the gear bag.
Budget roughly 30 to 45 minutes for your first attempt, and expect the fiddly part to be reflections rather than focus. It takes about ten minutes to learn the workflow below and a few sessions before you stop shooting flat, grey ice.
Table of Contents
- What You Need
- How to Photograph Frost Patterns on Windows: Step-by-Step
- Find or Create Suitable Frost Patterns
- Set Up the Camera and Lighting
- Choose Settings for Fine Frost Detail
- Focus, Compose, and Capture the Pattern
- Review the Results and Make Adjustments
- Common Mistakes
- Quick Tips for More Dramatic Frost Photos
- Frequently Asked Questions
- Can I photograph frost patterns without a macro lens?
- What is the best camera setting for photographing frost on glass?
- How do I prevent reflections when shooting frost patterns?
- What light works best for showing frost texture?
- Should I photograph frost from inside or outside the window?
- Can I create frost patterns for a practice photo session?
- Conclusion
What You Need
Four things matter: a camera, something that focuses close, something steady to hold it, and a light you can move. Everything else on this list is a comfort, not a requirement.
A camera with a manual mode. Any camera that exposes in full manual, including a phone with a pro or night mode, will do. Automatic modes will chase the bright outdoor scene and render the frost as a white smear.
Close-focusing capability. A true macro lens is the easiest option. It is not the only one. Many kit zooms focus close enough for a patch of frost about the size of a coin, and any lens will do if you crop tighter. The practical difference is working distance. Dale Matthies shoots with a 40mm macro and has to work about 2.5 to 3 cm from the subject, which leaves a depth of field of roughly 1 mm. Anything closer than that and he is right up against the glass.
Something stable. A tripod is the obvious answer and the one thing I would not shoot without at these distances. Without one, a stack of books on the windowsill, a firm hand braced against the wall, or a flexible wrapped-around leg tripod will carry you. Add the two-second timer or a remote release so the shutter does not shake the frame.
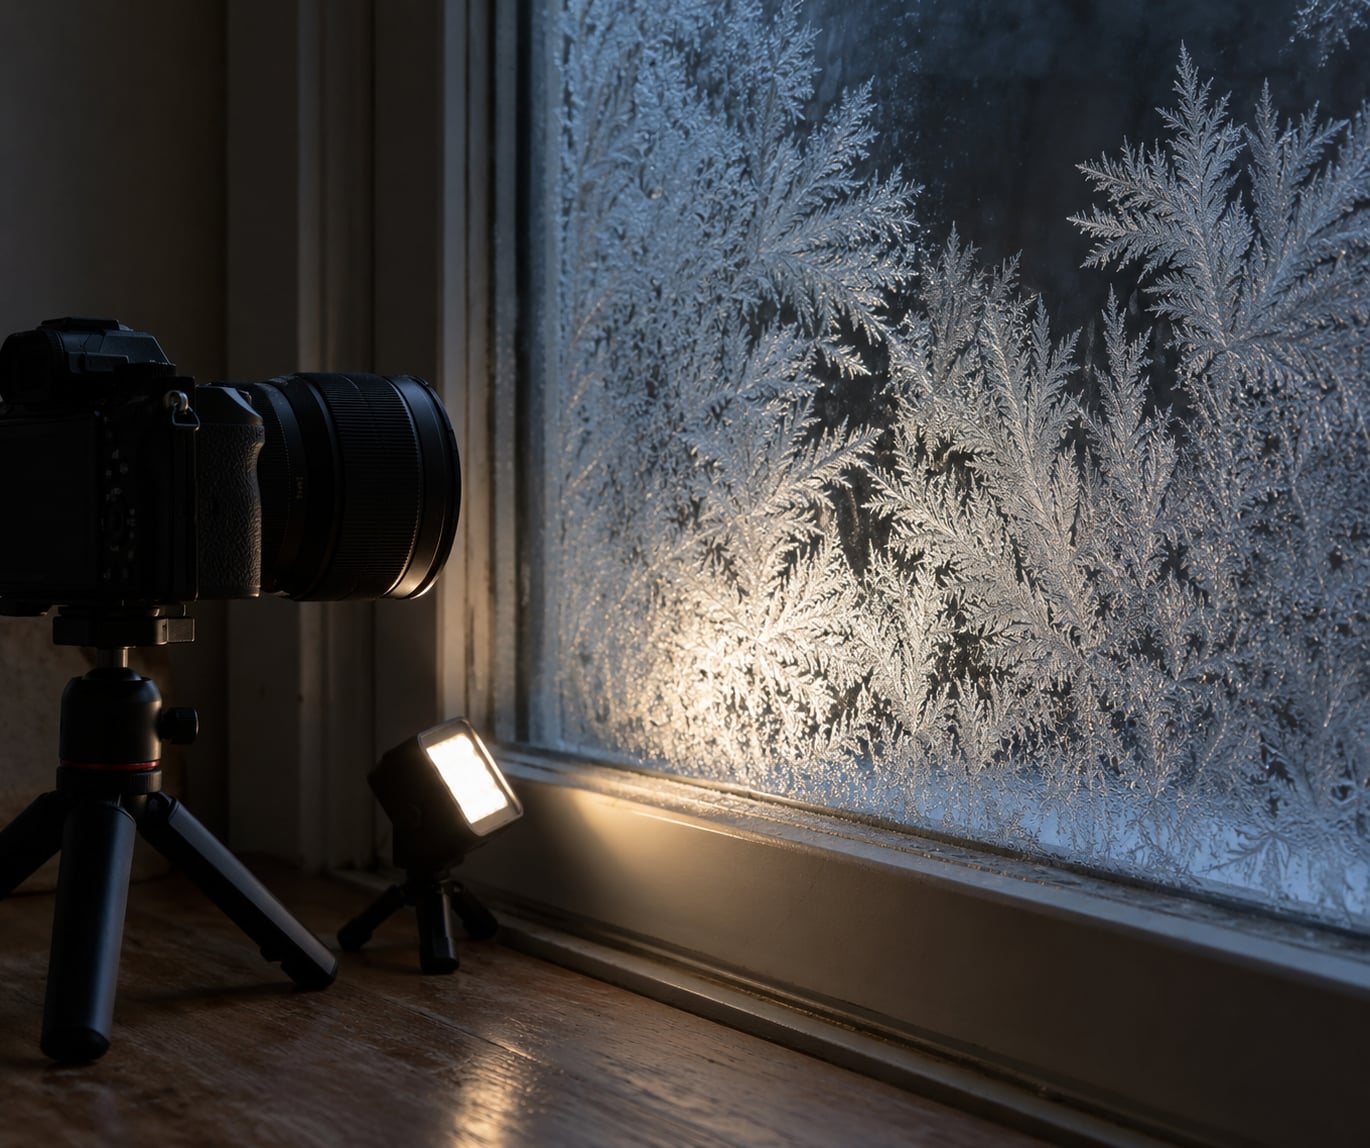
A movable light. A flashlight, a small LED panel, or even a desk lamp clamped to a stand. Frost is a texture, and texture only shows when the light rakes across it. One LED on an adjustable stand is what the Corel India write-up used to get dramatic contrast, and it remains the cheapest big improvement available.
A cloth. One for wiping the glass, one for the camera body. Warm hands leave fingerprints on cold panes, and fingerprints on frost are permanent until the ice regenerates.
Optional extras. A spray bottle of distilled water and a spare pane of glass you can chill in the freezer, useful when no natural frost forms. Spare batteries, because cold weather drains them faster than you expect. A lens cloth you can reach without taking the camera off the tripod. A polarizing filter, which helps with reflections at wide angles but costs a stop or more of light and has a mild softening effect at macro distances.
Two safety notes. Do not lean your forehead or bare hands on freezing glass, and do not climb on icy steps or rails to reach a pane. Stay on your own property or on public ground, and if a neighbour’s window catches your eye from the street, photograph the pattern rather than whatever is behind it.
How to Photograph Frost Patterns on Windows: Step-by-Step
This is the sequence that works for me, and it is the same whether the frost arrived on its own or you made it. Find the pattern, set up parallel to the glass, light it at an angle, set the exposure for the background, focus manually, then shoot a bracket and come back to edit.
Find or Create Suitable Frost Patterns
The frost on a window is called window frost, a form of hoar frost. Indoor air holds water vapour, and when the pane drops below freezing that vapour changes straight from gas to solid ice on the glass rather than condensing into water first. That direct gas-to-solid step is called deposition, and it is why frost often appears on the inside surface of a cold window while the room air is perfectly dry to you.
Look where conditions are most extreme. A north-facing bedroom or bathroom window in the coldest corner of the house usually carries more ice than a warm living room pane, and single-glazed or older unsealed units outperform new double glazing. Judy Arndt reported dramatic results on unsealed double-pane windows where moisture collects between the panes and the temperature differential reached around 40°C. Check early, before the sun reaches the glass.
The state of the pane changes the pattern. Jacques, a chemical engineer posting on the dpreview forums, notes that detergent residue and micro-scratches create active sites where crystal growth begins, and that faster-growing crystals develop sharp dendrite structures while slower growth produces larger, more regular forms. Practically: a well-scrubbed pane grows slowly and gives you time, while a lightly streaked one grows fast and looks more interesting. The Corel India article makes the same point from the other side, recommending scratched or old glass because the imperfections make for better shots.
When nature is not cooperating, make it. The cheapest method is a spare pane. Chill a sheet of glass in the freezer for about 30 minutes, lay it flat on a towel, and mist it lightly with distilled water. The water film has to be thin; a fat layer just runs and freezes as a flat sheet. The Corel India write-up describes an overnight alternative, leaving hot water under a piece of old glass so the condensation and rapid cooling kick off frosting on its own, but the freezer method is faster and easier to control.
Mist sparingly, and let the pane sit for a minute before you lift the camera. The shape you get depends more on how cold the glass is than on how cold the air is, which is why the freezer beats a cold night for a practice session.
Set Up the Camera and Lighting
Square the camera up to the glass so the lens looks straight through it. Dale Matthies is blunt about why: at a close focusing distance, anything less than perpendicular and parts of the pattern fall out of focus. It also protects you from reflections, because at an angle you are catching the room behind you as easily as the ice.
Kill the reflections before you worry about the light. Turn off every light in the room behind you, including screens. Put something dark over your head, a jacket works, so your own shape does not appear in the glass. Fit a lens hood or tape a piece of black card around the filter ring to block stray light from entering the front element. A polarizing filter rotated by hand while you watch the LCD will find the angle where reflections vanish, at the cost of some light and a little sharpness.
Then place your light at an angle to the glass rather than facing it. A light parallel to the pane, coming from the side or slightly behind, casts tiny shadows from every crystal branch, and shadows are what make texture readable. Straight-on frontal light gives you a flat, evenly lit pattern that looks like a texture swatch. The Corel India write-up mounted a single LED on an adjustable stand behind the frost and the contrast jumped immediately.
What sits behind the pane matters as much as the light. The same LED against a white wall, a brick wall, and a dark background produces three completely different moods, and coloured gels shift the ice noticeably. Backlighting has a second benefit: light passing through the crystals picks up the colour of whatever is outside. Judy Arndt credits that refracted outdoor scene for the colour in her shots and points out that overcast days do not work, because there is nothing out there with colour or contrast to bend. Flat grey sky makes a flat grey photograph.
Choose Settings for Fine Frost Detail
Frost does not move, so freeze-motion shutter speeds are wasted on it. 1/125s is comfortably fast for a subject standing still, and anything slower only risks camera shake. This is where a lot of people overshoot their ISO and then wonder why the ice looks gritty.
Work in manual or aperture priority, keep ISO low, and meter for the background. Starting points, all with the camera on a tripod:
- Backlit window, bright outside: ISO 100, f/8, 1/250s. Watch the histogram and speed the shutter up until the outdoor view sits just under clipping. The frost will darken slightly and that is the correct trade.
- Overcast, shooting outdoors: ISO 200 to 400, f/8, 1/125s. Expect a dull result, and add a small light to put some direction back into the texture.
- Night with a single LED: f/5.6, 1/60s, ISO 1600 to 3200. The Corel India settings reference sits in this range, and noise is the trade you accept for the light you gain.
- Zoomed-in crystal detail: f/11 to f/16. You need the extra depth of field to hold the foreground and background of a cluster sharp, and that means the tripod is no longer optional.
Set white balance manually to your light source rather than leaving it automatic. A tungsten LED on blue daylight ice produces a green cast that no amount of contrast will rescue.
Focus, Compose, and Capture the Pattern
Switch to manual focus and single-point AF. Turn on live view, magnify to 5x or 10x, and set focus on a single crystal branch rather than on the pane as a whole. Take a test frame, zoom it back up on the camera screen, and check that the branches are crisp and not glowing with focus fringing. Repeat until the test frame is sharp, then leave focus alone.
Deal with the shallow depth of field honestly. At about 1 mm of usable depth, you can only hold a slice of the pattern sharp, and no amount of careful dialling fixes that. Narrow the aperture to f/11 or f/16, or stack. To stack, lock the camera on the tripod, set manual focus and low ISO, start an interval timer or use the two-second timer, and take four to eight frames while nudging focus from the front of the cluster to the back. Move in very small steps; overlapping frames are what make the stack work. Combine them in Helicon Focus or in Photoshop, which handles frost stacking well because the subject does not move.
Compose before you shoot a lot. A frame filled edge to edge with pattern usually reads as an abstract texture and nothing more. Include the window frame, a bit of sill, a curtain, or a dark strip of room for scale, then crop tighter in the edit. Put the most interesting crystal cluster slightly off centre, and shoot both a wide frame that shows where the pattern lives and a tight crop of the best shape.
Shoot RAW if your camera offers it, and bracket a stop either side of your meter reading. Frost is a high-key subject, so the raw file gives you far more room than a JPEG when the highlights need pulling back. While you are there, move the light and shoot the same pattern again, because the same crystals under a different angle can look like two different subjects.
Review the Results and Make Adjustments
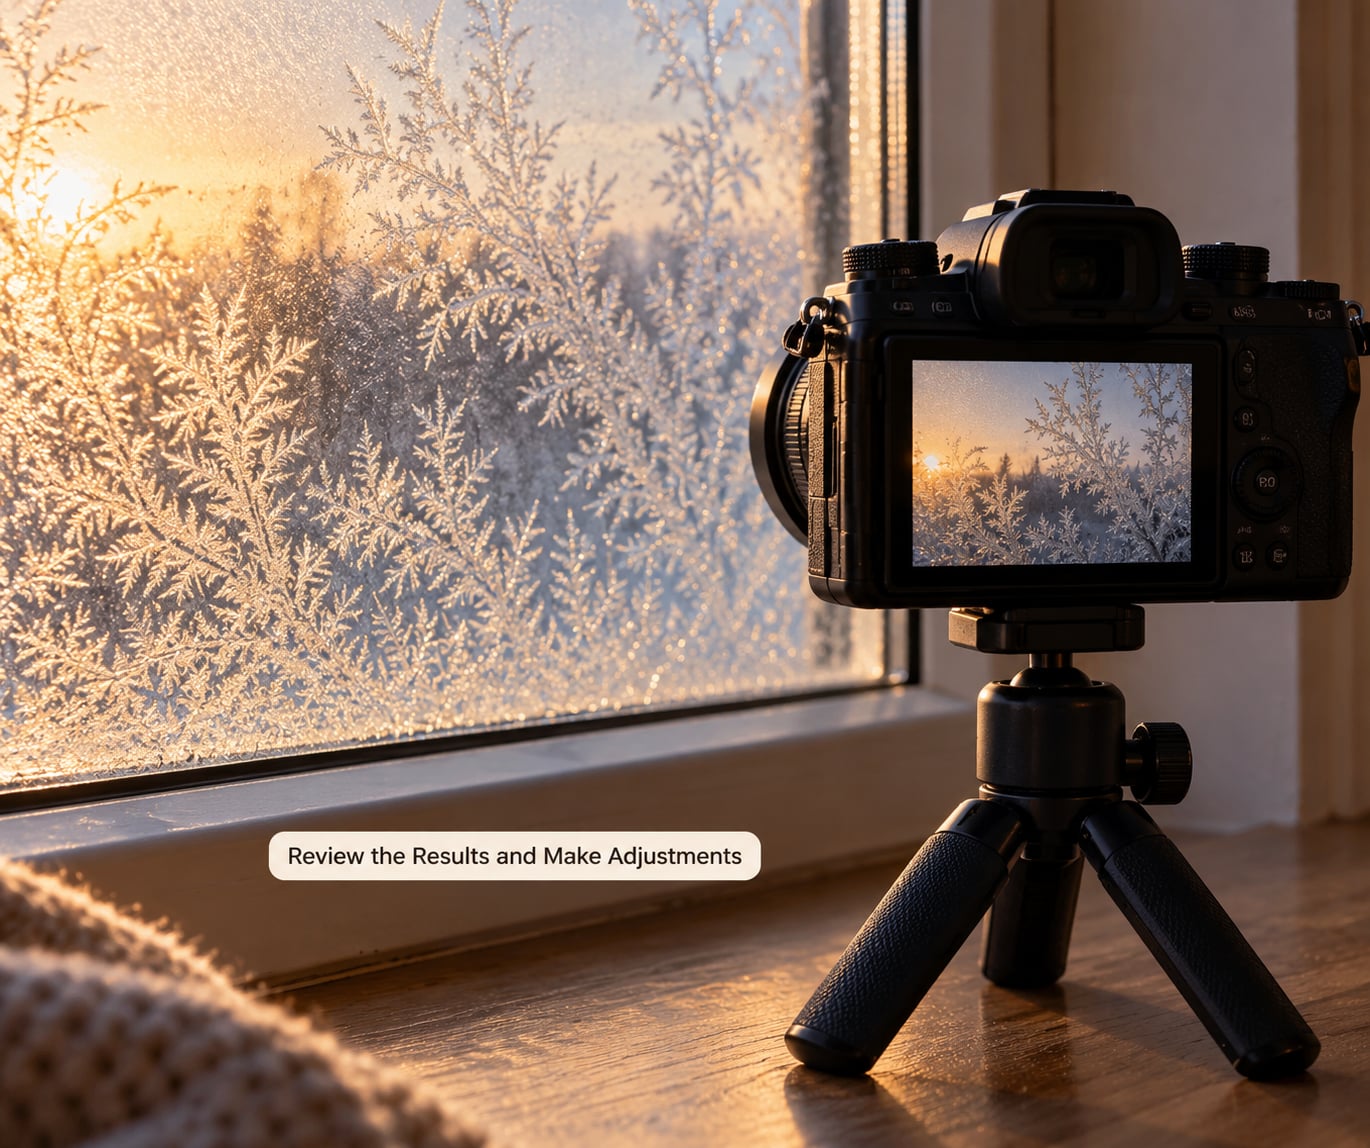
Open the file and look at the histogram first. Frost sits almost entirely in the upper range, so a histogram crushed against the right edge means the crystal detail is gone and unrecoverable. If the pattern is instead sitting in the middle looking grey and lifeless, you underexposed, and lifting it now is easier than reshooting in better light.
Fix the white balance, then add contrast. Dale Matthies found that raising contrast and adding roughly 20 percent fill light gave snowflake and frost shots real depth, while his HDR attempts produced no meaningful improvement on near-monochrome subjects, which is what frost usually is. He also found it pointless to reach for saturation. Judy Arndt got her punch from a curves adjustment instead, which keeps the whites white rather than pushing them pink.
Use clarity and sharpening sparingly. A small increase in texture or clarity followed by a light sharpening pass, with the mask limited to the crystals, is enough. Push either one further and you get the crunchy, over-rendered look that makes an image look processed rather than sharp. High-pass filtering at a low opacity gives a cleaner result than a straight sharpen slider.
Crop out the distracting corner, but leave a sliver of window frame in the picture. Without it the viewer has no idea how small the subject is, and the scale is most of what makes frost photographs interesting.
Common Mistakes
Reflections covering the pattern. Usually indoor light or your own reflection. Turn off room lights, put a dark jacket over your head, hood the lens, and rotate a polarizer while watching the screen.
Blown-out frost. The bright outdoor view is winning the exposure. Meter for the background and check the histogram; the ice should sit near white but not against the right edge. Shoot RAW so you have room to recover.
Most of the pattern soft. Depth of field at macro distance is around a millimetre. Stop down to f/11 or f/16, shoot at a shorter working distance to the part you care about, or stack four to eight frames.
Condensation on your own lens or body. You carried cold gear into a warm room and water formed on the cold surfaces. Keep the camera in a sealed bag, let it warm gradually, and do not wipe the front element while it is still cold; the grit in that moisture will scratch the coating. This is also why people avoid changing lenses on a warm windowsill.
Noisy, grainy result. You pushed ISO for a night shot. Tripod, drop to ISO 100 to 400, lengthen the shutter instead, and accept more risk from movement rather than from noise.
Flat, lifeless pattern. The light was on the camera axis. Move it to the side, or behind the glass, so every branch casts a shadow.
Streaks and dull patches. The glass was dirty or your warm fingers touched it. Wipe the pane, use a cloth, and keep your hands off the surface.
Nothing to shoot. You waited for sun. Frost retreats fast once it hits a warm pane, so work the coldest, shadiest glass first and set up before you start shooting rather than after.
Quick Tips for More Dramatic Frost Photos
Put something dark behind the glass. A black card behind the pane turns a pale pattern into a high-contrast one and makes the refraction visible.
Move the light between every frame instead of finding one position and trusting it. Side light describes texture, back light describes shape, and a low angle near the glass describes depth. Shoot all three.
Hunt for repeating structure. Fern-like dendrites, stripes pulled along a thermal edge, and frost flowers around a screw hole all photograph better with a tight crop than a wide frame does.
Edit one session as a set. Apply the same white balance, contrast, and sharpening to the whole batch and the sequence looks like a series rather than a folder of unrelated files.
Frequently Asked Questions
Can I photograph frost patterns without a macro lens?
Yes. Any lens that focuses close will do, because a tight crop loses very little at these distances. Set the lens to its closest focus position, move the camera until the pane fills the frame, and crop in afterwards. A clip-on close-up filter or a phone with a macro mode works too, though a phone needs you to press the screen on the subject and lock exposure down to avoid a shifting meter reading.
What is the best camera setting for photographing frost on glass?
Manual mode, ISO 100 to 400, f/8 to f/11, and 1/125s or faster is the solid starting point. Frost is static, so you do not need freeze-motion speeds. Meter for the bright background rather than the ice, and check the histogram so the crystal detail does not clip. At night with a single LED, widen to f/5.6 and raise ISO to 1600 or above.
How do I prevent reflections when shooting frost patterns?
Kill every light source behind and beside you, including screens, and put a dark jacket over your head so your own reflection does not land in the glass. Fit a lens hood or tape black card around the filter ring to block stray light. A polarizing filter also works, rotated by hand while you watch the screen, though it costs light and a little sharpness at macro distances.
What light works best for showing frost texture?
A small LED or flashlight placed at an angle to the glass, coming from the side or slightly behind it. Raking light throws tiny shadows from every crystal branch, which is what makes the texture readable. Straight-on light flattens the pattern. Whatever sits behind the pane matters too, since the same light against a white wall, brick, and a dark background gives three completely different results.
Should I photograph frost from inside or outside the window?
It depends on where the ice is. Indoor frost on the inside surface is shot from inside, with the camera parallel to the glass and the room behind you darkened. Frost on a car windshield or an outer pane is shot from outside, usually at a slight angle to the ice. Working from whichever side the crystals are on is the rule; crossing the glass to the other side just puts a second layer of reflections in the way.
Can I create frost patterns for a practice photo session?
Yes, and it is the fastest way to learn the settings. Chill a spare sheet of glass in the freezer for about 30 minutes, lay it flat on a towel, and mist it lightly with distilled water. Keep the film thin, wait a minute, then shoot. Older or lightly scratched glass grows faster and gives more interesting structure. Avoid spraying any frost near electronics, and do not put cold glass straight into hot water.
Conclusion
Start with a clean, cold pane, put a light at an angle to the glass, set manual focus with a test frame to confirm sharpness, and shoot a bracket before you change anything. That is the whole method, and the first frame will teach you more than another hour of reading.
Then go back the next cold morning. Frost rewrites itself every time the temperature swings, and the pattern that failed last week may be the best one you will ever photograph. The same day, the same pane, and the same light will never produce the identical frame twice, so keep the camera within reach when the cold arrives.