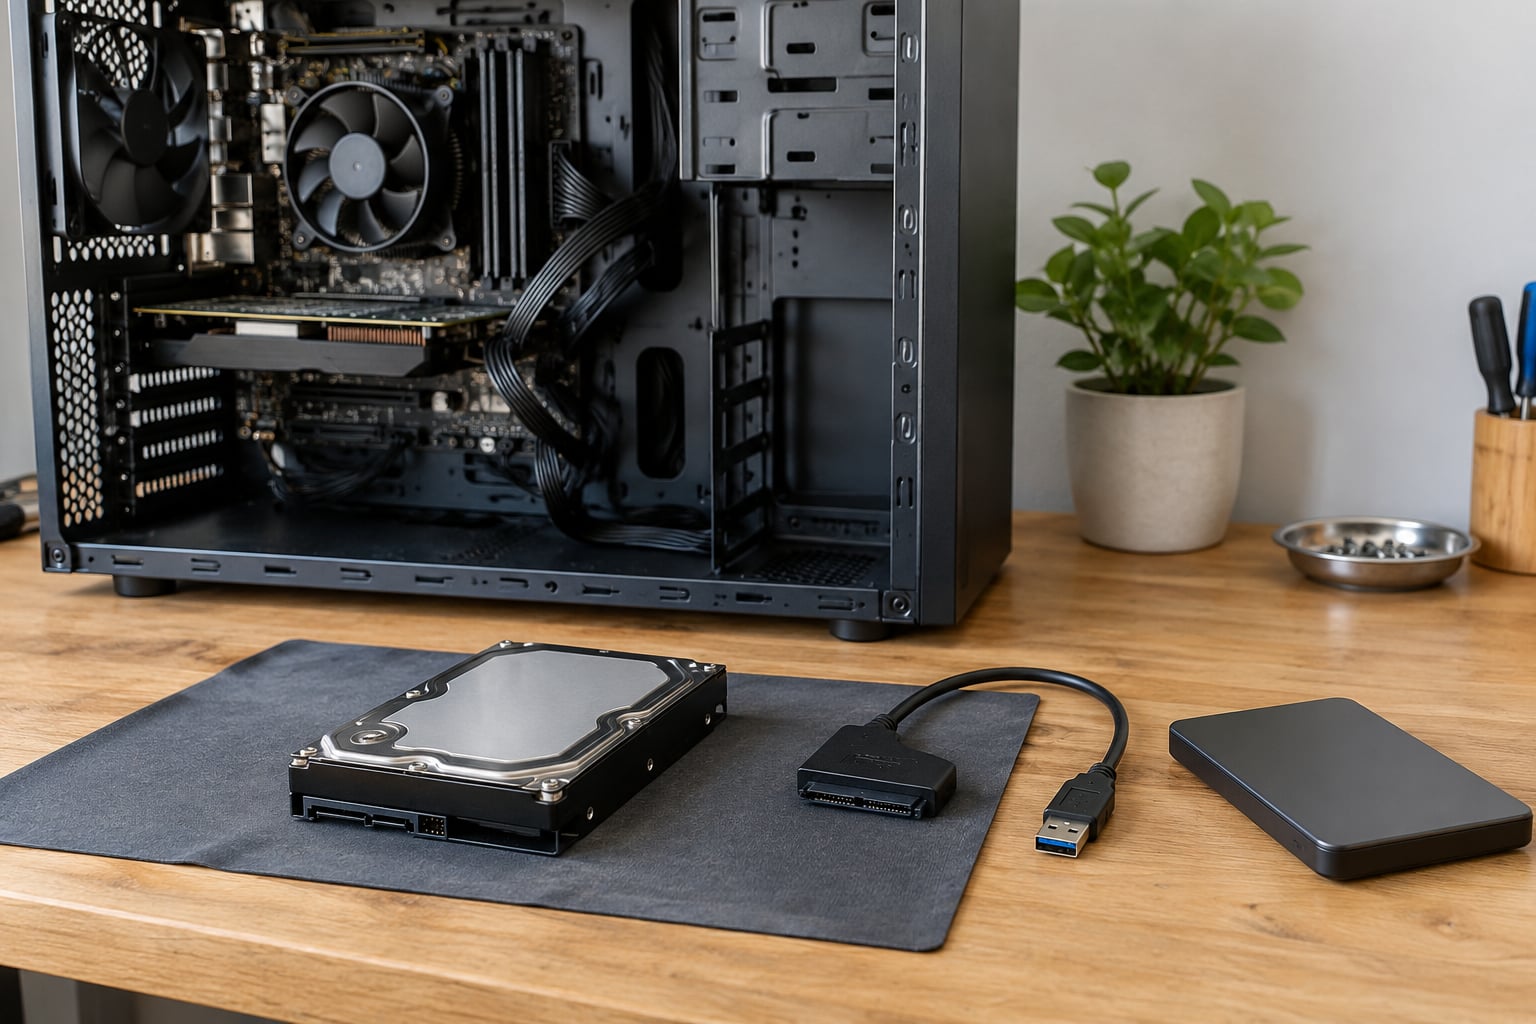
If the old machine still boots, you can move photos off an old computer by connecting an external hard drive, opening the Pictures folder, and copying the whole thing across, then checking the file count before you wipe anything. If it will not boot, the drive comes out and connects to a working computer through a USB-to-SATA adapter. Either way, allow an evening and treat it as a rescue job, not a file move.
That last part matters more than anything else in this guide. The photos on an old computer are usually the only copy in existence, and nobody has backed them up in fifteen years. Cutting instead of copying is how people lose them.
Table of Contents
- What You Need
- Which adapter or enclosure do you need?
- Step-by-Step: How to Move Photos Off an Old Computer
- Find and Protect the Photo Library
- Make a Temporary Backup
- Copy Photos to the New Storage
- Verify the Files Before Deleting Anything
- If the drive connects but is not recognized
- Common Mistakes
- Cutting instead of copying
- Not sizing the destination drive first
- Hiding folders on
- Assuming a finished transfer means everything arrived
- Emptying the recycle bin too early
- Frequently Asked Questions
- What is the easiest way to transfer photos from one computer to another?
- How do I get pictures off an old computer that will not turn on?
- What adapter do I need to read an old hard drive?
- My old hard drive is not recognized, what do I do?
- What is the best device to store all my photos long term?
- What should I do with my old computer before I throw it away?
- A Safe Photo Transfer Checklist
What You Need
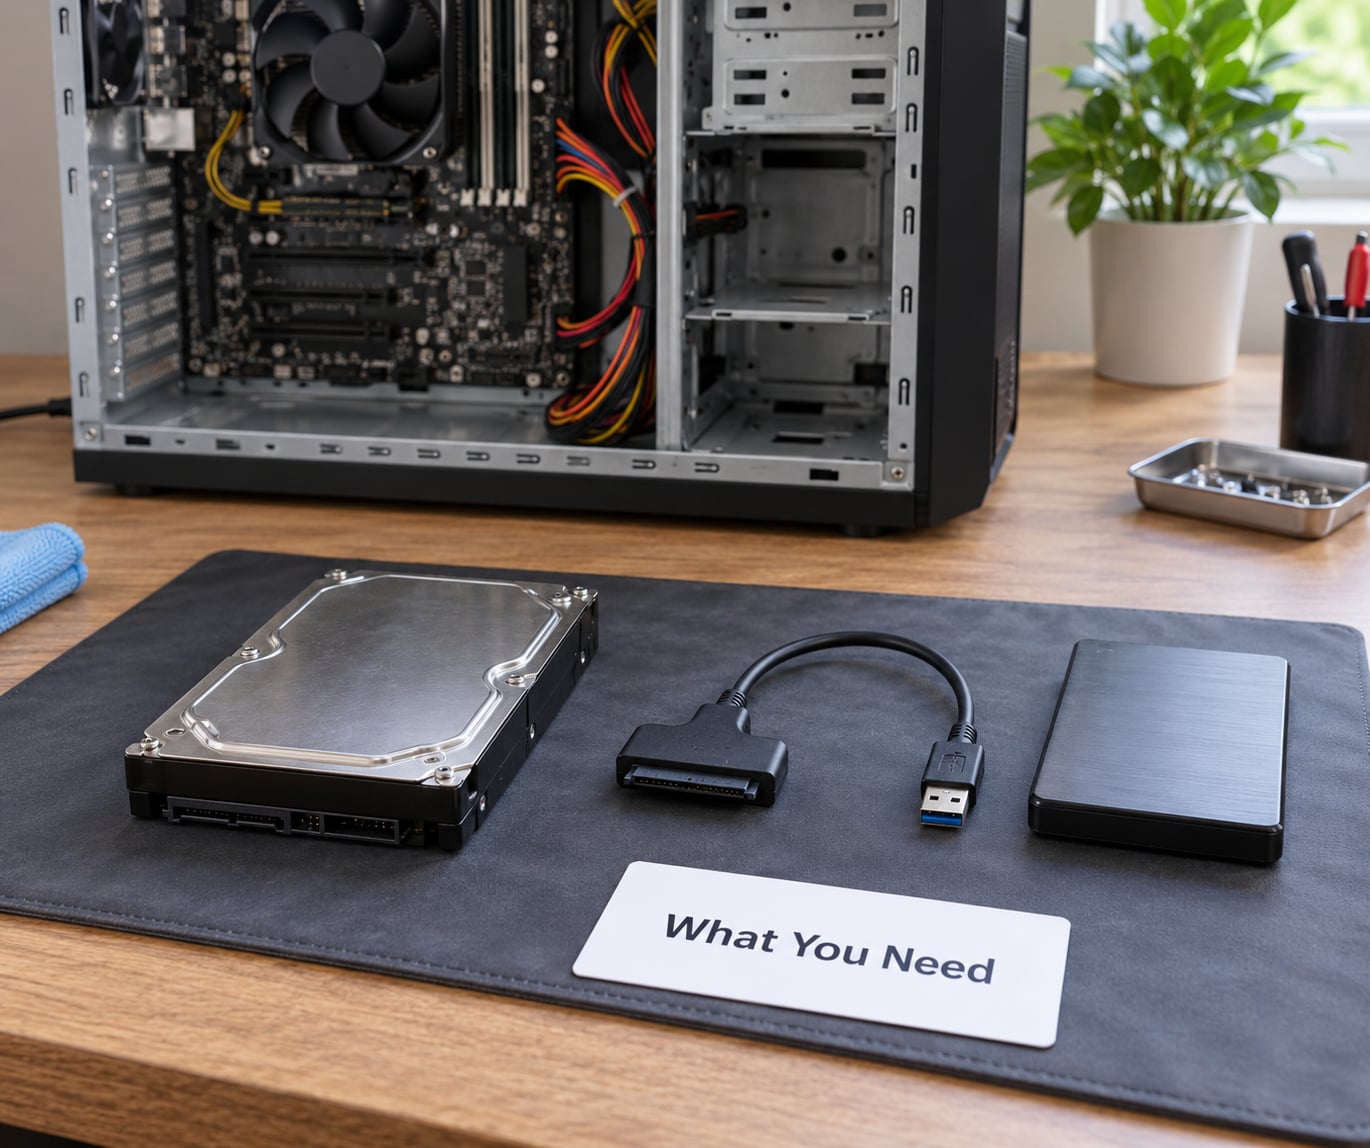
You need three things: the old computer, a destination drive with more free space than the photo library occupies, and a way to verify the transfer before anything gets deleted. If the old computer will not start, you also need the right adapter or enclosure, which depends entirely on what kind of drive is inside.
Which adapter or enclosure do you need?
Identify the drive before you buy anything. A USB-to-SATA adapter is a bare cable with a SATA connector at one end and a USB plug at the other, and it works if you have a free bay or just want the drive loose on your desk. A hard drive enclosure is a small box the drive screws into, which protects a bare drive from knocks and dust and is the better choice if the drive is old and fragile.
| Drive type | What it looks like | What you need | Power |
|---|---|---|---|
| 3.5 inch SATA desktop drive | Full-size metal box, about the size of a hardback book | 3.5 inch enclosure or SATA-to-USB3 cable | External power adapter, usually 12V |
| 2.5 inch SATA laptop drive | Thin rectangle, about the size of a credit card | 2.5 inch enclosure or SATA-to-USB3 cable | USB bus power, none needed |
| M.2 NVMe or SATA SSD | Small stick that slots into the motherboard | M.2 NVMe enclosure | USB bus power |
| IDE/PATA drive | Older drive with a wide two-row connector | IDE-to-USB adapter cable | Usually USB bus power |
| eMMC storage soldered to the board | No removable drive at all | Professional lab only | N/A |
A universal adapter exists that handles both SATA sizes and IDE, and experienced users on tech forums recommend one exactly because guessing the form factor wrong is the most common wasted purchase. If you are unsure, take a photo of the drive label and its connectors before you put anything back together, then compare it against the table above.
For the destination, format a USB drive as exFAT. It is the only common file system that both Windows and Mac write to without complaining, and it handles files larger than 4GB, which matters if you have scanned negatives or video. NTFS works fine if you only ever use Windows, but a Mac will refuse to write to it.
Step-by-Step: How to Move Photos Off an Old Computer
This is the decision point most guides skip. Three situations, three different routes.
- It boots and you can log in. Copy the library across the network or onto a USB drive. Nothing needs to be unscrewed.
- It powers on but the operating system is broken. Boot a live USB stick, or pull the drive and attach it to another machine.
- It does nothing at all. Skip the troubleshooting and take the drive out. You do not need the computer to read a hard drive.
Find and Protect the Photo Library
On Windows, the default location is C:UsersYourNamePictures. Open File Explorer, click This PC, and follow the path. Very old machines running Windows XP or earlier keep images under Documents and Settings instead, which is worth checking on anything bought second hand.
On a Mac, open Finder and look in the Pictures folder for the iPhoto or Photos Library package. Hold Option while opening the Library folder to reveal its contents, because macOS hides it by default. Library.photosdatabase inside it holds the database, and the originals usually sit alongside in an Originals folder. Copying only the visible thumbnails is the single most common way Mac users lose their pictures.
Do not limit your search to one folder. Check the Desktop, Documents folder, Downloads, any external drive the machine had, and the app-specific directories that hide work. Windows stores scan results under C:UsersYourNamePicturesScans for many Epson and Brother scanners, and phone backup tools keep their own trees.
Photographers should search by extension rather than folder name. Copy .CR2, .NEF, .ARW and .RAF alongside the JPEGs, plus .XMP sidecar files, which hold the edit history from Lightroom. If you have ever used a catalog, the .lrcat file is the index pointing at every image, and it is worthless without the images beside it. Sorting by type in File Explorer takes about ten seconds and catches things a folder-by-folder walk misses.
Watch out for cloud placeholders while you are browsing. OneDrive and iCloud Photos show files with a small cloud icon that have not actually been downloaded, and cutting those instead of the real local copy deletes the placeholder, not the photo. Anything with a cloud icon needs a right-click sync or download before you touch it.
Make a Temporary Backup
Before you reorganise, rename anything, or run a cleaner utility, copy the library to a second physical drive. One copy is a guess. Two copies are a plan.
This is also the point where you decide whether the drive is healthy. If the old drive clicks, beeps, grinds, or has spent years in a damp shed or garage, stop copying and make a disk image instead. An image is a complete sector-by-sector copy of the failing drive onto good storage, and once it exists you can pull files from the image as many times as you like. Reading a dying drive repeatedly, hunting for one folder, is the fastest way to destroy the photos that were still recoverable. Experienced users on data recovery forums are blunt about this: one patient image beats a hundred panicked retries.
If the drive is corroded or has visible damage, do not plug it in at all. That has caused actual fires in cases reported on forums. Power it down and take it to a professional instead.
Copy Photos to the New Storage
Plug the destination drive into the old machine and let it mount. Open the Pictures folder, click once in the empty space to deselect, then press Ctrl+A to select everything inside. Copy with Ctrl+C, open the new drive, and paste with Ctrl+V on Windows; on Mac it is Command+C and Command+V, or Command+Option+C if you want to preserve the exact timestamp metadata.
Copy whole folders, not loose files. If you drag 4000 individual images into a new folder, you lose the folder structure, the shoot names, and any XMP sidecars that were sitting one level up. A straight folder-to-folder copy keeps the original names and dates exactly as they were, which is what you want for an archive you may still be sorting in five years.
On Windows 11 the same thing works through Settings, then System, then Storage, then Advanced storage settings, where Temporary files lets you select every app and its data at once. That is faster for a machine full of app libraries, and it catches the scattered folders a manual walk tends to skip.
Let the copy finish and do not interrupt it. A partial paste is worse than a failed one, because it looks complete in the folder view. A terabyte-class library over USB 3.0 typically takes a few hours; USB 2.0 ports on older machines can stretch a large transfer across an entire evening.
Verify the Files Before Deleting Anything
Right-click the source Pictures folder, choose Properties, and note the file count and total size. Do the same on the destination folder. If the counts do not match, run the copy again before anything else; Windows will skip files that already exist and fill in what is missing.
Then open images rather than trusting the extension. Double-click a handful of originals, a few edits, and the oldest and newest files by date. Open the newest one first: it is the file most likely to have been damaged by a drive that was already degrading when it was put away. For a photographer, open a RAW file in your editor and check that the sidecar is still attached.
Finally, make a second copy on separate storage. Open a few files from that second drive too. Until two separate devices hold the library, you do not have a backup, you have a copy.
If the drive connects but is not recognized
No drive letter in File Explorer usually means Windows simply has not assigned one. Open Disk Management, right-click the disk, choose Change Drive Letter and Paths, and add a letter. Windows should also load a basic driver for any modern SATA drive the moment it is plugged in, so a genuinely unrecognized drive is a hardware signal.
Work through these in order: try a different USB port, preferably a rear port on a desktop that draws more power; try a second enclosure or adapter in case the cheap one has died; try a different computer; and check Disk Management before assuming the drive is gone. If it appears in Disk Management but reports 0 bytes or unallocated, stop there and get professional help rather than formatting anything.
Common Mistakes
Cutting instead of copying
Ctrl+X moves the files. If anything interrupts it, or the destination drive fills up mid-transfer, the originals vanish from the source with nothing complete at the other end. Use Ctrl+C every time.
Not sizing the destination drive first
The most common way a transfer fails halfway is a drive that was full before you started. A 2TB drive with 1.7TB already used cannot swallow a 900GB library. Check free space on the destination before copying, not after.
Hiding folders on
File Explorer hides system and app data folders by default, and photo apps scatter originals into places the Pictures folder never mentions. Turn on View, then Show, then Hidden items in File Explorer, and do the same in Finder with Command+Shift+Period.
Assuming a finished transfer means everything arrived
The progress bar reaching the end tells you the files were written, not that they are all readable. Corruption on a degrading drive often produces files that open and then fall apart at the bottom third. Open a sample from every folder, including the biggest folder and the oldest files.
Emptying the recycle bin too early
Deleted files sit in the recycle bin until you empty it, and on an external drive they sit until you eject it properly. Eject the drive from the system tray before unplugging it, or you risk a corrupted file system that takes the archive with it.
Frequently Asked Questions
What is the easiest way to transfer photos from one computer to another?
Format a USB hard drive as exFAT, copy the entire Pictures folder onto it, then copy that folder into your Pictures folder on the new machine. Copying whole folders rather than loose files keeps your original names, folder structure and edit history. It takes about ten minutes of setup and however long the files take to write, which for a large library is usually a few hours.
How do I get pictures off an old computer that will not turn on?
You do not need the computer to work. Unplug it, open the case, remove the hard drive, and connect it to a running machine through a USB-to-SATA adapter or enclosure matched to the drive size. The files appear as an ordinary external drive and you copy them across like anything else. If the drive clicks or was stored somewhere damp, image it first or leave it to a professional.
What adapter do I need to read an old hard drive?
It depends on the drive, not the computer. A 3.5 inch desktop drive needs a 3.5 inch enclosure and external power. A 2.5 inch laptop drive needs a 2.5 inch enclosure and runs on USB power alone. An M.2 SSD needs an M.2 enclosure, and an older IDE drive needs an IDE-to-USB cable. Photograph the drive label and its connectors before ordering anything.
My old hard drive is not recognized, what do I do?
Open Disk Management on the working computer and check whether the drive appears at all. If it does but has no letter, assign one through Change Drive Letter and Paths. If it does not appear, move through the list: another USB port, another adapter or enclosure, another computer. A disk that lists as 0 bytes or unallocated should not be formatted or initialized, because both destroy whatever is recoverable.
What is the best device to store all my photos long term?
Use at least two, ideally three copies on separate media, and keep one of them somewhere physically different. The usual rule is three copies on two types of storage with one off site, and checking that one copy each year by opening a few files. A single external drive fails silently, and cloud alone is not enough if you shoot large RAW files.
What should I do with my old computer before I throw it away?
Confirm that two verified copies of every photo exist elsewhere first, then wipe the internal drive properly rather than deleting folders, which only hides them. On Windows, Reset this PC with the Clean data option erases the drive. On Mac, erase the disk with Secure Erase. If it will not power on, removing the hard drive and taking it separately is the safer disposal route.
A Safe Photo Transfer Checklist
Start with step one, today, before anything else happens to that machine: locate the photo library and copy it to a drive you own. Everything after that is easy.
- Find the library. Pictures folder on Windows, or the Photos Library package on Mac, plus Desktop, Documents and any app folders that hold scans or phone backups.
- Make a second copy immediately. One copy is a guess, two is a plan.
- If the drive clicks, beeps or has lived somewhere damp, stop and make a disk image before any further reading.
- Copy whole folders, never loose files, onto a destination formatted as exFAT.
- Compare folder and file counts between source and destination.
- Open a sample of images, including the newest ones and a few RAW files with their sidecars.
- Make the third copy on separate storage, somewhere physically different.
- Only then wipe, donate or recycle the old machine.
That last step is the one people skip, and it is the reason a recovered photo library quietly disappears two years later when a machine gets sold at a garage sale. Two verified copies, one of them somewhere else, and the rest is bookkeeping.