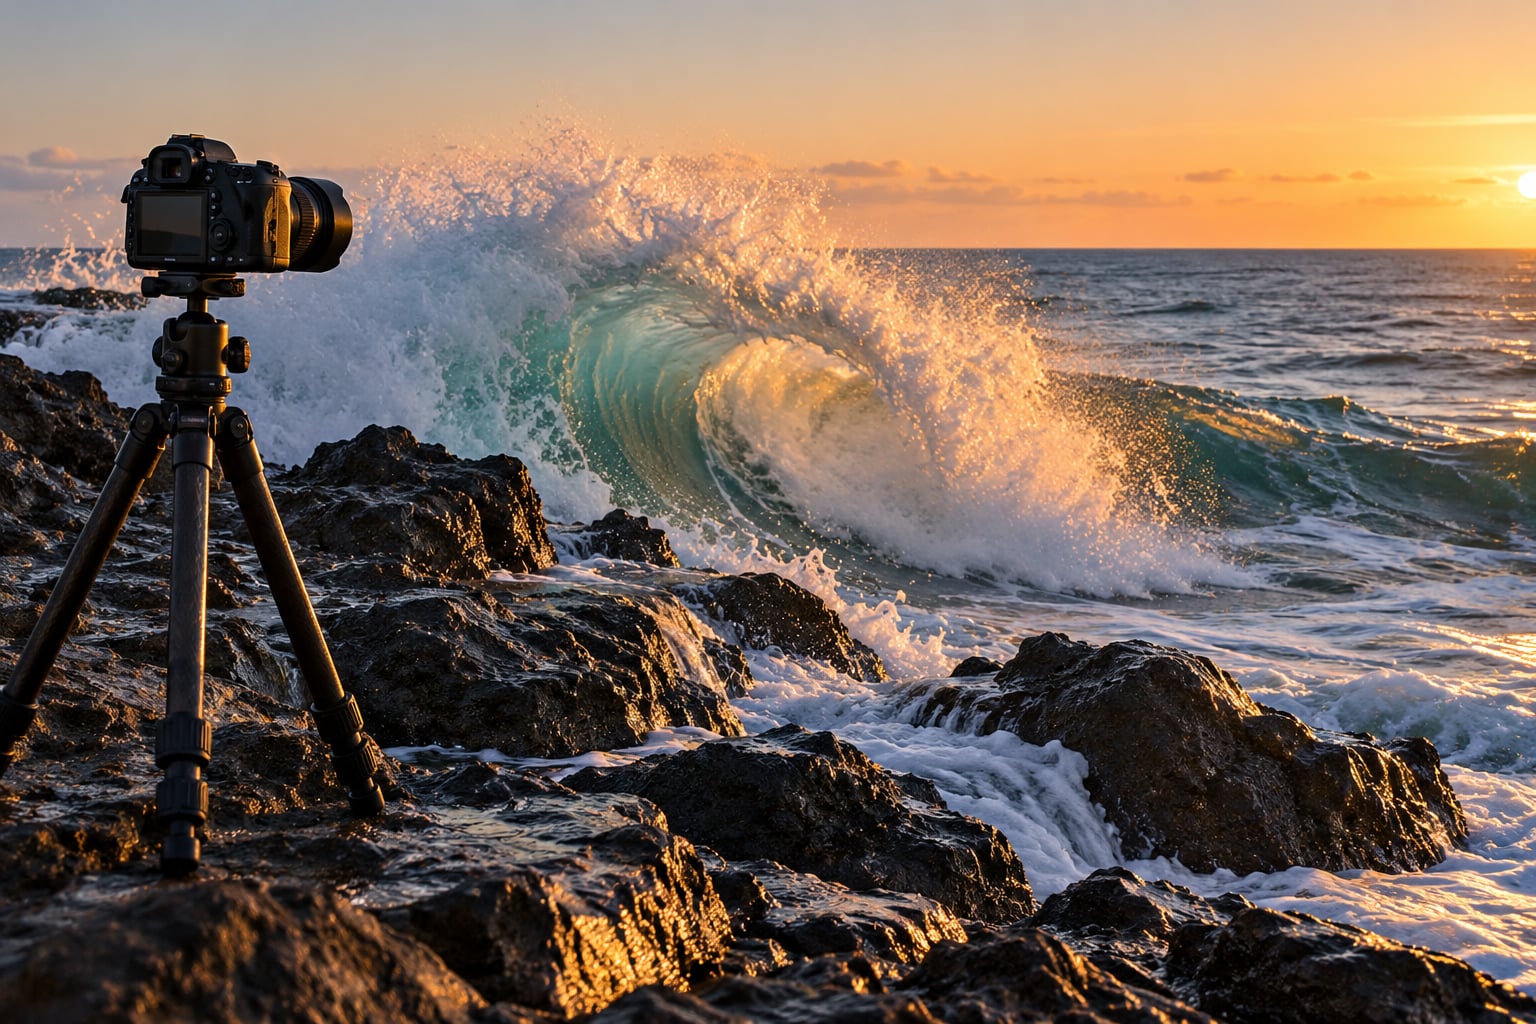
To photograph ocean waves, pick a safe position above the water line, choose the light, and set a shutter speed that matches the effect you want: 1/1000s or faster freezes spray into droplets, 1/8 to 1/30s streaks foam into motion, and 10 to 30 seconds on a tripod turns the break into smooth mist. Then anticipate the wave, shoot bursts, and cull at home.
That is the whole method, and most of the difficulty is in the timing rather than the kit. A phone can do it. A kit lens can do it. What you cannot skip is a bit of planning about where the water breaks, because a wave that photographs beautifully from the shore can be behind a rock shelf that costs you the tripod.
One safety note before anything else. Read the surf report and tide chart for the exact hour you plan to shoot, watch the water for at least ten minutes before you set up, and never stand on wet rock or turn your back on the surf. Sneaker waves arrive out of a lull that looks calm, and no photograph is worth being pulled off a ledge.
Table of Contents
- What You Need
- Step-by-Step Guide: How to Photograph Ocean Waves
- Step 1: Scout the Coast and Choose Your Light
- Step 2: Frame Waves With a Clear Visual Story
- Step 3: Camera Controls for Photographing Ocean Waves Sharply
- Step 4: Anticipate the Break Instead of Following It
- Step 5: Create Motion With a Slower Shutter
- Step 6: Try Multiple Wave Compressions From One Position
- Step 7: Protect the Camera From Salt and Spray
- Step 8: Review the Images and Refine the Next Attempt
- Common Mistakes
- Frequently Asked Questions
- Can I photograph ocean waves with a smartphone?
- Is a polarizing filter useful for photographing ocean waves?
- How do I photograph waves on an overcast day?
- Do I need a tripod to photograph ocean waves?
- What is the safest way to compose a photo with a breaking wave?
- Conclusion
What You Need
The minimum kit is small. A camera with a lens that reaches past the surf, a lens cloth, and a way to keep salt off the front element is genuinely all you need. Almost any camera can freeze a wave; the lens choice is what decides whether you are standing in the splash zone or comfortably back on dry sand.
A medium to long telephoto is the workhorse here. Something in the 100-400mm range lets you frame a section of wave face from a safe distance, and it compresses the layers of swell behind the break into a stack that looks far more dramatic than it felt standing there. A 70-200mm works if your beach is narrow. A wide lens forces you into the water, which is where I would rather not be with a camera that costs more than my car insurance.
A circular polarizer is the one filter worth buying early. It cuts the surface glare that makes water look like grey plastic, deepens the blue in the wave face, and darkens the sky. The catch is real: it costs you roughly one to two stops of light, so you either raise the ISO or use a faster shutter. Rotate it rather than screwing it on tight, and be aware that at wide angles the sky can go uneven.
An ND filter is only necessary if you want silky water. A six-stop filter turns a 1/30s exposure into a 2s one; a ten-stop turns it into roughly half a minute. That second option is the one that makes water look like fog, and it is a very different photograph from the one you get with a polarizer alone.
Then the unglamorous things. A microfibre cloth and a plain white cloth kept separately, because grit plus glass is how you scratch a front element. A rain cover or a large plastic bag for blowing sand. Spare batteries, since continuous autofocus and image stabilisation drain them faster than you expect. And a monopod if you have one, though a tripod works fine and gets left behind more often than you would think.
Check the forecast before you leave. Wind direction matters more than most beginners realise: an offshore wind pushes spray back off the wave and holds the crest up, while an onshore wind flattens the top and pushes foam toward you. Overcast conditions are not a write-off either, they are simply a different look.
Step-by-Step Guide: How to Photograph Ocean Waves
Step 1: Scout the Coast and Choose Your Light
Walk the shoreline first, for ten minutes, with no camera out. Find out where the water actually breaks, which is rarely where you first parked. Note the direction the wave travels, whether a rock shelf or jetty gives you a fixed edge to compose against, and where the background is clean.
Then look at the light. Side light from a low sun rakes across the wave face and picks out every ripple and ridge of foam. Backlight, with the sun behind the wave, lights the thin spray from underneath and makes the water glow green. Midday overhead light flattens everything into a bright white line and blows the highlights out, so if that is your only option, look for a shaded angle or come back later.
Golden hour is worth the early alarm, and the hour after sunset is often better still because the swell keeps arriving without the heat.
Step 2: Frame Waves With a Clear Visual Story
A wide frame of open water rarely says anything. Pick a subject and give it context: a wave curling beside a dark rock, foam drawing a line across wet sand, a crest framed by the curve of the shoreline.
Foreground rocks do the work of framing and giving scale at the same time, as long as you keep them dark or partially in shadow so they do not compete with the wave. Negative space in the direction the wave is travelling gives it somewhere to go, which reads as speed. A low viewpoint down at water level makes the wave tower; a high viewpoint from a headland shows you the pattern of the sets and lets you compress several lines of swell with a long lens.
Zoom in more than feels natural. Filling the frame with one section of a breaking wave is the difference between a snapshot and a photograph.
Step 3: Camera Controls for Photographing Ocean Waves Sharply
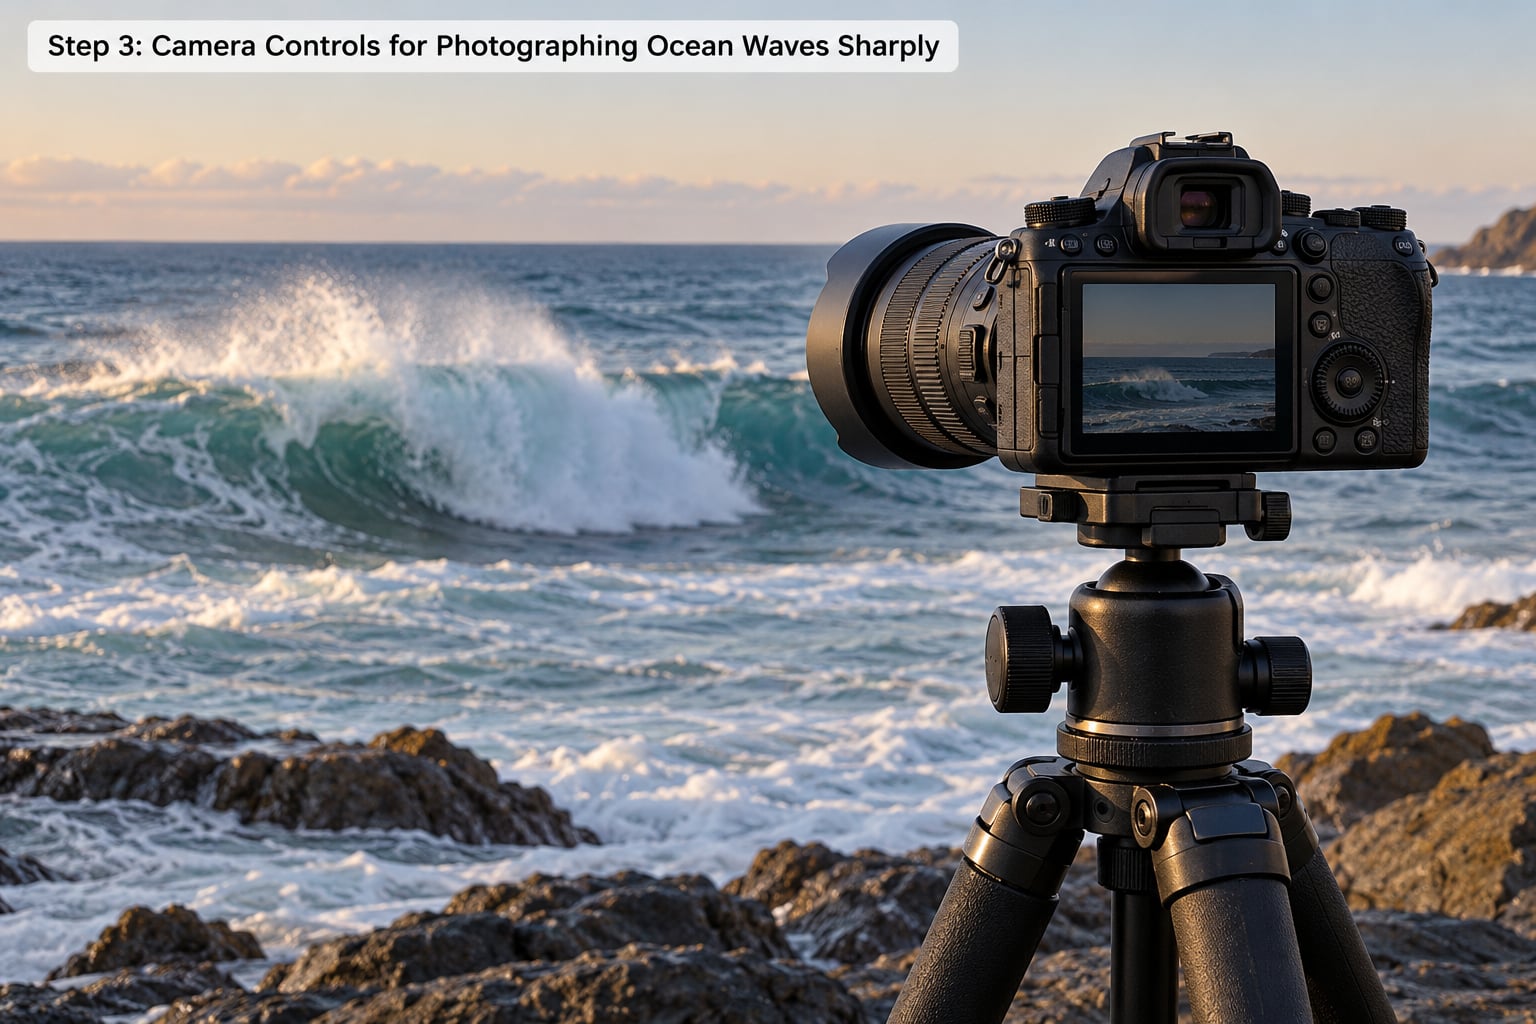
Start in manual or shutter priority and dial in a shutter speed, because shutter speed is the control that decides the look. 1/1000s to 1/2000s freezes the wave at the top of its break with individual droplets hanging in the air. 1/250s to 1/500s gives a semi-frozen edge with a little trail, which often looks more natural than full freeze. Below 1/60s the water starts to streak.
For aperture, f/5.6 to f/8 is the working range. It keeps enough depth of field that the wave face and the spray behind it are both sharp, without dropping into diffraction softness. Along a long wave face, stopping down to f/11 can hold more in focus. Watch the ISO and let it float rather than clamping it, but know that ISO 6400 and beyond will not rescue a genuinely dark frame.
Use continuous autofocus, or servo mode, with a single small focus zone positioned over the water where the wave will break. Wide-area tracking is a poor match here, because the whole sea surface is moving and the camera will hunt. If autofocus keeps hunting, pre-focus on a fixed object at the break point and switch to manual. That one change fixes more soft wave frames than anything else.
On exposure, white foam against dark water is a brutal ratio for the meter. Dial in negative exposure compensation, often one to two stops, and check the histogram so the foam sits just under the clipping point. Shoot RAW. Blown foam cannot be recovered in a JPEG, and it is the single most common reason a wave photo looks washed out.
Shoot in burst at your fastest rate. At 10 frames per second you get a real chance at the one frame where the barrel is open or the spray is at its peak, instead of gambling on a single press.
Step 4: Anticipate the Break Instead of Following It
Waves arrive in sets. Typically you get three or four of a similar size, then a gap of a few minutes before the next group, and the biggest wave of a set often arrives at the end rather than the start. Watch for two or three full sets before you lift the camera.
Track the position of the break, put your focus zone on it, and wait. The mistake almost everyone makes is panning the camera after a wave is already falling, which guarantees you frame a wall of white foam with no shape to it. Compose, focus, and then hold. When the wave you have been waiting for starts to peel, that is when you start the burst.
Keep both eyes open if your camera allows it. One eye on the viewfinder and one on the incoming swell is the difference between reacting and anticipating.
Step 5: Create Motion With a Slower Shutter
Slow the shutter deliberately and the same wave becomes a different subject. At 1/8s to 1/30s the foam trails behind the crest like a brushstroke and the moving water separates from the still rock behind it. At several seconds the wave flattens into a milky sheet. At 10 to 30s the water disappears entirely and you are left with the shape of the rock and the smoothness of the surface, which is where the ND filter earns its place.
Long exposures need a stable camera, so this is the one situation where the tripod is not optional. Focus on something stationary, the rocks or the horizon, not on the moving water, or the camera will hunt. Turn the polarizer off, since stacking two filters costs you three or more stops. And watch the histogram constantly, because bright foam will overexpose in a way the screen review does not warn you about until it is too late.
Step 6: Try Multiple Wave Compressions From One Position
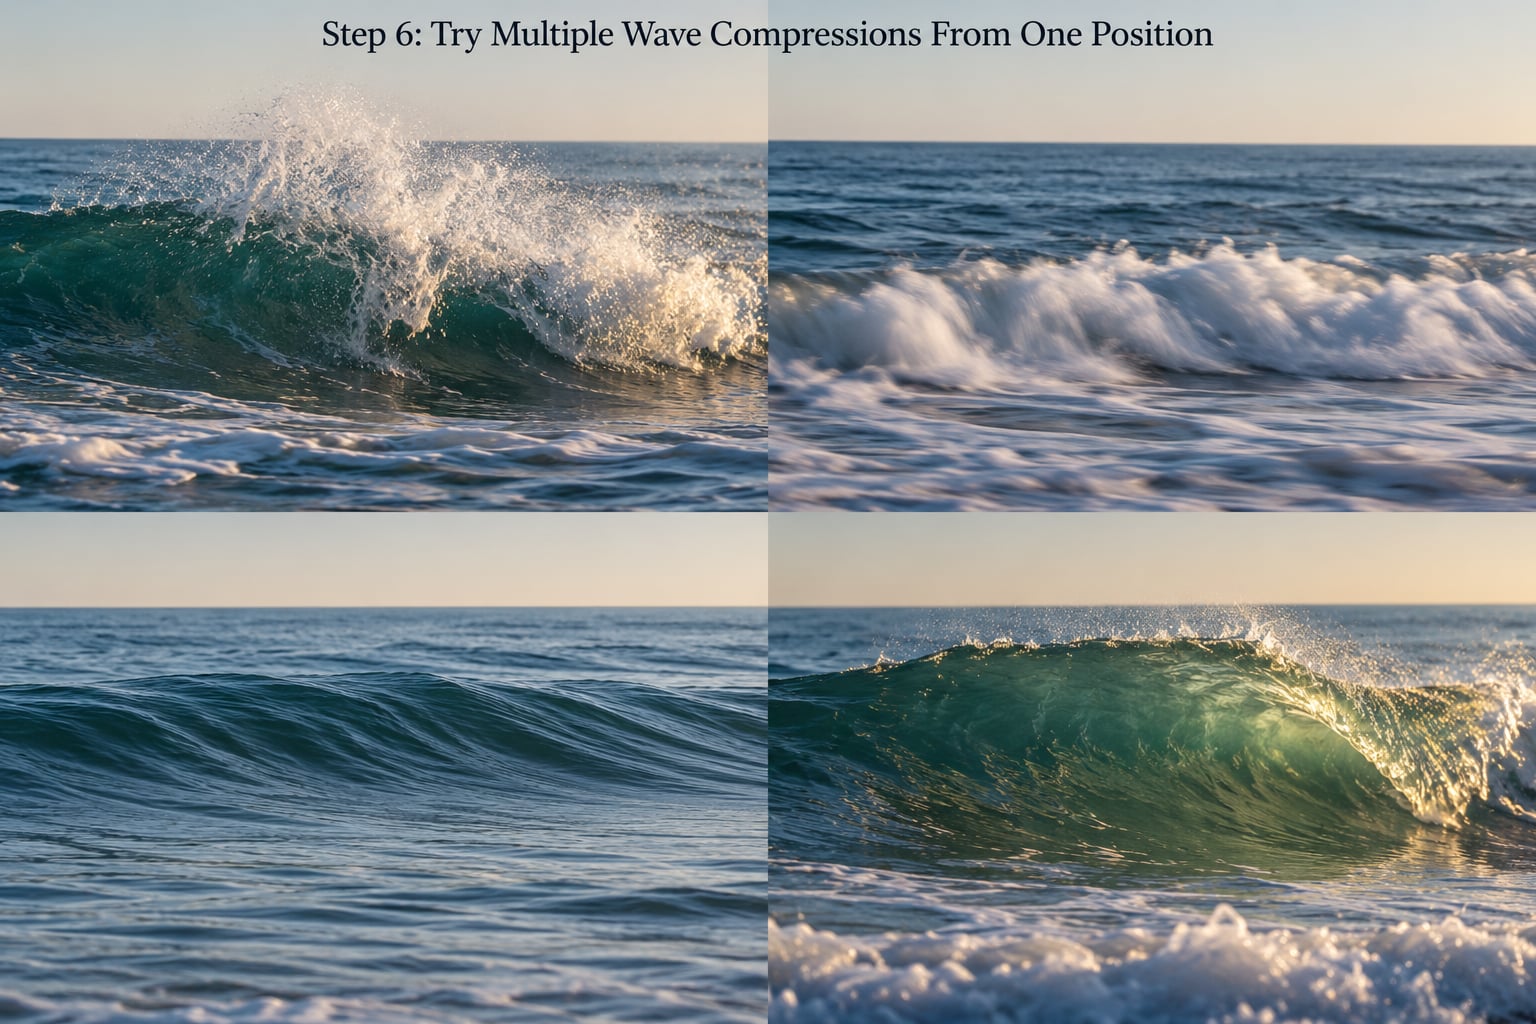
Once you have a position you like, stay there and change one thing at a time. Shoot a burst at 1/1000s, then drop to 1/60s from the same spot, then put the ND on and try a ten-second exposure, then wait for the sun to move behind the wave.
The four results read very differently. The fast shutter gives you droplets, texture and a sense of violence. The medium shutter gives you direction and speed. The long exposure gives you stillness that makes a busy beach look serene. The backlit frame gives you colour and glow. Comparing them at home teaches you which effect suits which conditions far faster than reading about it.
Step 7: Protect the Camera From Salt and Spray
Salt is the real enemy of coastal photography, and it attacks metal parts and seals quietly. Do not stand on wet rock, and do not walk along the water line. If spray reaches the camera, switch off and do not press buttons, because pushing a salt-wet control is how a working camera becomes a repair bill.
Do not change lenses in blowing sand. Grit that gets inside the mount grinds the sensor or the rear element every time you mount. If you must swap, turn your back to the wind and do it inside a jacket.
Wipe the front element with a clean damp cloth and a drop of mild detergent, never a dry tissue, which pushes grit across the coating. Let the body air out somewhere ventilated before you put it in a bag, and rinse off salt on the tripod legs, where seized leg locks come from. Tripods that live near the sea need a rinse with fresh water and a wipe-down of every joint.
Step 8: Review the Images and Refine the Next Attempt
The edit is where the learnable part of the shoot actually happens. Look at the burst as thumbnails first and pick two or three frames, because reviewing forty near-identical images tells you nothing. Then check each one for focus, clipped foam, subject placement and background clutter.
Write down what went wrong in a specific way: not bad shot, but focus landed on the splash behind the wave, or the wave sat dead centre with no space in front of it, or the horizon tilted. Each of those has a control you can change next time, and the adjustment is usually one variable. Move a step closer, or one stop slower, or a third of the frame to the left.
Repeating identical settings and hoping for a different frame is the most common way people plateau at beach photography.
Common Mistakes
Soft waves from autofocus hunting. Continuous autofocus with a wide tracking zone cannot lock onto moving water. Use a single small focus zone over the break, or pre-focus manually on a fixed object at the action zone.
Blown white foam. The meter is fooled by bright foam against dark water. Add one to two stops of negative exposure compensation, check the histogram, and shoot RAW so the highlights are recoverable.
Camera shake at slow shutter speeds. Below 1/250s with a long lens, hand-holding produces a soft frame no amount of editing will save. Rest your elbows on your knees as a human tripod, or put the camera on a tripod.
Underexposed water. Under a polarizer at golden hour, the scene gets darker fast. Check the histogram before the first wave arrives rather than after you have filled the card with dark frames.
Everything centred in the frame. Put the wave on a third and leave space in the direction it is travelling. Centred subjects read as snapshots.
Shooting through dirty glass. Salt haze and fingerprints kill contrast more than any setting can restore. Wipe the front element at the start and the end of the session, and never clean it with a dry tissue.
Confusing high ISO with high shutter speed. ISO only changes brightness. The shutter speed decides whether the wave is sharp, and no amount of ISO will freeze a droplet.
A few habits that pay off: shoot a short test burst after you arrive rather than jumping straight into long sequences, keep the burst going slightly past the peak because the best frame is often the one after the obvious one, and note the tide height and time in your file names. Six months later, knowing when and where you were is worth more than the exact settings.
Frequently Asked Questions
Can I photograph ocean waves with a smartphone?
Yes. Most phones can freeze a breaking wave cleanly, and the burst mode in the stock camera app gives you ten frames per second, which is enough to catch the peak of the break. Open the Pro or manual mode if your phone has one and set the shutter to 1/1000s or faster, then hold ISO as low as the light allows. The limits are the lens aperture, which is fixed, and the sensor, which handles bright foam less gracefully than a dedicated camera.
Is a polarizing filter useful for photographing ocean waves?
Very useful, with one tradeoff. A circular polarizer cuts the surface glare that makes water look flat and grey, deepens the blue in the wave face and darkens the sky, and it is the fastest fix for the hazy look you get shooting into the light. It costs roughly one to two stops of light, so you compensate with a faster shutter or a higher ISO, and it has almost no effect when you are already shooting straight into the sun.
How do I photograph waves on an overcast day?
Overcast light is a gift for texture. The soft, even light means no blown highlights and no harsh shadows, so the shape of the wave face reads cleanly from a low angle. Watch for the breaks in the cloud, which act as natural spotlights on the water, and use them by waiting for one to move over your subject. Overcast also means slower shutter speeds, so raise the ISO before you drop below the speed needed to freeze spray.
Do I need a tripod to photograph ocean waves?
Only for slow shutter speeds. If you are freezing spray at 1/1000s or faster, a tripod is optional and often a nuisance, since you will be repositioning constantly as the sets move. Use one when you want milky long exposures, typically anything past half a second, or when you are working with a very long lens in low light. A monopod gives most of the stability at a fraction of the weight.
What is the safest way to compose a photo with a breaking wave?
Stay above the water line on stable ground and never stand on wet rock, which is both slippery and unpredictable. Position yourself so the surf is never behind you, and keep your back to a headland or a bank of dunes rather than open water. Watch a full set of waves without the camera before you commit to a spot, and leave if the interval between sets drops noticeably. Long lenses let you get the same frame from much further back.
Conclusion
Start with the position, not the camera. Walk the shore, read the sets, find a spot above the water line where the light rakes across the wave face, and decide whether you want the wave frozen, streaked or smoothed. Set the shutter speed to match, focus on where the water will break, and shoot a short test burst before committing to a full sequence. Then change one variable at a time on the next set, and the photographs start to come out instead of the frames you hoped for. The whole method takes about twenty minutes to set up and an hour of patience, and it works just as well from the sand as it does from a rock shelf.