Framing and matting a photo at home takes about 30 minutes and costs less than a shop job, once you have the right tools. The whole process is four moves: measure the frame’s opening, cut a window in acid-free mat board slightly smaller than your print, hinge the print to the mat with archival tape, then lock the layers into the frame with the glazing and backing board. If your print is an odd size, you mat it anyway — the mat is what makes an off-the-shelf frame fit.
I’ve built most of my own gallery wall this way rather than paying a framer for every piece, and the difference between a clean frame and a crooked one comes down to two numbers: the mat border width and the window size. Get those right and everything else is just careful stacking.
What follows is the process I actually use, including the sizing math nobody explains and the hand-cut method if you don’t own a mat cutter.
Table of Contents
- What You Need
- Step-by-Step: How to Frame and Mat a Photo at Home
- 1. Choose a Frame and Mat
- 2. Measure the Frame Opening and Photo
- 3. Mark and Cut the Mat Board
- 4. Trim and Mount the Photo
- 5. Assemble the Frame
- 6. Check Alignment and Finish the Display
- Common Mistakes
- Frequently Asked Questions
- How much should it cost to matte and frame a picture?
- How can I make a photo frame at home easily?
- How to cut mat board without a mat cutter?
- What are the rules for picture matting?
- Should I use a mat when framing photos?
- What are some alternatives to matboard?
- Conclusion
What You Need
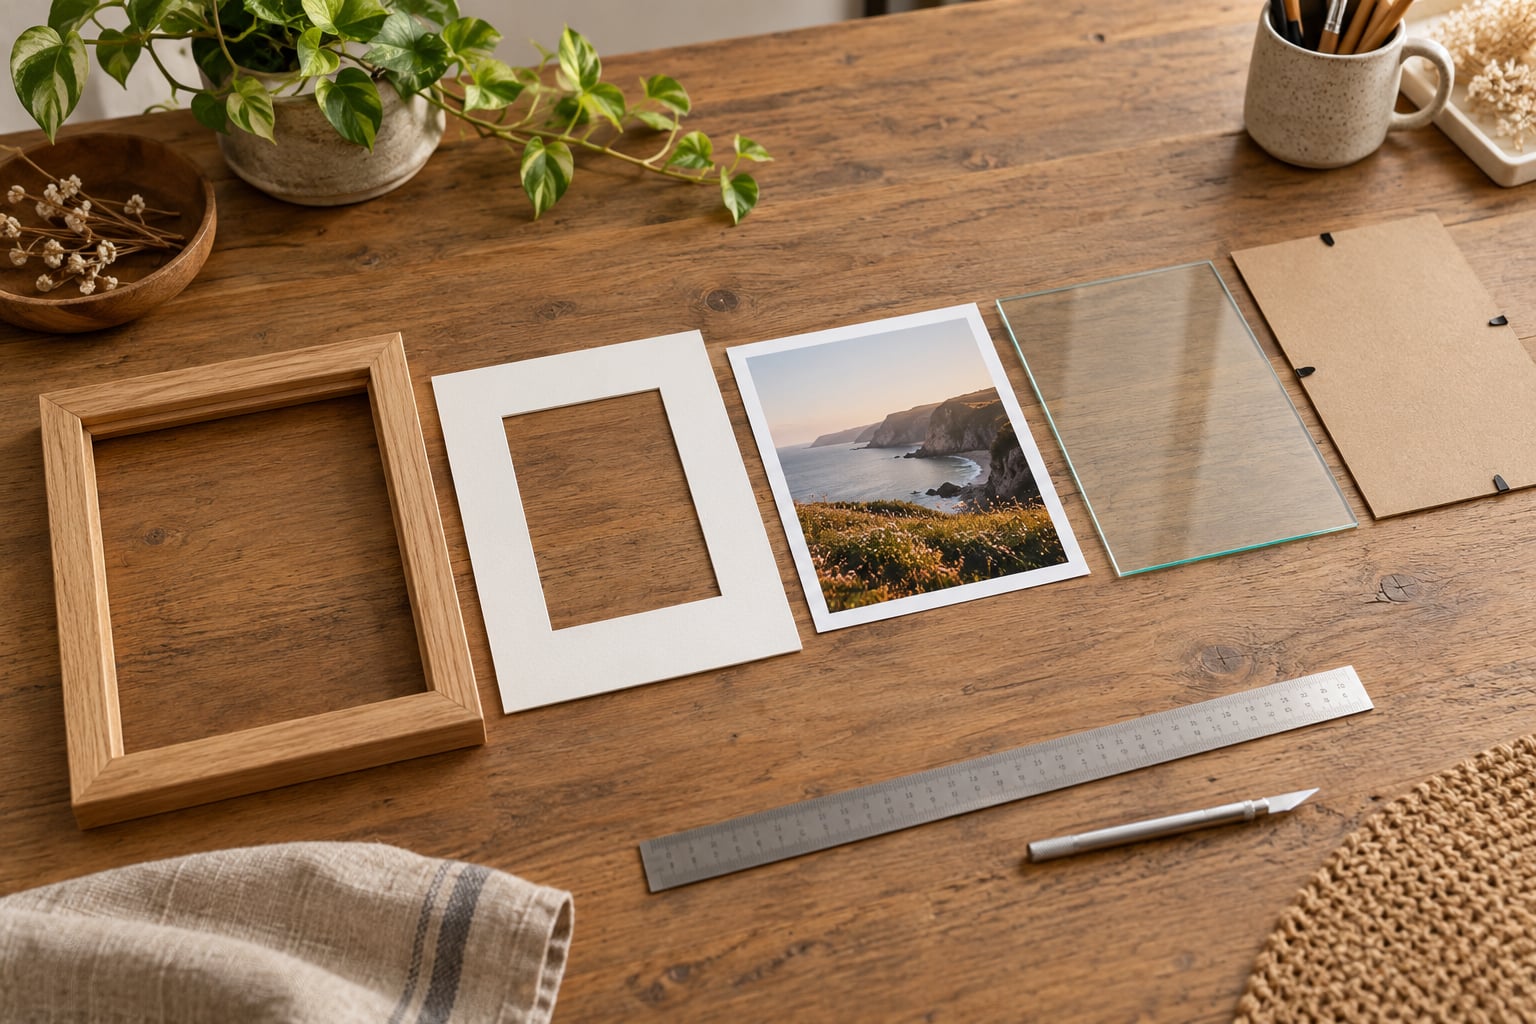
A mat board is a thick, buffered card — 4-ply is the everyday standard and 8-ply gives a deeper bevel that casts a real shadow line. Buy acid-free or conservation board for anything you want to keep; check the label on the back of the board, not just the colour.
- The photo — the print itself, plus a spare in case a trim goes wrong.
- A frame — a moulding with a rabbet deep enough to hold a mat and a backing board. Thrift-store and estate-sale frames are ideal; you reuse the glass, back and hardware for free.
- Mat board — one piece for a single mat, two for a double mat. Buy a sheet at a craft store and cut it down to a standard frame size so you can swap frames later.
- Backing board — acid-free foam core or dense cardboard, cut to the exact inner dimensions of the frame.
- Archival tape — artist’s tape or paper hinge tape for mounting. Household tape, glue stick and masking tape are all wrong here.
- Measuring tools — a steel ruler or tape measure, a pencil, and a small square or another straight edge.
- A cutting tool — a mat cutter is the clean option. A craft knife with fresh blades works for hand-cutting.
- A self-healing cutting mat — essential if you use a craft knife, since it stops the blade dulling and the board tearing.
- Glazing points or turn tabs — the little metal tabs that hold the back in place. Many frames include them.
- Optional — a level, a soft microfibre cloth, window cleaner for the glass, and paper or fabric to cover a mat board.
Handle glazing by the edges with two hands. Glass edges are the part most likely to chip or cut, and sheet acrylic is far less dangerous in a household but still scratches if you rub it.
Step-by-Step: How to Frame and Mat a Photo at Home
Measure the frame opening, cut a mat window about 1/8 inch smaller than the print on every side, hinge the print to the mat with archival tape so it can still move, then sandwich mat, print and backing board behind the glazing and lock it in with points. Allow 30 minutes for a first attempt at a standard 8×10 or 11×14.
1. Choose a Frame and Mat
Match the frame’s proportions to the print’s orientation. A tall frame around a landscape photo leaves the mat doing all the work, which looks fine as long as the border is generous. If the print is a standard size, choose a frame that fits it directly with no mat at all — that’s the simplest good-looking option.
A mat earns its place when it gives the image breathing room or makes an odd-sized print fit. If the photo is edge-to-edge detail, a wide mat can feel like a waste of the image; keep the border modest.
For colour, off-white or a soft warm white is the safest choice, and experienced photographers reach for it almost every time because pure white reads as a hole next to most prints. A narrow black or charcoal inner mat under an off-white outer mat gives depth without shouting.
The rule I’d use for width: about 10 to 15 percent of the print’s short side, and make the bottom border slightly deeper than the top so the image feels optically centred rather than floating high.
2. Measure the Frame Opening and Photo
Measure the visible opening of the frame — the inside edge of the moulding, not the outside of the frame. Then measure the photo. Write both numbers down; almost every beginner mistake starts with guessing.
The mat window, in other words the hole you cut, is calculated like this:
Window size = photo size minus 1/8 inch on each side
Worked example. You have an 8×10 print and an 11×14 frame. The 11×14 frame’s visible opening is usually about 9.5 x 11.5 inches, so the mat border on the sides is (9.5 − 8) ÷ 2 = 3/4 inch, and top to bottom (11.5 − 10) ÷ 2 = 3/4 inch. Cut the window at 7 7/8 x 9 7/8 inches so the print’s own white paper edge stays hidden behind the mat.
That 1/8 inch undersize is the trick that stops a bright line of print paper showing at the edge of the window. Cut the window exactly to the photo size and you will see a sliver of white on one side within a week, as the paper shifts slightly in changing humidity.
3. Mark and Cut the Mat Board
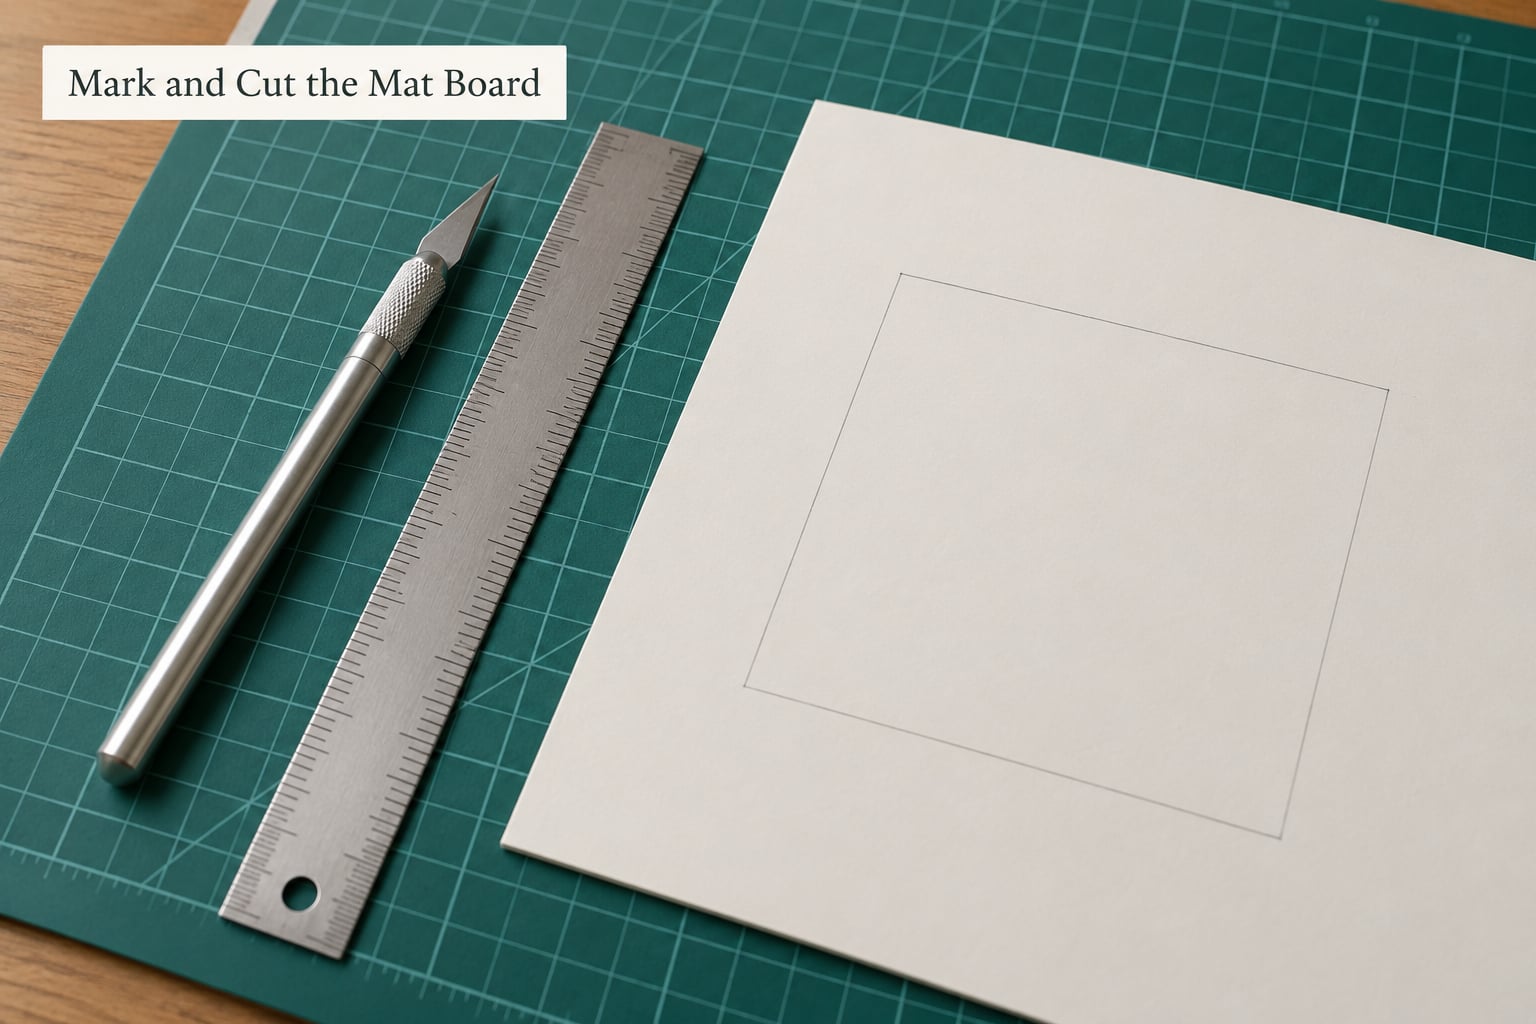
Cut the mat board down to the frame’s opening size first, then mark the window on the side that will face into the frame. Marking on the back keeps pencil lines out of the visible bevel and makes the sides easier to identify later.
Measure in from each edge by your border number, draw the rectangle, and extend every line about an inch past each corner. Those overshooting lines give you a clear path for the knife to run all the way through, instead of trying to meet two cut ends at a corner.
With a mat cutter, set the guides to your window dimensions, hold the board flat, and draw the blade once in each direction with steady pressure. Push through the full depth in a single pass; forcing the blade in stages crushes the core and gives a ragged bevel.
Without a mat cutter, put the board on a self-healing cutting mat with a steel ruler on the line and run a fresh craft knife blade along it in several light passes rather than one heavy one. Cut the two short sides first, the two long sides next, and leave the last side until the end so the center panel is still held in place. Then slice the remaining side and lift the waste piece out. Practice on a scrap offcut first — the corner is where beginners tear the board.
How do you tell a good cut? The bevel should be an even, continuous 45-degree channel all the way around with no fuzzy torn fibres at the corners.
4. Trim and Mount the Photo
Trim the print only if needed, and always with a sharp blade on a self-healing mat, cutting on a table rather than in your lap. Recutting destroys the factory edge and removes a millimetre of image, so measure twice.
Wash and dry your hands before touching it. Skin oils and fingerprints on a print are permanent, and a fingerprint on the inner face of the glass is the single most common complaint people have about their own finished frames.
Tape-hinge it: lay the print face up on a clean surface, place two short strips of archival tape along one long edge of the mat’s back, sticky side out, and press the print onto them. The tape should sit on the mat board, not across the front of the image, and it should cover only about a quarter to a third of the print’s back so the photo can still expand and contract with humidity. That movement is exactly why you never T-hinge the print flat across its back, and why experienced photographers mount to the backing board or hinge to the mat instead.
Dry mounting with heat-laminate film gives a perfectly flat, permanent result and it’s the right choice for a print you will never want to remove. It is not reversible, and it will bow if the artwork is stored in humidity, so for anything you care about, hinge instead.
5. Assemble the Frame
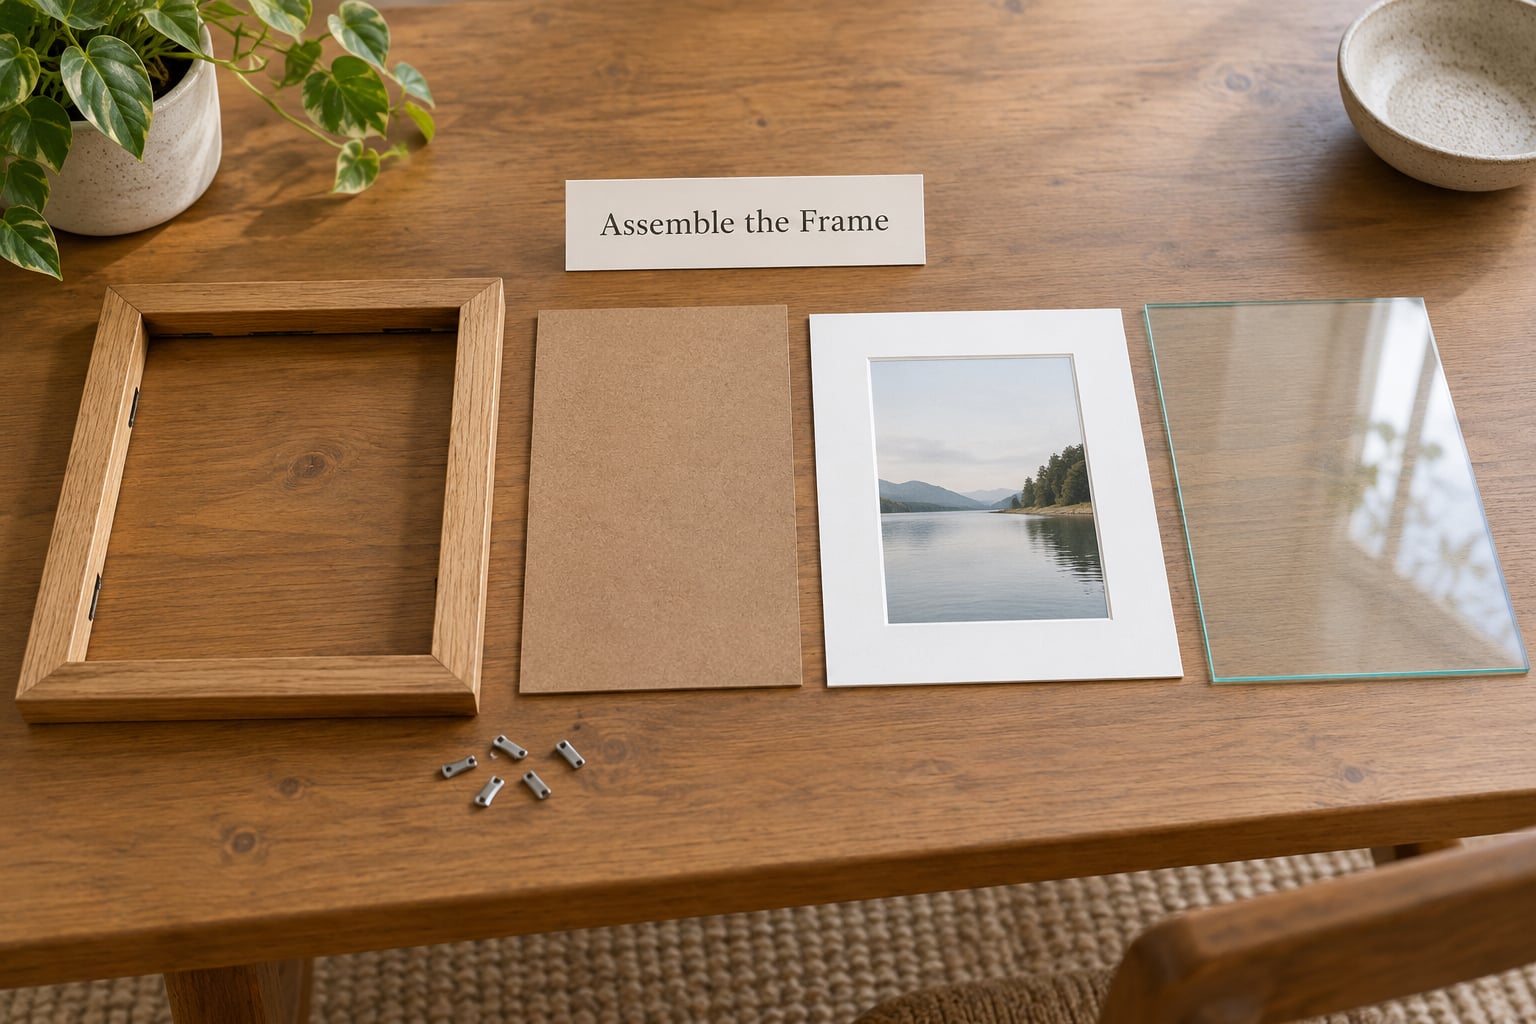
Work on a clean flat surface and build the stack back to front, so the first thing you place into the frame is the backing board side. The layer order from the wall outward is: backing board, photo, mat, glazing, frame.
Clean the glazing before it goes in. Glass cleaner and a microfibre cloth for glass; warm water with a drop of dish soap for acrylic, never alcohol or ammonia, which will haze plastic permanently.
Slide the matted print in face to the glass, put the backing board on the back, and press the board down so the stack sits flat and the mat contacts the glass all the way around. Push the glazing points or turn tabs into the rabbet with about half the tab buried, spacing them roughly 6 to 8 inches apart plus one at each corner. Bend them down over the back to trap the board.
If the photo shifts as you work, stop and start the layer over on a clean spot. Smudged fingerprints at this stage are the ones that stay visible forever, because they are trapped behind the mat.
6. Check Alignment and Finish the Display
Stand the frame up and look at it from about arm’s length, then crouch and look from below. The gap between the mat and the frame should look equal on all four sides from a normal viewing angle, which usually means the photo sits a touch above true centre in the frame itself.
Check the mat border widths once more and make sure the bevel catches light evenly with no bright glare spots. Wipe the front of the glazing and let it rest for a few hours before you handle it much, since the pressure points set as the stack settles.
For hanging, one D-ring pair and picture wire takes up to about 10 pounds on a single hanger, and a sawtooth hanger works well for lighter standard sizes. Into drywall, use two picture hangers set a third of the way from the top corners of the frame rather than a single centre hanger, which lets the frame rotate. A level matters more than people expect; a 16×20 print can look crooked across an entire wall from 6 feet away.
Common Mistakes
Almost every framing problem traces back to one of these, and all of them are cheap to fix on the first attempt and expensive to fix afterwards.
- Measuring the outside of the frame instead of the opening. The mat has to fit inside the rabbet, not the moulding’s exterior. Measure the visible opening at the narrowest point, at the top, because rebate dimensions vary.
- Cutting the window to the exact photo size. Undersize it by 1/8 inch per side so the print’s paper edge stays hidden.
- A mat window that is too large. Once the window swallows the quiet edge of the image, the photo reads as cropped. Compare the border against the image’s own inner margin and let the mat stay slightly wider.
- Using ordinary tape or glue. Household tape yellows, leaves adhesive residue and can pull the emulsion off a print when removed. Use artist’s tape or paper hinge tape, and glue only where nothing will ever touch the adhesive.
- Pressing the print flat across its whole back. Paper moves with humidity, and a fully taped back buckles into waves inside the frame. Hinge one edge and let the rest float free.
- Fingerprints on the inner face of the glazing. Handle the glass by its edges, keep the printed side of the photo facing outward, and do assembly on a clean sheet rather than on carpet.
- Skipping the backing board. Without it the mat bows out, dust gets in and the layers can shift in transit. Cut the backing to the exact inner size so the points hold real pressure.
- No practice cut. Run one full window in a scrap offcut first. Every ragged corner I’ve seen was a first cut on the good board.
One more worth naming: don’t size your mat to a unique dimension if you can help it. Cutting it to a standard frame size means you can reframe later without recutting anything, which is exactly the advice that comes up again and again on photography forums.
Frequently Asked Questions
How much should it cost to matte and frame a picture?
Doing it at home needs a frame, a sheet of mat board, archival tape and a backing board, so your cost is mostly the frame. A shop job adds labour on top of the same materials, which is why off-the-shelf frames plus a mat you cut yourself usually beat custom framing for a single print. Craft stores and local frame shops will cut a mat window for you in a few minutes if you would rather not own a cutter.
How can I make a photo frame at home easily?
Buy a frame that already has glass and hardware, then skip the mat entirely if your print is a standard size. Slide the print in face to the glass, put the backing board on, and press a few glazing points into the rabbet. That is a finished frame in about five minutes, and most people can get the result they want without touching a mat board at all.
How to cut mat board without a mat cutter?
Mark the window from the back of the board, extend each pencil line an inch past the corners, and rest a steel ruler on the line over a self-healing cutting mat. Take several light passes with a fresh craft knife instead of one heavy one. Cut the two short sides first and the final side last, so the centre piece stays held until the very end.
What are the rules for picture matting?
Three rules do most of the work. Undersize the window by about 1/8 inch per side so no print edge shows. Keep the border near 10 to 15 percent of the print’s short side, and a little deeper at the bottom. Use acid-free board and archival tape, and keep the photo from touching the glass so it can breathe.
Should I use a mat when framing photos?
Use one when the print is an odd size, when the image needs breathing room, or when you want the photo to sit well inside a moulding that is larger than the image. Skip it for standard-size prints and for detail-heavy images, where a border only steals frame. A narrow black inner mat under an off-white outer mat is the classic way to add depth without over-matting.
What are some alternatives to matboard?
Raised white core board gives a deeper bevel and more colour choices than standard mat board. For a textured look, you can glue wallpaper, wrapping paper or fabric onto the face of a mat board before cutting the window, sealing it with a fixative. Foam core also works as a backer, and a canvas or aluminium float mount holds larger prints without a mat at all.
Conclusion
The sequence is what matters: measure the opening, cut the window a fraction under the photo size, hinge the print so it can still move, then stack backing board, photo, mat and glazing in that order and lock it with points. Start with the measuring tape, not the knife. Cut one scrap window first so the real board gets a confident pass, and give the whole thing an hour the first time.