How to hang a photo gallery wall comes down to four things: decide the arrangement on the floor, trace every frame onto paper, tape those templates to the wall at the right height to preview the layout, then mark and drill. Most crooked walls I have seen were caused by measuring from the ceiling instead of from the floor’s visual center, or by hanging from a single hook on a wide frame. Budget about 90 minutes for a wall of nine to fifteen prints, plus drying time for filler if you patch anything. Difficulty is low, but the measuring has to be done twice.
If you have printed a set of photographs and no idea what to do with them, this is the weekend project. Bring your prints, a tape measure and about thirty minutes of patience, and the wall will look like it was done by a designer.
Table of Contents
- What You Need to Hang a Photo Gallery Wall
- Step-by-Step: How to Hang a Photo Gallery Wall
- 1. Plan the Layout and Sort the Photos
- 2. Mark the Wall and Find Secure Mounting Points
- 3. Attach the Hanging Hardware
- 4. Hang, Align, and Style the Frames
- Common Mistakes and Fixes
- Frequently Asked Questions
- How far apart should photos be in a gallery wall?
- What is the easiest way to hang a gallery wall in a rental?
- How do I hang heavy photo frames on drywall?
- Should all gallery-wall frames have the same size?
- How high should a photo gallery wall be above a sofa or console?
- Conclusion
What You Need to Hang a Photo Gallery Wall
Gather everything before the first mark goes on the wall. Half of a bad gallery wall is a missing tool discovered halfway through.
- Your frames and prints — every piece, unwrapped, with the hanging hardware still attached. Know each frame’s outer width and height, not the print size inside it.
- A tape measure — a 25-foot one beats a 6-foot one on anything wider than a door.
- A pencil and a small level — the 9-inch torpedo level is easier than a 3-foot box level in a hallway.
- Painter’s tape — low-tack tape holds paper templates without taking paint with them.
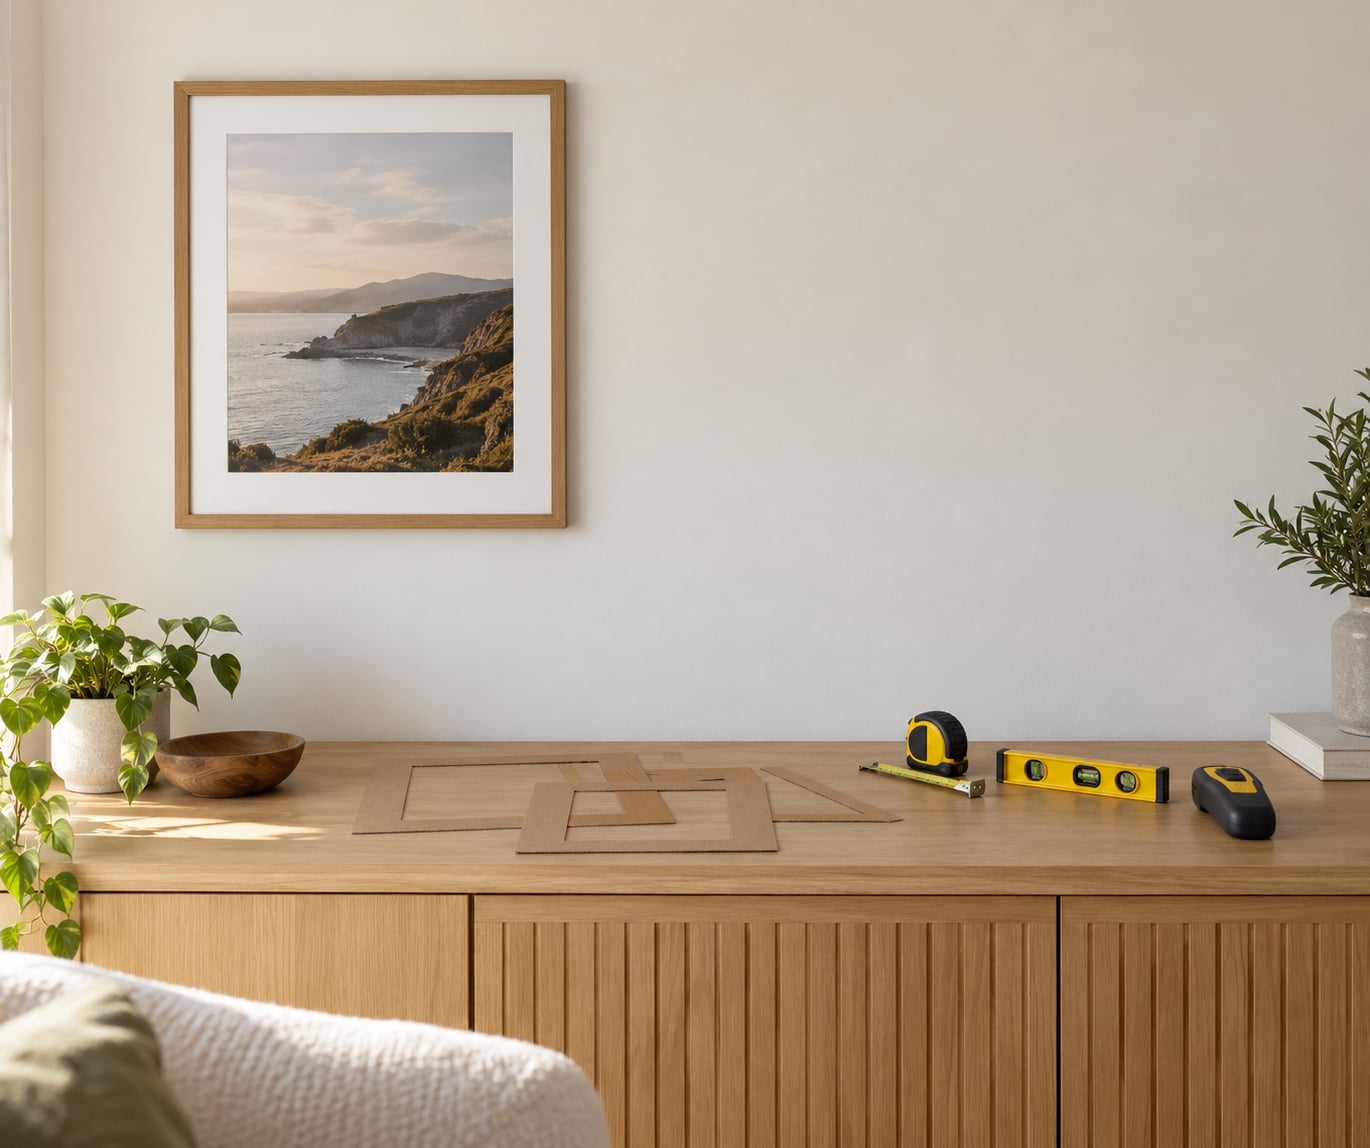
- Cardboard or kraft paper — one cutout per frame. Cardboard holds shape better than paper when you tape it up.
- Scissors or a craft knife — for the cutouts.
- A stud finder — plus a pencil so you can mark stud edges.
- Hammer and picture nails for drywall and studs, plus anchors for hollow walls.
- Safety gear — glasses when drilling into masonry, and a dust mask for brick or concrete.
Anchor choice matters more than anything else in that list, because a nail that pulls out of plaster takes a chunk of wall with it.
| Wall type | Best fastener | Typical weight per fastener |
|---|---|---|
| Drywall with a stud | Picture nail or 1-inch screw into the stud | Very high, most of what you need |
| Drywall with no stud | Self-tapping drywall anchor | Light to medium frames |
| Old plaster or lath | Screw-in plaster anchor or toggle bolt | Medium; never a plain nail |
| Brick | Masonry screw or sleeve anchor | High with a proper bit |
| Concrete | Masonry screw with a hammer drill bit | High |
| Rental or no-drill wall | Removable picture strips or hooks rated above your frame weight | Check the strip rating on the pack |
Ignore any printed figure you find online and read the rating on the pack. Manufacturers change these numbers without changing the packaging look, and the gap between a light anchor and a heavy one is where most drywall failures start.
Step-by-Step: How to Hang a Photo Gallery Wall
Here is the whole process in four steps. Do them in order and the spacing problems basically solve themselves.
1. Plan the Layout and Sort the Photos
Start by choosing a layout style, because the style decides how you space everything. A grid suits matching frame sizes and reads clean. A salon layout, where frames sit loosely at different heights, handles mixed sizes and looks relaxed. A symmetrical layout mirrors one piece across a centerline. A staircase layout follows a stair angle and works in a hallway.
Then pick the focal point. It is usually the largest frame or the print you care most about, and everything else builds outward from it. This is the piece the eye lands on first, so it goes near the center of the arrangement rather than tucked in a corner.
Lay everything out on the floor. Empty the room’s traffic path first, because a 24 by 36 inch frame eats floor space fast. Build the grouping around the focal point, then leave about 2 to 3 inches between neighboring frames — that gap is what makes a wall of separate pieces read as one composition.
Take a photo from where you normally stand, not from directly above the arrangement. Perspective from standing height is different from the overhead view, and it is the standing view that matters. Many people also tape the floor layout down and swap pieces for a day before committing, which saves a lot of repainting later.
Group by visual weight, not just size. Two small prints flanking a large one will look balanced. A row of five small frames next to one oversized frame will look like a mistake, no matter how even the gaps are.
2. Mark the Wall and Find Secure Mounting Points
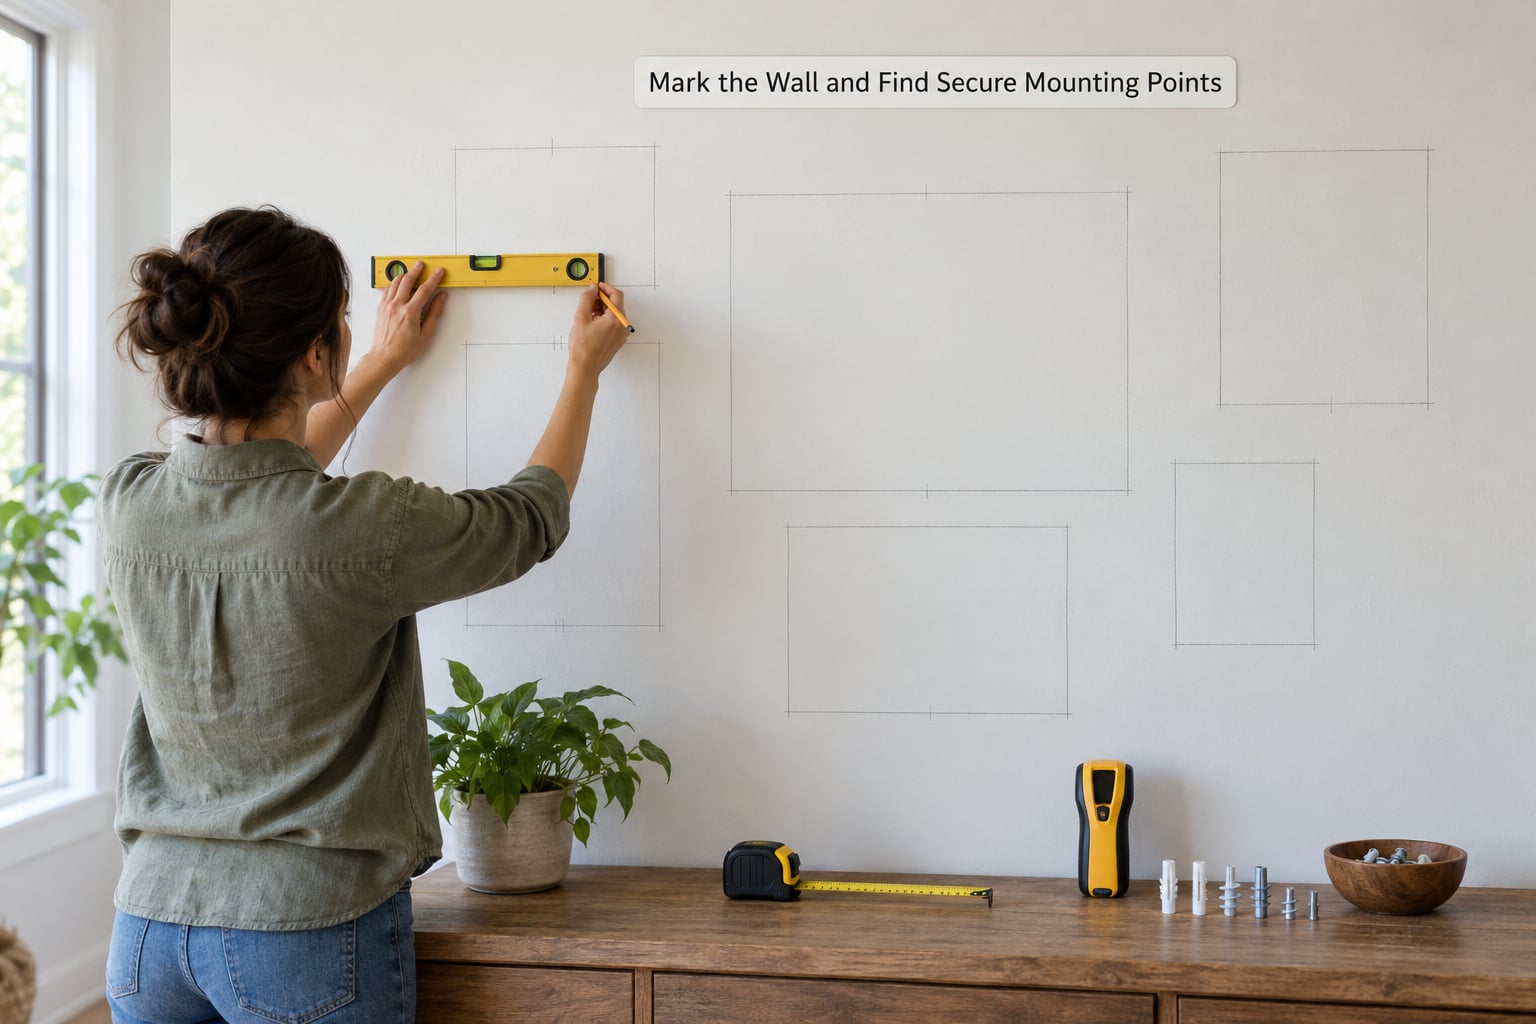
Measure the wall before you touch a frame. Note the width of the wall and the width of the whole arrangement from your floor layout, then mark the wall’s horizontal centerline with a pencil and a level line the full width.
Now decide how high to hang the group. Three numbers come up constantly, and they are not interchangeable.
- Rule of 57 — the center of your arrangement sits 57 inches from the floor. It is a good default for a wall with no furniture underneath.
- 60-inch center method — the center of the grouping at roughly 60 inches. A touch higher, and it suits ceilings of 8 feet or more.
- Two-thirds rule — the bottom of the arrangement sits about two-thirds of the way up the wall. Useful when the wall has furniture, a chair rail or wainscoting below it.
When furniture is involved, the relative measurement beats the absolute one: 6 to 8 inches above a sofa back, or about 8 to 10 inches above a console table. Over a desk, 8 to 12 inches clears the monitor.
With your height set, mark it on the wall and check it by standing back. Look at the arrangement from the doorway of the room, not from underneath it.
Next, find the studs. Run the stud finder across the marked area and mark both edges of each stud, not just the center. Studs usually sit 16 inches apart in older homes and more often 24 inches in newer ones, but measure rather than assume.
Before any drilling, switch on an electrical outlet tester and check the area for hidden wires, and look for plumbing on exterior walls where hose bibs live. Keep fasteners at least a few inches from any box you find. If you hit resistance or the bit stops short of a consistent depth, stop and re-scan.
Mark every nail position with a pencil while the layout is still theoretical. Each frame gets one or two marks depending on its width, and you want the marks drawn before the frames are in your hands.
3. Attach the Hanging Hardware
Turn each frame over and check what hardware came with it. Small frames, roughly 5 by 7 and 8 by 10 inches, usually have a single D-ring or a sawtooth hanger in the center. Medium frames up to about 24 inches wide get two D-rings joined by picture hanging wire. Larger frames get D-rings, wire and sometimes a center hook.
Use two hooks on any frame wider than about 16 inches. One hook lets a wide frame pivot on the nail, and that tilt is the single most common complaint people have about their own gallery wall. Space the two D-rings roughly one-third of the frame width from each edge, which keeps the weight centered.
If the hardware is missing or the wire is kinked, add your own. A pack of small D-rings screws into the back of most wood or composite frames in a couple of minutes, and a fresh length of hanging wire fixes a stretched cable.
Test each connection before it meets the wall. Hang the frame on a door handle or a broom handle and let it hang for a minute. If the wire slips or a ring pulls loose, reattach it now rather than after it is on the wall at eye level.
Then drive your fasteners. For a picture nail in a stud, set the nail about an inch proud of the wall and follow the same spot with a second nail one level across for a wider frame. For drywall anchors, screw the anchor in flush, then add the nail or screw. For plaster, brick or concrete, use the masonry fasteners from the table above and drill with the correct bit.
Tap every fastener with the handle of a screwdriver afterward. A fastener that wobbles is a fastener that will not hold a frame, and finding it now takes five seconds.
4. Hang, Align, and Style the Frames
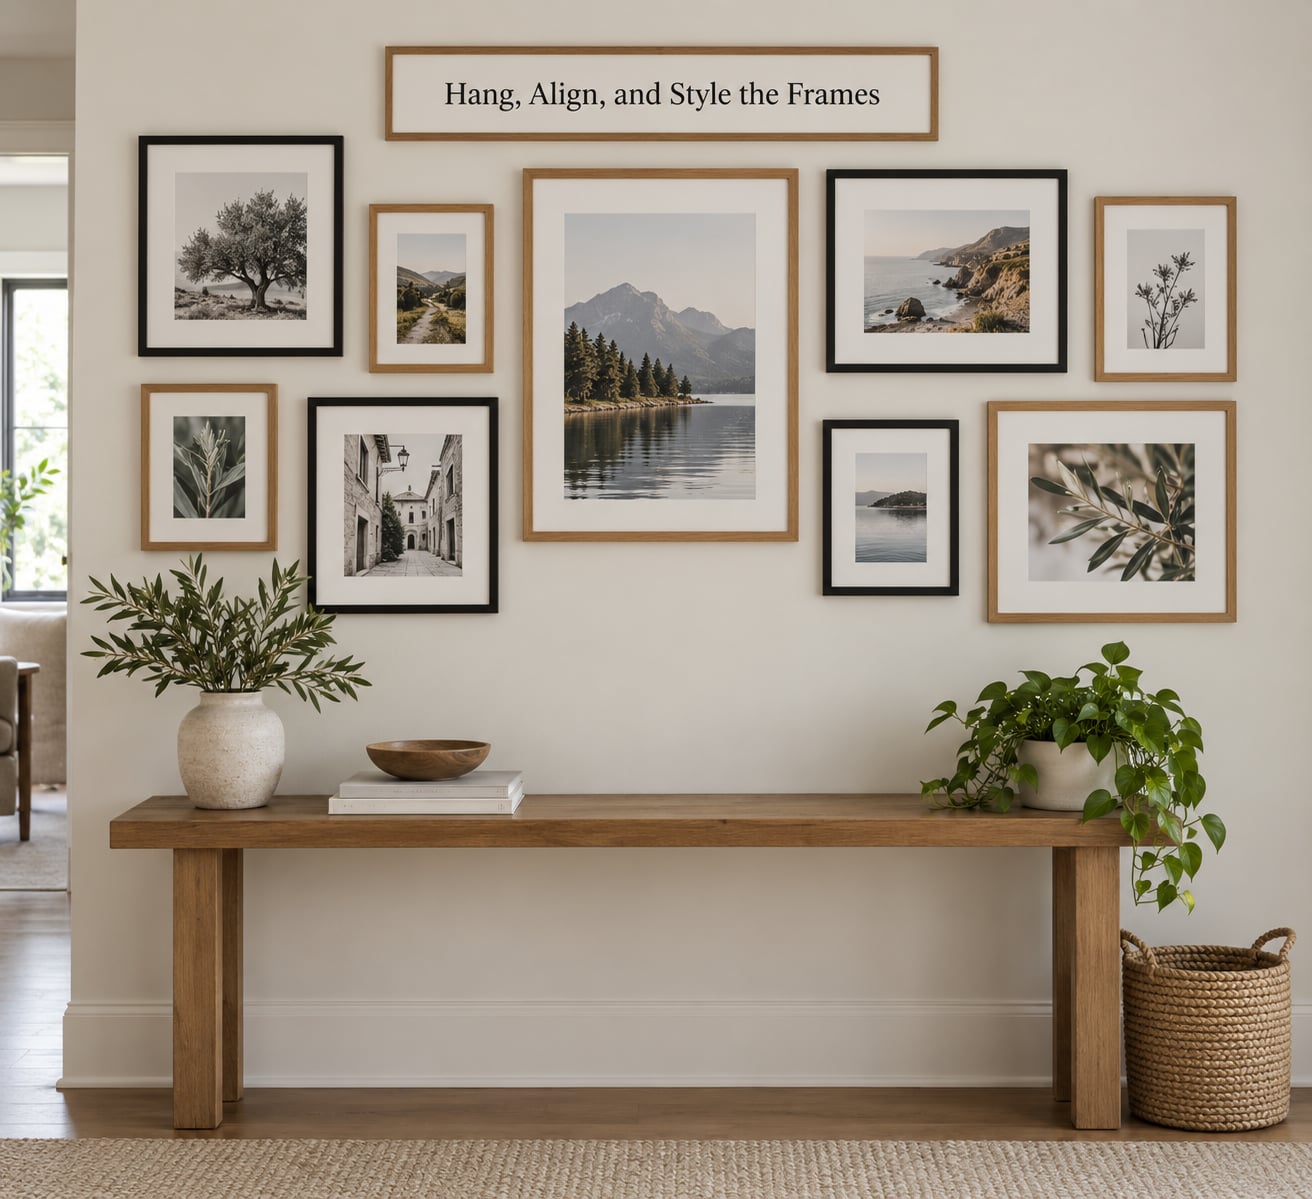
Hang from the marked points one frame at a time, starting with the focal piece. Picture wire sits on the nail, so the nail position sets the frame height — if a frame ends up too low, the fix is to move the nail up rather than shim the frame.
Use the level constantly, checking both across each frame and down the edges of a column. Every frame’s top edge should sit on the same horizontal line as its neighbors in a grid, and every column should share a vertical line in a salon layout.
If the frames do not sit flush, the wall is probably not flat. Older homes often have out-of-plumb walls, and you can correct it with a thin cardboard shim or a self-adhesive felt pad behind the frame at the gap side. Keep the shims consistent, and check that the frames still hang level afterward.
For the photography itself, a few choices make a mixed set look deliberate. Keep frame moulding widths consistent, or commit fully to variety and make sure the mix is obvious. Standard print sizes — 8 by 10, 11 by 14, 16 by 20 — nest well, so mixing them looks deliberate rather than accidental. Two inches of matting on every print gives mismatched photos a shared inner border.
Mixing color and black-and-white photographs works when one of the two dominates. A mostly monochrome wall with two color prints as accents reads better than an even split of both.
Step back from the doorway and look again. Fix the spacing last, because small gaps are easier to correct than a frame hanging in the wrong place.
Common Mistakes and Fixes
These are the failures I get asked about most, in the order they show up.
- Uneven gaps between frames. The cause is eyeballing. Fix it by measuring from the frame edges with a tape measure instead, marking each position, and moving one frame at a time until the gap reads 2 to 3 inches everywhere.
- Crooked or tilted frames. Almost always a single hook on a wide frame. Add a second hook or a second nail spaced a third of the frame width from the opposite edge.
- The wall sitting too high. People measure to the ceiling rather than to the furniture or the floor. Measure from the finished floor and check the height from the doorway before drilling.
- Anchors that pull out of the wall. The anchor was rated below the frame weight, or it was installed into a hollow cavity. Replace it with a heavier-duty anchor or move the fastener into a stud.
- Small nail holes and torn paint from a nail placed in plaster. Use a screw-in plaster anchor instead of a nail next time. For the existing damage, press a finger over the hole to push the crumbling edge back in, fill with lightweight filler, let it dry, then sand lightly and touch up the paint.
- A crowded arrangement with almost no breathing room. Frames touching each other look like one block. Pull them apart to at least 2 inches and the whole group reads better.
- A layout that feels off with nothing obviously wrong. Usually the focal point sits too high or too far to one side. Adding one more piece and rebalancing often resolves it faster than moving everything.
- Frames hanging on an uneven wall so they wobble. The wall bows away from the frame at one corner. Add a thin shim behind the deep side until the frame sits flat, then check it still hangs level.
- Hanging above furniture with an absolute height only. A 57-inch center can still look cramped over a tall sofa. Measure from the furniture instead, 6 to 8 inches above the back.
- Forgetting the door and window swings. Frames get installed, then a door catches the corner of one. Open every door and drawer near the wall before the first nail.
Frequently Asked Questions
How far apart should photos be in a gallery wall?
Two to three inches between frames is the standard gap for a photo gallery wall with medium and large prints. Larger frames with wide moulding can take 3 to 4 inches so the frames do not crowd each other. Keep the gap identical across the whole arrangement, and measure it rather than eyeballing, because consistent spacing is what makes separate frames read as one composition.
What is the easiest way to hang a gallery wall in a rental?
Trace each frame onto cardboard, tape the cutouts to the wall with painter’s tape to preview the layout, then hang the real frames on removable picture strips rated above your heaviest frame. Check the strip rating on the pack and stay well under it, since weight ratings assume the surface is clean and smooth. Adhesive hooks work well on painted drywall and come off with a hair dryer and a gentle pull.
How do I hang heavy photo frames on drywall?
Find a stud and drive the hanger straight into it, which is the strongest option in drywall. If no stud lines up with the frame, use a self-tapping drywall anchor or toggle bolt rated above the frame weight, installed in the hollow cavity behind the drywall. Frames wider than about 16 inches need two fasteners, and large glazed pieces should have two people lifting them.
Should all gallery-wall frames have the same size?
No. Mixing sizes works well when you group by visual weight and let one or two large pieces anchor the arrangement. What matters more than identical sizes is a consistent gap and a shared visual element, such as matching moulding widths or identical matting. Sizes drawn from standard print sizes such as 8 by 10, 11 by 14 and 16 by 20 nest together more cleanly than odd dimensions.
How high should a photo gallery wall be above a sofa or console?
Leave 6 to 8 inches between the sofa back and the bottom of the lowest frame, and 8 to 10 inches above a console table. That relative measurement matters more than a fixed number from the floor, since taller furniture changes the right height. If you have no furniture underneath, use the rule of 57 and put the center of the arrangement 57 inches from the finished floor.
Conclusion
The method that works is plan on the floor, trace every frame, tape the cutouts to the wall at the height you measured from the furniture or the floor, and hang the real frames on those marks. Nearly every crooked wall traces back to skipping the templates or hanging a wide frame from a single hook.
Start with the two reversible steps. Clear a patch of floor, lay out your frames around a focal point with 2 to 3 inches between them, and snap a photo from standing height. Once you like what you see on the floor, nothing goes near the wall until the cutouts are up.