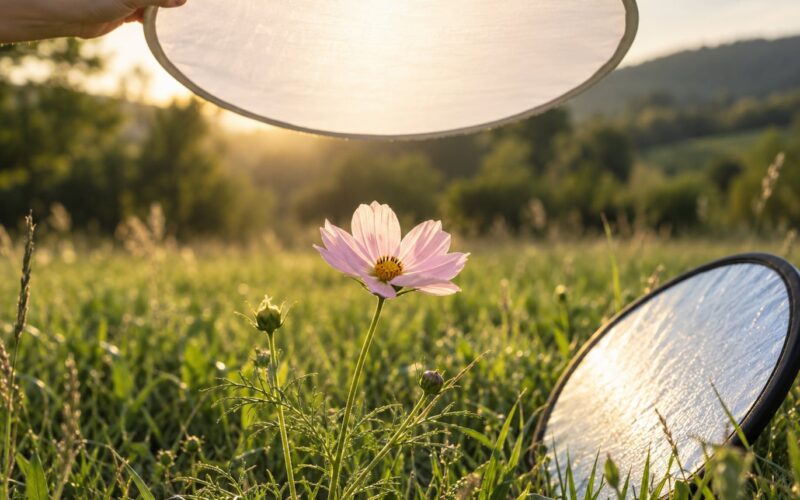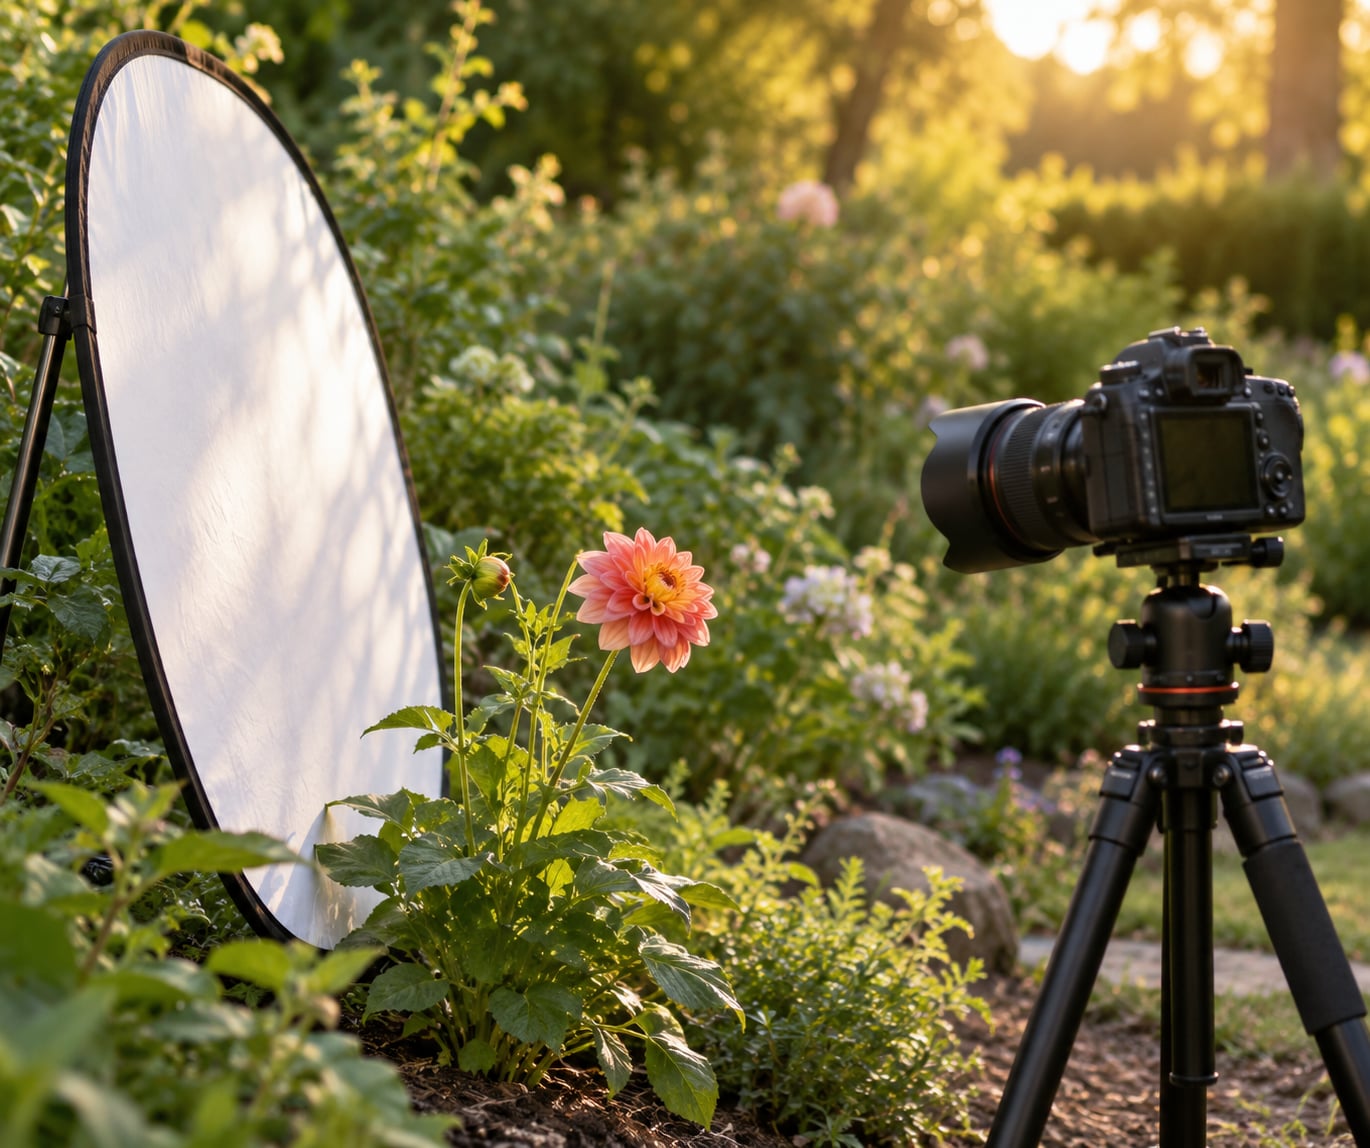
A reflector fills the shadow side of a flower with bounced sunlight, so you can shoot a single bloom in open shade or harsh midday light and still get petal texture instead of a black half. Knowing how to use a reflector for flower photos comes down to three things: put the panel opposite your key light, choose the surface that matches how strong that light is, and watch the highlights before you press the shutter.
Most flower photos go wrong for the same reason. The sun hits one side of the bloom, the other side falls into shadow, and the camera meters for the bright petals. The result is a flower with detail on one side and mud on the other.
A reflector fixes that in seconds and adds no light of its own, so it fits naturally into natural-light shooting. In this guide I walk through the whole outdoor workflow, including the macro settings that most reflector tutorials skip.
Table of Contents
- What You Need
- Step-by-Step
- How to Position the Reflector
- Which Reflector Surface Should You Use?
- How Far Should the Reflector Be?
- How Do You Avoid Reflections and Overexposure?
- Common Mistakes
- Frequently Asked Questions
- What size reflector is best for flower photos?
- Can I use a reflector in direct sunlight?
- Should I use a white or silver reflector for flowers?
- How do I position a reflector when photographing a flower in shade?
- Can a reflector replace a diffuser?
- How do I stop a reflector from creating glare on petals?
What You Need
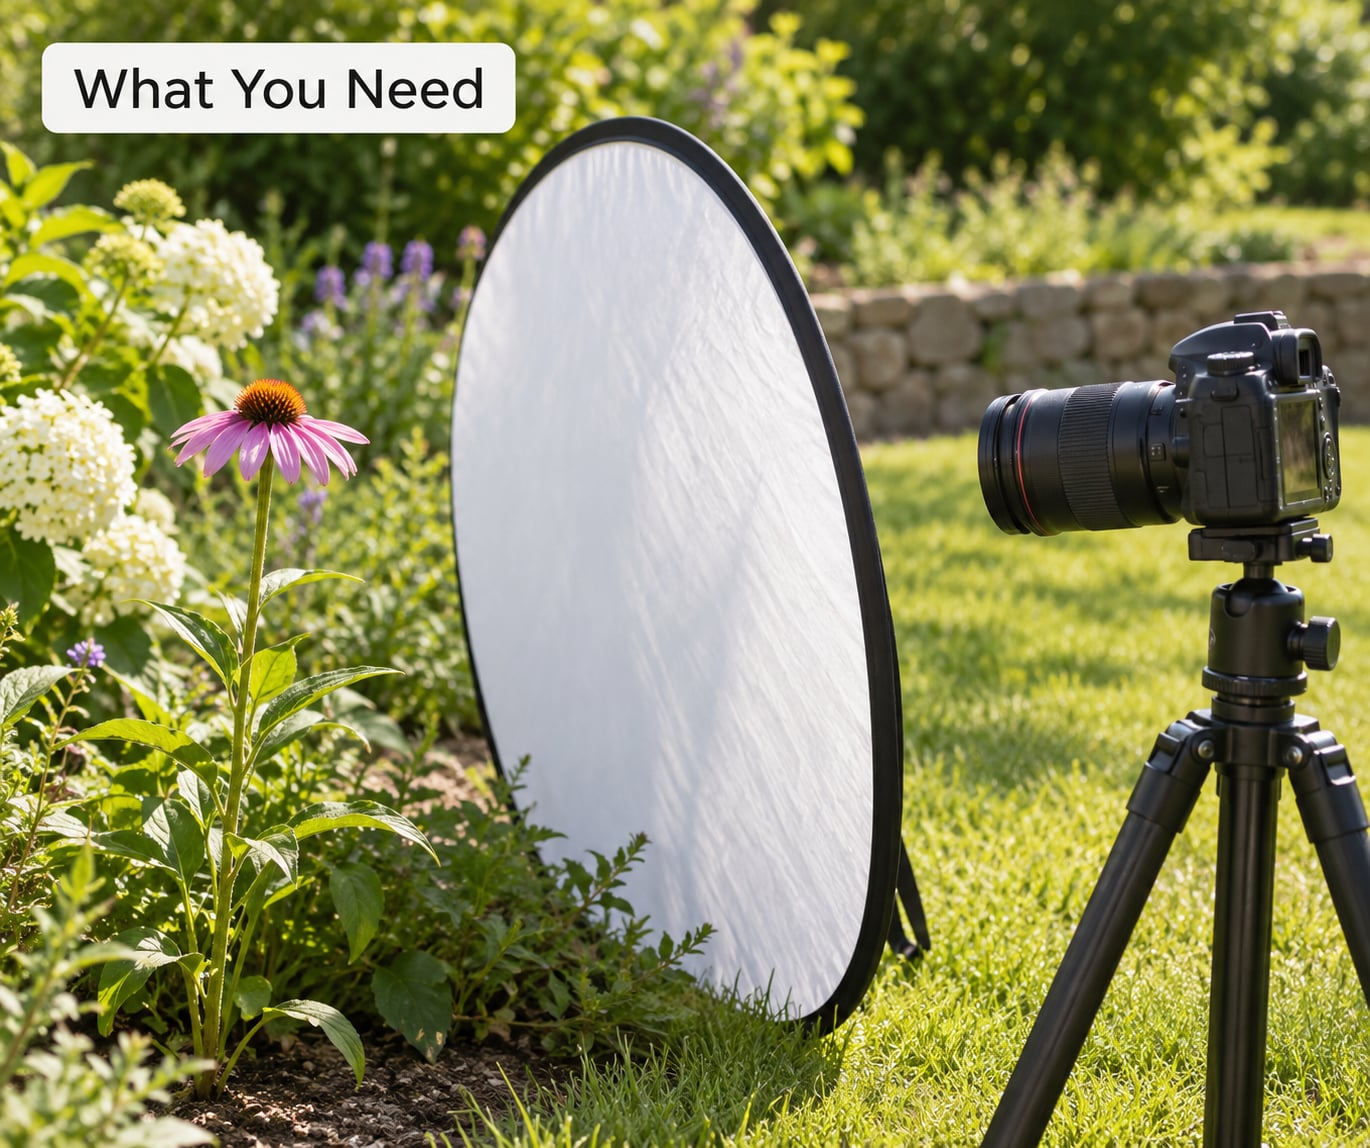
The full kit is small. Grab a reflector panel, something to hold it, and a camera you can shoot manually. Everything else is a workaround you can improvise.
- A multi-panel reflector. A foldable kit with white, silver, gold, black, and translucent sides covers most situations. For a single bloom, an 80 cm to 110 cm panel is plenty. Anything smaller struggles to fill a shadow side.
- A DIY fill card. A sheet of white foam board, a piece of pale card, or aluminium foil taped onto cardboard does the same job as the white side at a fraction of the cost.
- Something to hold the panel. A garden cane pushed into the soil, a clamp on the tripod leg, or a folding clamp sold for reflectors. Macro work is done solo, so the panel needs to stay put while you work.
- A tripod and manual focus. At macro distances, autofocus hunts badly. Shoot manual and use your camera’s focus peaking or magnification to confirm sharpness.
- A starting exposure. ISO 100, around f/8 to f/11, and whatever shutter speed the light gives you on the tripod. Check the histogram for blown petal highlights before you judge the fill.
- Optional diffusion material. A translucent panel or a thin white sheet lets you soften the key light itself when the sun is too harsh to reflect.
Match the setup to the conditions. Direct sun needs a white or silver surface and careful angle control. Open shade needs far less fill, usually just a dim white bounce or nothing at all. Close-up work at high magnification wants the largest panel you can carry, because reflected light falls off fast over a short distance.
Step-by-Step
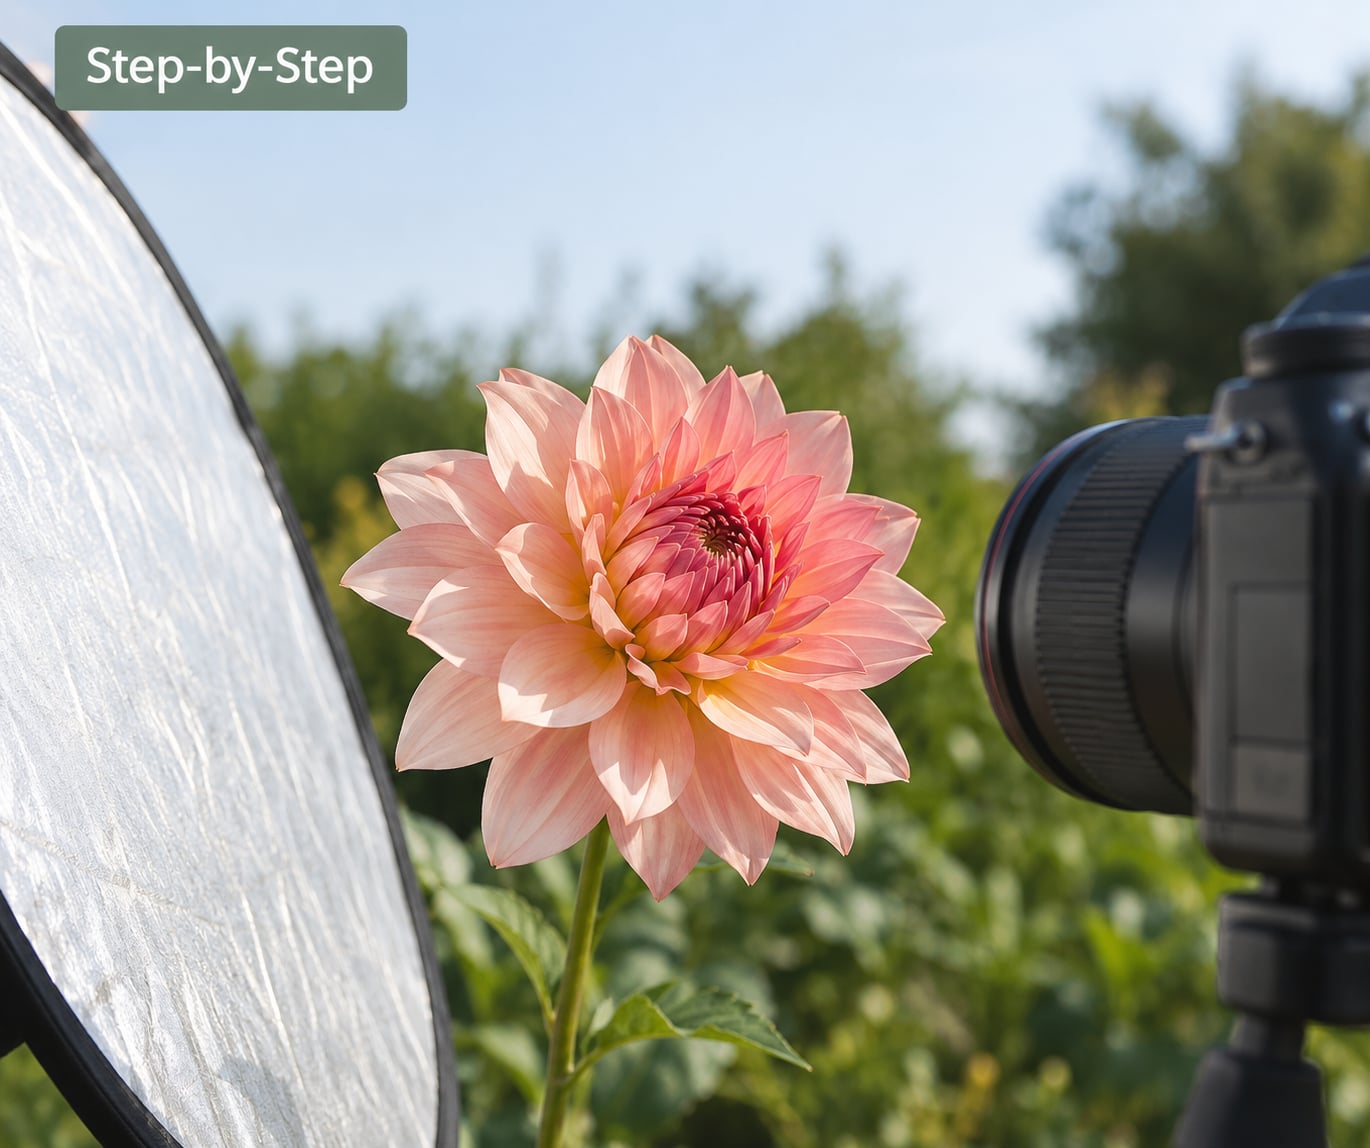
Here is the outdoor sequence I use for a single bloom. Work through it in order and check the result on the camera screen after each stage.
- Pick the bloom and check its light. Choose a flower where one side is lit and one side is dark. A flower in flat overcast light needs almost nothing from a reflector.
- Work out the key direction. Stand where the camera will be and look at the flower. Note where the light comes from and where the shadow falls.
- Set the camera on a tripod. ISO 100, f/8 to f/11, manual focus on the front edge of the petals. This locks everything else down so changes you see come from the reflector.
- Position the reflector opposite the key. Put it on the shadow side, roughly level with the flower head, at arm’s length.
- Rotate the panel until the shadow lifts. Tilt it slightly up and down until the shadowed petals show texture without the whole flower going flat.
- Take a test frame and zoom in. Look at the highlights on the brightest petals. If they are white with no detail, tilt the panel down or move it back.
- Adjust the fill ratio. Watch the contrast between lit and shadowed sides. Slightly open shadows look natural. Matching them exactly looks flat and dead.
- Refine the background. Angle the panel so light does not spill onto the greenery behind the bloom and pull attention away from it.
- Shoot the set. Change aperture for depth of field, focus stack if you need more depth than focus allows, and keep the reflector fixed for every frame in the series.
How to Position the Reflector
Position the reflector on the shadow side of the flower, opposite the main light source. Look for the line where the flower changes from lit to shaded, then place the panel just past that line at the height of the bloom.
The angle matters more than the distance. Start the panel angled slightly back toward the light source, then rotate it away a few degrees at a time until the shadowed petals show veins and texture. If the whole flower suddenly looks evenly lit, you have gone too far and lost the shape.
Here is the difference to watch for. Fill light arrives at the shadowed petals indirectly and softly, so texture survives. A direct reflection bounces the sun straight back at the subject, and it produces a hard hot spot you can see in the preview. This is the technique behind learning how to use a reflector for flower photos properly.
Which Reflector Surface Should You Use?
White is the default for flowers because it returns neutral, even fill that does not shift the colour of the bloom. Reach for silver when the light is dim or the shadow side is very dark, since it returns more light and a slightly cooler tone. Gold adds warmth and suits autumn colours or warm-toned species, but it tints the petals and can mislead you about the true colour.
Translucent is the odd one out. You hold it between the light and the flower rather than bouncing light back, so it softens the key itself instead of filling shadows. Black is negative fill, used to darken a petal or block a distracting reflection. Grey or neutral sits between white and black and gives you a gentler nudge.
For most flower work, start white and only change when the shadows will not lift. Colour accuracy on a bloom matters more than brightness in almost every case.
How Far Should the Reflector Be?
Close means stronger and harder-edged. Further away means softer and weaker, because reflected light falls off quickly over the short distances you work at in macro.
Begin about an arm’s length from the bloom and move in until the shadow just starts to open up, then back off a few centimetres. If the panel is too close, the shadow edge goes hard and you may see a hotspot. Too far and nothing seems to change.
Check two things on the preview: whether the brightest petals still hold detail, and whether the shadow side reads as texture or as a grey block. Size matters as much as distance. A panel that is much larger than the flower wraps light around the bloom; a small card produces a single flat patch of light.
How Do You Avoid Reflections and Overexposure?
Waxy petals, glossy leaves, water droplets, and wet stems all throw specular reflections straight back at the lens. A reflector angled too squarely at the surface will show you a hard white blob where there should be colour.
Tilt the panel a little further off-axis and the highlight breaks apart into something usable. If glare persists, switch to a matte white side or move the card out to arm’s length. Reflection also comes from the panel itself, so crinkles and creases create stripes of brightness. Flatten or hang the panel out of direct sun and keep it further from the subject.
Check before you commit. Turn on highlight warnings or look at the histogram, and make sure the petal edges closest to the panel are not clipping. Slightly underexposing and lifting the fill in editing is safer than recovering a blown white petal.
Common Mistakes
Most reflector problems come from treating a simple tool like a light source. Here are the failures I see most often and what to change.
Placing it too close. A panel almost touching the bloom creates a hard shadow edge and a visible hotspot. Move it back until the shadow softens and the transition looks gradual.
Aiming the panel at the sun. Pointing the reflector straight into the light makes the surface blaze and can flare the lens. Angle it so it catches the light without putting the sun in frame or reflection.
Using silver by default. Silver is strong and slightly cool, which on a single bloom can look artificial and cool the petals. Switch to white unless the shadows genuinely will not lift.
Filling every shadow completely. Equal light on both sides flattens the flower and removes the shape that made it worth photographing. Stop as soon as texture returns, and leave a little contrast.
Ignoring the background. A bright panel aimed too wide spills light onto the greenery behind the bloom and competes with it. Angle the panel inward and check the background exposure with the flower framed as you intend to shoot it.
Leaving the panel edge in the shot. At wide apertures the panel can appear as a pale wedge behind the flower. Keep it low, below the line of the bloom, or crop it out on the tripod.
Losing the panel to wind. A single bloom at macro scale is a light subject in a light breeze. Weight the base of the panel or push the stake in properly, otherwise your fill changes between frames and the set will not match.
Reaching for a reflector when a diffuser is needed. If the sunlight itself is too hard and the petals are clipping, bounce light is not the answer. Put the translucent panel between the sun and the flower instead.
One more habit pays off more than any gear choice: take one frame with the panel out of the way, then one with it in place. Comparing the two on the camera screen teaches your eye faster than reading about fill ratios.
Frequently Asked Questions
What size reflector is best for flower photos?
For a single bloom, an 80 cm to 110 cm panel is the practical range, and 110 cm is the safer pick if you shoot wide or work with small clusters. A card smaller than roughly 30 cm will not fill a shadow side at close range, because reflected light falls off fast over short distances. Larger panels wrap light around the flower and produce a softer, more natural gradient.
Can I use a reflector in direct sunlight?
Yes, and direct sun is the situation a reflector is built for. Strong, hard light leaves one side of a bloom dark while the lit side clips, so bouncing some of that light back into the shadow side is exactly what fixes it. Watch the brightest petals after adding fill, tilt the panel off-axis if you see hard specular glare, and expect to underexpose slightly.
Should I use a white or silver reflector for flowers?
White for almost every flower. It returns even, neutral fill that keeps petal colour honest, which matters more than raw brightness on a subject whose whole point is its colour. Switch to silver only when the light is dim or the shadow side is very dark and white will not lift it. Gold is worth trying on autumn and warm-toned species, but it tints the petals.
How do I position a reflector when photographing a flower in shade?
Find the direction the light is coming from, even if it is soft, and put the panel on the opposite side of the bloom from that light. In shade the fill only needs to be gentle, so a white card at arm’s length is usually plenty. Hold it further back than you would in sun, because shaded petals clip more easily and over-filling flattens the flower.
Can a reflector replace a diffuser?
No, they do opposite jobs. A reflector returns light that would otherwise miss the subject, so it fills shadows without touching the key. A translucent panel sits between the sun and the flower and softens that key light at source. When sunlight is so hard that petals clip, diffusion is the fix. When the subject is simply too dark on one side, reflection is.
How do I stop a reflector from creating glare on petals?
Angle the panel further off-axis so the specular highlight breaks apart instead of bouncing straight into the lens. Waxy petals, glossy leaves, and water droplets all behave like small mirrors, so this matters most on wet or fresh flowers. Use a matte white side rather than silver, keep the panel out of direct sun so crinkles do not create striped hotspots, and check the histogram for clipping.
Start with the simplest version and build from there. Learn how to use a reflector for flower photos in four moves: find the shadow side of the bloom, prop a white panel about an arm’s length away, angle it back toward the light, and shoot one frame. Check the histogram on the brightest petals, then tilt the panel until the shadow shows texture rather than grey. Get that one shot right and every setup after it gets faster.