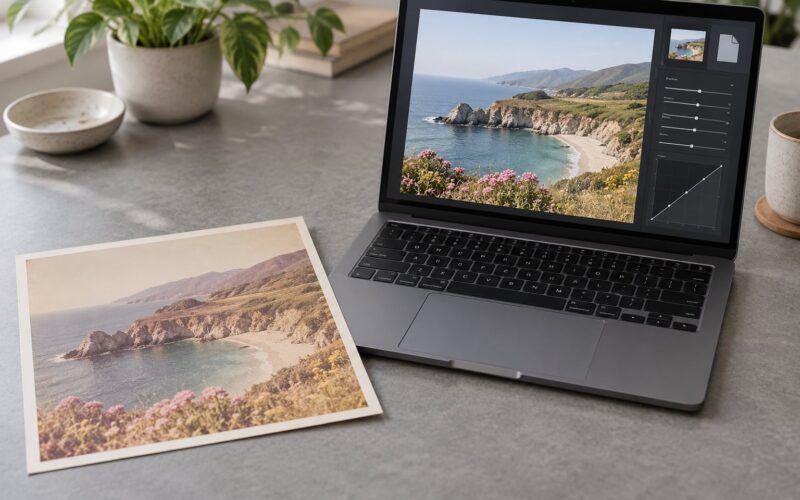
The fastest way to watermark photos without ruining them is to keep the mark small, faint and off the subject: roughly 30-50% opacity, sized to about 3-5% of the frame width, tucked into a bottom corner with a small inset, and saved as a transparent PNG. Apply it before you compress, export a copy, then check it at thumbnail and phone size before you publish anything.
That whole job takes about two minutes per image once you have the file ready, and about twenty seconds per image if your editor can batch it.
Worth saying up front: a watermark is a deterrent and an advertisement for your name, not a lock. Copyright in your photograph exists automatically the moment the shutter is pressed, so a mark never proves ownership. The thread that ranks first for this question on r/photography makes the same point bluntly, that any visible mark can be stripped out with Photoshop just as easily, and plenty of working photographers never watermark at all.
So the goal is not protection. The goal is that the image still looks like a photograph, your name travels with it, and a casual repost or a lazy crop is not enough to detach it from you.
Table of Contents
- What You Need
- Step-by-Step
- 1. Prepare a Watermark That Stays Unobtrusive
- 2. Place It Where It Does Not Cover the Subject
- 3. Adjust Size, Opacity, and Contrast Carefully
- 4. Check the Watermark Across Screen Sizes
- 5. Export the Final Image Without Unnecessary Quality Loss
- Common Mistakes
- Frequently Asked Questions
- What is the best way to watermark my photos?
- How do I put a watermark on a photo without Photoshop?
- Can you put a watermark on iPhone photos?
- How do I watermark a bunch of photos at once?
- Is it illegal to remove a watermark from someone’s photo?
- Should I watermark photos I sell?
- Conclusion
What You Need
You need four things, and three of them you probably already have.
A layer-based editor. Anything that opens an image and lets you drop a picture or text on top of it without flattening works. Lightroom Classic and Lightroom both have a built-in watermark editor, as do Capture One and several free browser tools. If you only ever edit on a phone, the fastest routes are covered in the FAQ at the end of this guide.
A watermark file or text tool. For a logo, that means a PNG with real transparency, saved in 24-bit colour. For a text mark, it means a font you like and about ten minutes of typing. Build it once, reuse it everywhere.
Export settings you already trust for your delivery platform, plus one extra step in the right order. Export order is the part most people get wrong, and it is the difference between a clean file and one that looks soft.
A preview method. One of these is enough: a second monitor, a phone with the image emailed or AirDropped to it, or simply the zoom control in your editor set to thumbnail view. You are checking two things only, that the mark is still visible when the image is small, and that it does not sit on the subject.
Step-by-Step
1. Prepare a Watermark That Stays Unobtrusive
Start with a transparent PNG, not a JPEG, because a JPEG logo arrives with a white rectangle welded to it.
Open a new document roughly 800 pixels wide, place your logo or type your name, and export the file as a 24-bit PNG with a transparent background. If your mark is a photo, the same rule applies: mask it out and export with alpha, rather than painting the background white.
Keep it clean. Thin strokes, generous spacing, no drop shadow with a hard black edge, no bevel, no glow. Those effects looked dated the year they were invented and they fight the photograph every single time.
Save that one file somewhere you will find it again and stop making new versions. Reuse is the whole point.
2. Place It Where It Does Not Cover the Subject
Find the subject first, then place the mark where the photograph can spare it.
Turn on guides or use the editor’s anchor control. In Lightroom the Watermark Editor has an anchor grid you click on to set which corner or edge the mark hangs from, plus inset fields that push it inward from that edge, so a bottom-right anchor with a 4% inset always lands in the same spot no matter the aspect ratio.
Move the mark and watch what it touches. A face, a hand, a product label, the horizon line, a blossom in a close-up. If it lands on any of those, change position before you change anything else.
Now the trade-off nobody mentions: a mark in the corner is easy to crop away, and a mark across the centre is hard to crop but sits on top of your picture. The usual compromise is a bottom corner with a modest inset, accepting that a determined thief can crop it, because a determined thief can also use content-aware fill.
For proofing galleries and previews where theft is the real worry, a second option is to run a repeating pattern across the whole frame at very low opacity. It looks busy, so it is wrong for portfolio work and right for client proofs.
3. Adjust Size, Opacity, and Contrast Carefully
Size first, opacity second. Shrinking is reversible, fading is easy to overshoot, and a mark that is too big cannot be fixed by turning it down.
Scale proportionally so the lock icon, the chain link, or the corner anchor is engaged. Sizing by pixels means a landscape export and a vertical export of the same shot get wildly different marks, and the vertical one ends up enormous.
Then set opacity. 30-50% is the working range for most photographs. Bright, high-key images and white studio backgrounds need the lower end, sometimes 20-25%, because a mark that reads as a faint grey smudge on a dark image reads as a bold grey smudge on a pale one.
Judge contrast before you judge opacity. A white mark disappears against a sky, and a black mark disappears against tarmac. The fix is a one or two pixel stroke in the opposite colour, or a soft shadow at low opacity, applied to the mark file once so it works on every background. Both are far less destructive than raising the opacity to compensate.
Some photographers push further and drop the mark’s blend mode to Screen on dark frames or Multiply on light ones, which lets the tones of the photograph pass through the mark. It works beautifully until you batch it across a mixed set of images, where a mark tuned for a night shot becomes invisible on the daytime one from the same trip.
Here are the settings I would start from, matched to the kind of image you are publishing.
| Situation | Opacity | Size | Position | Mark type |
|---|---|---|---|---|
| Moody outdoor or low-key shot | 45-50% | 4-5% of frame width | Bottom right, 4% inset | White text or light logo |
| Bright wedding or high-key portrait | 25-30% | 3-4% of frame width | Bottom left, 4% inset | Dark text with thin white stroke |
| Product on a white background | 20-25% | 3% of frame width | Bottom right, 5% inset | Dark text, no stroke needed |
| Client proofing gallery | 35-40% | 5% of frame width | Repeating pattern, flat | Wordmark, no signature |
| Portfolio hero image | Skip the visible mark. Use metadata and a Content Credential instead. | |||
4. Check the Watermark Across Screen Sizes
Check the mark small before you check it large, because small is where watermarks fail.
Zoom your editor out to a thumbnail grid. A mark that looked perfect at full size either disappears entirely at 200 pixels wide, which means it is doing nothing, or it turns into a distracting dark blob, which means it is doing too much. Both are common, and neither shows up while you are zoomed in.
Then check the specific crops your platform will impose. Social platforms and search results both crop, sometimes hard. Drag a crop rectangle over the image at a square and at 4:5 to see whether your mark survives, or whether a centre crop slices it in half.
Finally send the file to your phone. A mark that reads cleanly on a calibrated monitor is often barely there on a phone screen in daylight, and that is where most people will see your work.
If it vanished at thumbnail size, drop the opacity a little, not the size. If it vanished on the phone, that is usually a resolution issue, and exporting larger fixes it. If it only works at full size, you have a mark that protects nothing.
5. Export the Final Image Without Unnecessary Quality Loss
Watermark first, then compress. This is the one rule worth memorising, because doing it in the other order compresses your mark into mush and then compresses that mush again.
Most editors let you place the watermark inside the export dialog, which is exactly right. Your library stays clean and unwatermarked, and the mark only exists in the copies that leave your computer.
For web delivery, ship JPEG or WebP at a sensible quality setting, in sRGB. PNG is for the logo file itself, not for the finished photograph, since a full-size PNG will be several times the size of a JPEG at the same quality. For prints, watermark after the print-sized resample and keep the file at the resolution your lab asked for.
Batch it when you have more than a handful. In Lightroom Classic the route is File, Export, then Add Watermark in the export dialog, or the Watermark Editor under the Library module’s Develop settings depending on your version. If per-image placement matters to you, note that batch positioning inside the export dialog is still an open request among users, so the practical answer is a fixed anchor plus inset for the set, and manual nudges only for the frames that need them.
Add a second layer of proof that survives a crop. The EXIF copyright field costs nothing and travels with the file, and Content Credentials, the newer provenance standard, attach signed information about how an image was made and edited. Neither stops anyone, both of them help when you need to make a claim later.
Export a copy, open it fresh, and look at it once more. You have now learned how to watermark photos without ruining them for the last time, because from here the only variable left is your own eye.
Common Mistakes
The mark is too big. It reads as a stamp, and the photograph stops being the subject. Cut the size roughly in half before you touch the opacity, and remember that a mark sized as a percentage of frame width survives resizing to every platform.
Opacity is too high. Anything above roughly 60% is a filter, not a watermark. If it needs to be that strong to be visible, the placement is wrong, not the transparency.
White text on a pale image. The mark is technically there and practically invisible. Switch to the dark version of your mark, or add a thin contrasting stroke to the PNG you already have.
Resizing by hand, over and over. Each pass softens the logo and eventually the photo. Lock the aspect ratio, size against the frame rather than in pixels, and make that the only resize you do.
Flattening too early. Merging layers before the export means the watermark is now part of the master file, and you cannot turn it off. Keep it in a layer, or in the export dialog, until the moment you ship.
Compressing twice. Compress, then watermark, then compress again. Export from the original each time, and let the watermark ride along in a single pass.
Watermarking the paid delivery. Your client paid for a clean file. The photographer on jmpeltier.com added a signature mark to every image, used it for about a year, then removed it entirely and now only watermarks inside the hosting platform where it costs two clicks to undo. That is a defensible position, and it is worth deciding on purpose.
Trusting one tool with the whole job. Hosting platforms such as SmugMug bake protection into gallery views without touching the download, which is convenient, but it does nothing for images you send by email or post directly.
Frequently Asked Questions
What is the best way to watermark my photos?
The best method is a transparent PNG logo or a simple text mark placed in a bottom corner at 30-50% opacity and about 3-5% of the frame width, applied inside your editor’s export step so the original file stays clean. Watermark first, then compress, and ship JPEG or WebP. This keeps the mark legible on both dark and bright images without covering the subject.
How do I put a watermark on a photo without Photoshop?
Any editor with layers will do. Open the photo, add your transparent PNG as a new layer above it, set the layer opacity between 30 and 50%, scale it with the aspect ratio locked, and flatten on export only. Lightroom, Affinity Photo, GIMP, Photopea and most free browser tools all support this exact sequence, and on a phone the native markup tool in Apple Photos does the same job in about fifteen seconds.
Can you put a watermark on iPhone photos?
Yes, in three ways. Apple Photos has a markup tool with a signature option, which is the fastest route for a single image. For more control, free apps such as Snapseed let you place a PNG and dial in opacity. For a whole roll, Lightroom Mobile handles batch watermarking from the same app you edit in. On Android, Google Photos can stamp text directly on an export, and free apps do the rest.
How do I watermark a bunch of photos at once?
Use your editor’s batch or export feature rather than opening files one at a time. In Lightroom Classic, the export dialog has an Add Watermark option, and in Lightroom the watermark editor lives in the Develop module and can be saved as a preset. Set a fixed anchor and inset so the mark lands consistently, then adjust the handful of frames that need it by hand. Free bulk web tools exist, but they usually flatten and re-compress your files.
Is it illegal to remove a watermark from someone’s photo?
Removing a mark is not illegal in itself. Copyright in a photograph exists automatically from the moment it is taken, so a watermark is not proof of ownership, it is a claim of it. What is not legal is using the image without permission once you know it belongs to someone else. Circumventing a technical protection measure can also breach anti-circumvention rules. If your work was lifted, keep the original file and the date you published it.
Should I watermark photos I sell?
Usually not the final file you deliver. Clients pay for the image, and a mark on a print or a high-resolution download is a common complaint. Watermark the proofing gallery, the social media previews and the website portfolio instead, where the mark does useful work as branding and deterrence. If you sell prints through a third-party marketplace, check their rules first, since some platforms add their own mark and reject images that carry one.
Conclusion
Start with one small, transparent mark placed away from the subject, set it to 30-50% opacity and about 3-5% of the frame width, and let it live in the export step rather than the master file. Export a copy, look at it as a thumbnail and on your phone, and only then adjust the opacity. Everything else in this guide is a variation on that, and the version of the mark that suits your photographs is the one nobody notices until they try to reuse the picture.